Table of Contents
Advertisement
Advertisement
Table of Contents

Related Manuals for NeuraLabel Sirius 4


Summary of Contents for NeuraLabel Sirius 4
- Page 1 Sirius /Sirius Installation Guide...
-
Page 2: Manual Configuration
Manual Configuration z Installation Guide (This Manual) This manual describes how to assemble and install the device. z Residual Risk This manual describes the map of residual risks that require protective measures by machine installers and users. z Setup Guide This manual describes how to connect the printer to a computer and set it up following installation. -
Page 3: About This Manual
The customer cannot assemble or install this product by themselves. The assembly and installation work is done by workers specified by NeuraLabel. In addition, the customer cannot disassemble or move the product after it has been assembled. There is a risk that the customer may damage the product if they assemble and install, or disassemble and move, the product. -
Page 4: Table Of Contents
Table of Contents Manual Configuration ................2 About This Manual ...................3 Introduction ....................5 About the Map and List of Residual Risks That Require Protective Measures by Machine Users and Machine Installers ............5 Warnings and Precautions ................6 About the Product Warranty ..............7 Before Installation .................. -
Page 5: Introduction
Introduction About the Map and List of Residual Risks That Require Protective Measures by Machine Users and Machine Installers Product name: Sirius /Sirius Label Printer Before starting work, carefully read “Sirius /Sirius Label Printer Residual Risk”, provided as a separate document with the product, and establish safety measures for the users and installers. -
Page 6: Warnings And Precautions
Warnings and Precautions Warnings and Precautions Read the provided manuals for your safety before using the product. Cautions Related to Safety WARNING Mishandling due to ignoring this display may cause death or serious injury. CAUTION Mishandling due to ignoring this display may cause personal injury. General Cautions WARNING Do not touch the safety... -
Page 7: About The Product Warranty
This manual is mainly about installing the product. Carefully read the various guides regarding details about how to use the product and the Maintenance Manual about how to maintain the product. All rights are reserved by NeuraLabel. You must not copy, transfer, translate, etc. the content herein without authorization. -
Page 8: Before Installation
Before Installation Overview of Configuration The equipment is configured from the following units. Sirius /Sirius Label Printer Printer Unwinder Equipment configuration Printer Unwinder - 8 -... -
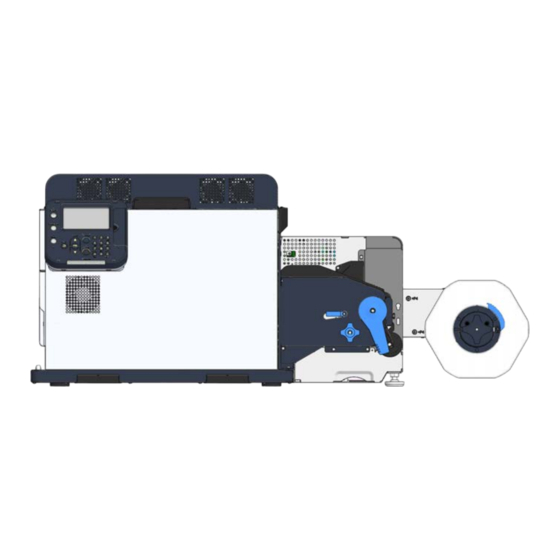
Page 9: Names Of Parts And Configured Units
Names of Parts and Configured Units Names of Parts and Configured Units The following shows the names of parts and the <Inside printer> configured units for the equipment. Print cartridge * [1] Printer Belt unit (including waste Top cover Interface toner box) LED heads... - Page 10 Names of Parts and Configured Units <Control Panel> [2] Unwinder <Front/right side> Unwinder cover Hanger Roll paper guide Number Name Function Roll Paper Holder Tension bar Display Shows the menus and state Flange screen of the machine. In the standby screen, there are two types, the “Supplies Life”...
-
Page 11: Installation
The printer weighs about 95 lb (43 kg) requires at least two people to lift it. * Including the print cartridge and other consumables. <Manuals> Printer Sheet-Instruction_Safety symbols NeuraLabel Original Consumables <Printer> Pan European Limited Warranty RiskMap <Power cord> Note z The package does not include a LAN cable, USB cable, <Print cartridges>... -
Page 12: Unwinder
Checking the Product Unwinder <Unwinder> <Mounting screws> ×3 <Cable clamp> ×3 - 12 -... -
Page 13: Confirming The Installation Environment And Location To Install The Machine
Confirming the Installation Environment and Location to Install the Machine Confirming the Installation Environment and Location to Install the Machine For safe and comfortable operations, install the product in a location that satisfies the conditions in [Precautions related to installation], [Installation Environment], and [Installation Space] as described below. - Page 14 Confirming the Installation Environment and Location to Install the Machine [External Dimensions] 18 3/4" (477 mm) 40 15/16" (1040 mm) 17 3/8" (441 mm) - 14 -...
- Page 15 Confirming the Installation Environment and Location to Install the Machine [Installation Space] Select an installation location that is level and can support the weight of the machine (weight of equipment is about 95 lb (43 kg) for the printer and about 42 lb (19 kg) for the unwinder). * Including the print cartridge and other consumables.
-
Page 16: Unpacking
Unpacking Unpacking Printer Remove the top layer of packing materials. This section describes how to unpack the machine. [Precautions when unpacking the printer] CAUTION ① Be sure to use two people to lift the equipment because it weighs about 95lb (43 kg). ②... - Page 17 Unpacking Remove the handles (4 pieces), and Open out the bottom part of the box, then remove the top of the packing place your hands on the printer's box. handles (2 in front/2 in back) and support the printer as you remove the front and back packing materials on the bottom.
- Page 18 Unpacking Cut and remove the bands that secure Place the printer in the installation the printer. space that you have confirmed in advance. Note Remove the plastic bag. z Allow enough space to work when installing the unwinder. z The weight of the equipment, including consumables, is about 95 lb (43 kg).
- Page 19 Unpacking Grasp the top cover open lever and Remove the Pad-TC from the top of the open the top cover. print cartridge, and then remove the tape that is securing the lift up lever. Pad-TC Tape Remove the holding tape (4 pieces) from the edges of the top cover.
-
Page 20: Unwinder
Unpacking Unwinder Pull out the sheet-protection. This section describes how to unpack the unwinder. Note Sheet-Protection z The packing box and packing materials are needed to transport the unwinder. Keep them and do not throw them away. Open the top of the packing box. Remove the top layer of packing Close the top cover. - Page 21 Unpacking Remove the unwinder. Peel off the tape from two locations. Remove the plastic bag from the unwinder, and then remove the accessories. * Refer to the following pages regarding installation to the printer. - 21 -...
-
Page 22: Unwinder Configuration
Unpacking Unwinder Configuration Installing Cable Clamps Configure the unwinder for outside winding or Cable clamps are provided with the unwinder. inside winding, according to the type of roll Use them to run the cable connected to the paper you are using. printer’s interface along the front. -
Page 23: Installing The Unwinder To The Printer
Unpacking Installing the Unwinder to the Hold the unwinder close to the Printer mounting pins and mounting hole, and then press it against the right side of the printer and lower it. After configuring the unwinder, install it to the printer. - Page 24 Unpacking Use three screws to secure the unwinder to the printer. Tighten the screws in order 1, 2, then 3, as shown in the following diagram. Extend the adjuster so it contacts the stand. Note z Be careful not to extend the adjuster too far. The unwinder installation is complete.
-
Page 25: Turning On And Off The Power Supply
Turning on and off the Power Supply Turning on and off the Power Supply Precautions about the Electric z Do not use extension cords. If you use an Power extension cord, the drop in AC voltage may cause the machine to not operate correctly. If you must use one, use one that is rated for at least 100 V at 15 A. -
Page 26: Connecting A Power Cord
Power cord Plug the power plug into the power socket. Memo z When the machine starts, the NeuraLabel logo screen appears on the LCD on the control panel. After a short time, the idle display appears and printing is possible. -
Page 27: Turning Off The Power
Turning on and off the Power Supply Turning off the Power Press and hold the <POWER> button for approximately 1 second. "Shutting down. Please wait. Printer will turn off automatically." appears on the control panel and the LED lamp on the <POWER>... -
Page 28: Test Printing
Test Printing Test Printing Adjusting Density and Test Press the scroll button ▼ several times, Printing and when [Print Information] appears, press the <OK> button. Load a roll of paper (regular continuous paper, 5.125" wide (130-mm) on the unwinder. Refer to the "User's Guide"... -
Page 29: Adjusting The Position Of The Sensor
Test Printing Adjusting the Position of the Sensor You need to adjust the positions of the unwinder’s black mark/gap sensors and the printer, according to the media you are using. Refer to the “User’s Guide” regarding how to adjust the positions of the sensors. Printer Black mark/Gap sensor Unwinder... - Page 30 NeuraLabel Printing Solutions 4800 Sugar Grove Blvd. Ste 200, Houston, TX 77477 January 2020 NeuraLabel.com...
Need help?
Do you have a question about the Sirius 4 and is the answer not in the manual?
Questions and answers