NeuraLabel 600e Installation Manual
Hide thumbs
Also See for 600e:
- Printing manual (64 pages) ,
- Installation and quick start manual (22 pages)
Advertisement
Advertisement
Table of Contents

Related Manuals for NeuraLabel 600e


Summary of Contents for NeuraLabel 600e
- Page 1 NeuraLabel 600e Printer Installation Guide...
- Page 3 Unpack Printer Box and Accessory Box Locate the following • 2 people to lift printer from the box. • A sturdy table that can hold the printer. Recommended minimum table size of 24” x 24” with 48” clearance for printing. •...
- Page 4 You Will Need NeuraLabel 600e CFA (Continuous Feeder Attachment) NeuraLabel 600e Printer 600e Power Cable Network Cable...
-
Page 5: Printer Placement
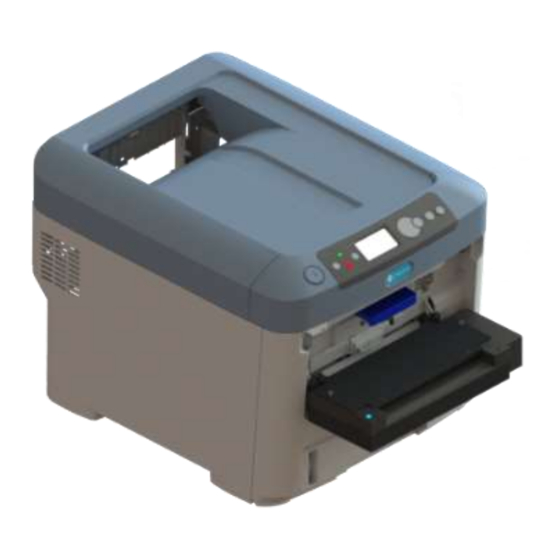
For this step you will need a NeuraLabel 600e Printer. Use two people to place the NeuraLabel 600e Printer on a sturdy table. Allow space for the media to be fed into the printer either from the table or the floor. Allow space for the media to... - Page 6 For this step you will need a NeuraLabel 600e CFA. The NeuraLabel 600e CFA hooks onto the mounting hardware of the NeuraLabel 600e printer. The left hook on the NeuraLabel 600e CFA fits in between the alignment hooks on the mounting hardware. Refer to the figure for detail.
- Page 7 Connect CFA to Printer Figure 7 Caution! Ensure that the Printer power is OFF before plugging in your CFA.
-
Page 8: Connect Printer To Power
Connect Printer to Power Figure 9 You may now power on the NeuraLabel 600e Printer. Caution! Do not unplug CFA while the printer is on. Doing so may damage your printer. -
Page 9: Next Steps
• Green is gap sensor mode. • Blue is side mark sensor mode. • Magenta is middle mark sensor mode. • Not all CFAs support all modes. • Download and install NeuraLabel 600e driver. www.neuralabel.com/600e • Load marked media with mark face down. -
Page 10: Technical Support
Technical Support Contact NeuraLabel Printing Solutions for further help. • 1-281-240-2525 X16 • support@neuralabel.com...
Need help?
Do you have a question about the 600e and is the answer not in the manual?
Questions and answers