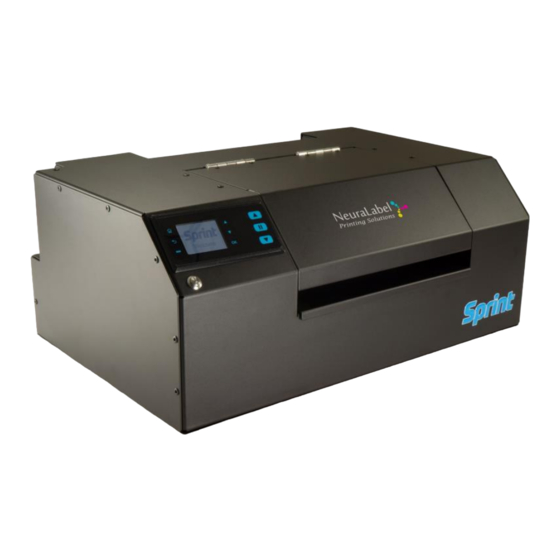
Summary of Contents for NeuraLabel Sprint
- Page 1 NeuraLabel Sprint Printer Installation and Quick Start Guide July 2019 - 0 - www.neuralabel.com...
-
Page 2: Table Of Contents
Table of Cont ents • Unpacking • In the Box • Your Sprint Printer • Printer Setup • Loading Media • Printer Alignment and Quality Check • Network/USB Setup • Printer Driver • Print a Sample Label • Optional Equipment •... -
Page 3: Unpacking
Step 4 Step 3 Place printer on table with access to Remove lower foam, plastic power, and network or USB connectivity. bag and blue packing tape. your Be sure to save Sprint box and packing materials. - 2 - www.neuralabel.com... -
Page 4: In The Box
In the Box • Sprint printer • Power cord (2 pieces) • USB cable • Network cable • Ink: Black, Cyan, Magenta, Yellow • Printhead, preinstalled in the printer • Sample media (4”x6” labels) - 3 - www.neuralabel.com... -
Page 5: Your Sprint Printer
Your Sprint Printer Independent Lockable Media Guides Mark/Gap Sensor Operator Panel Accessory Port Power Button Network Power Printer Front Printer Back Media Exit Media Entrance Media Path Ink Cartridge and Media Present Indicator Printhead Carriage Menu Controls Pause Indicator Jog Media Backward... -
Page 6: Printer Setup
Cartridges installed” appears. Select OK. • The printer will begin its initialization routine to fill the printhead with ink. Note that your Sprint printer ships with a new “dry” printhead. • When the printhead is filled, printing can begin. Cartridge Access - 5 - www.neuralabel.com... -
Page 7: Loading Media
Loading Media Before You Begin: Media is loaded in the back side of the Sprint printer into the guides. Media is loaded label side up. The Mark/Gap sensor is in the middle of the track. Media is loaded into back of printer Each media guide (Left/Right) is independently adjustable. - Page 8 • The media is now loaded and ready for printing. • Note the position of the loaded media. Note the media present indicator at the front of the printer. (see page 4) Media load position at front of printer - 7 - www.neuralabel.com...
-
Page 9: Printer Alignment And Quality Check
Printer Alignment and Quality Check Printer Alignment must be done whenever a new printhead is installed in the Sprint printer. It should be done when setting up a new printer. The Quality Report can be printed to check the alignment. -
Page 10: Network/Usb Setup
• Network: Check the printer connectivity by bringing up a web browser on your computer and typing in the IP address. You should see the printer’s web page appear in your browser. NeuraLabel Sprint Web Interface • USB: Wait to plug in later, after the printer driver is installed. - 9 -... -
Page 11: Printer Driver
• Select the Drivers tab and click the Add… button. • Follow the wizard until you can click Have Disk… and browse to the Sprint.inf file. • When done the NeuraLabel Sprint will be added to the Installed printer drivers: list. -
Page 12: Print A Sample Label
• Load the provided 4”x6” sample media into the printer. Select the Sprint Printer: • Select File->Print and choose the Sprint Printer. • Click Properties to bring up the Sprint Properties dialog. Select the Page Size: • Choose the Paper/Quality tab, then the Advanced…... - Page 13 • Select OK to return to the print dialog. Print Labels: • If using Adobe Reader, your screen will appear similar to that shown. • Print a few copies of the sample label. • Be sure to select Actual size. - 12 - www.neuralabel.com...
- Page 14 Centering the Print Adjust the print using the Labels tab of the NeuraLabel Sprint Printing Preferences. Mark Offset: Centers the print up and down Sets where the print starts with respect to the gap (or mark). Mark Offset only affects labels after the first label of a new load.
- Page 15 Print start with respect to the right edge of the media. Set a gap between labels (non-continuous direction) printed without marks or gaps Look for Gaps Look for Marks Print without looking for Gaps or Marks - 14 - www.neuralabel.com...
-
Page 16: Optional Equipment
Optional Equipment Unwinder: Your Sprint printer may have come with an Unwinder to hold the blank label stock. This unwinder plugs directly into the Sprint printer and is positioned using a base plate. Rewinder: Your Sprint printer may have come with an Rewinder to hold the printed label stock. - Page 17 NeuraLabel Contact Information • www.neuralabel.com • support@neuralabel.com • orders@neuralabel.com - 16 - www.neuralabel.com...


Need help?
Do you have a question about the Sprint and is the answer not in the manual?
Questions and answers