Table of Contents
Advertisement
Quick Links
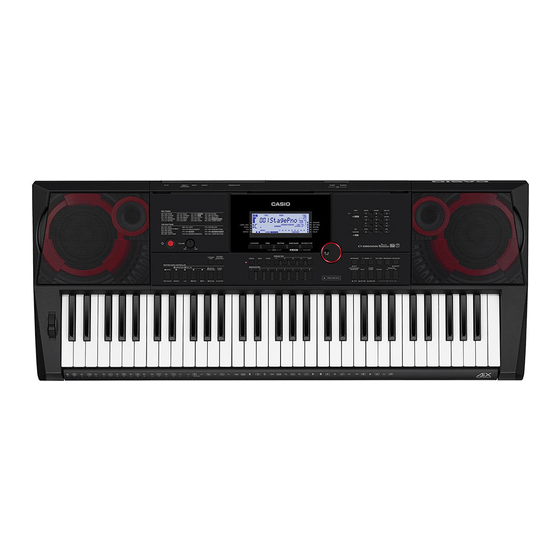
CT - X9000IN
CT - X8000IN
USER'S GUIDE
Please keep all information for future reference.
Safety Precautions
Before trying to use the Digital Keyboard, be sure to read the separate "Safety Precautions".
About Music Score data
You can use a computer to download music score data from the CASIO Website. For more information, visit the
URL below.
http://world.casio.com/
CTX8000IN-E-1B
EN
Advertisement
Table of Contents

Related Manuals for Casio CT-X9000IN


Summary of Contents for Casio CT-X9000IN
- Page 1 Before trying to use the Digital Keyboard, be sure to read the separate “Safety Precautions”. About Music Score data You can use a computer to download music score data from the CASIO Website. For more information, visit the URL below.
- Page 2 • Any reproduction of the contents of this manual, either in part or its entirety, is prohibited. Except for your own, personal use, any other use of the contents of this manual without the consent of CASIO is prohibited under copyright laws.
-
Page 3: Table Of Contents
Digital Keyboard ....EN-13 Advanced Split Settings .....EN-49 CT-X9000IN: Outputting Sound Using Recommended Tones and Tempos from a Microphone . - Page 4 Separately Available Accessories ●Music Stand • You can get information about accessories that ●Leaflets are separately for this product from the CASIO • Safety Precautions catalog available from your retailer, and from the • Appendix CASIO website at the following URL.
-
Page 5: General Guide
General Guide • All of the illustrations in this manual show the CT-X9000IN. bp bq br bs bt ck dm dn do dp dq dr CT-X9000IN CT-X8000IN • Some of the button names shown here include the $ mark. This indicates that you need to long-press the button to perform its operation. - Page 6 Number keys ds TRANSPOSE buttons bn [–], [+] keys dt MODULATION/ASSIGNABLE button bo INTRO, PART SELECT button (CT-X9000IN only) bp VARIATION/FILL-IN 1, REPEAT button ek PITCH BEND wheel bq VARIATION/FILL-IN 2, A-B button el CHORD root names br VARIATION/FILL-IN 3, sREW button...
- Page 7 General Guide ■ Back CT-X9000IN CT-X8000IN er USB flash drive port et LINE OUT R, L/MONO jacks (CT-X9000IN only) es USB port fk CT-X9000IN: PHONES jack CT-X8000IN: PHONES/OUTPUT jack* fl MIC IN jack (CT-X9000IN only) fm MIC VOLUME knob (CT-X9000IN only)
-
Page 8: Preparing The Music Stand
General Guide ■ Display Tone indicator Rhythm indicator Song Bank indicator Music Preset indicator Number/setting value display (left), name display (right) Tempo, measure, beat Keyboard part indicators Chord name Auto Accompaniment indicators Mixer info display area ... -
Page 9: Preparing A Power Supply
AC adaptor. • Never insert metal, pencils, or any other objects into Power cord the product’s DC24V (CT-X9000IN) or DC12V (CT- X8000IN) terminal. Doing so creates the risk of accident. • Do not try to use the power cord that comes with the product with another device. -
Page 10: Ct-X8000In: Using Batteries
Preparing a Power Supply CT-X8000IN: Using Batteries Turning Power On or Off You can use six D-size batteries for power. Connect the Digital Keyboard to a power supply. • See “Using the AC Adaptor” (page EN-8) or • Be sure to turn off power before loading batteries. “CT-X8000IN: Using Batteries”... -
Page 11: Adjusting Display Contrast
Current setting value ● Mixer (page EN-62) setting status C o n t r a s t ● CT-X9000IN: Category selection, tone and rhythm category selection status, last selected tone/rhythm in each tone/rhythm category *1 When the setting configured with the following operation is Use bn [–] and [+] or the bl dial to change the... -
Page 12: Connecting To Audio Equipment
Digital Keyboard Audio Output (Speaker) 3 Enabled when PHONES connected (PhoneSpk) (page EN-112). Your Digital Keyboard outputs audio from its built-in speakers and/or the PHONES jack. (CT-X9000IN: Also outputs audio fk PHONES jack from the LINE OUT jacks.) (Stereo standard jack (6.3mm)) •... -
Page 13: Outputting Keyboard Notes To Audio Equipment
Connecting to Audio Equipment CT-X9000IN: To connect an external device to Outputting Keyboard Notes to the Digital Keyboard’s LINE OUT jacks Audio Equipment Connection requires commercially available connecting cords, You can connect audio equipment or a music amplifier to the supplied by you. -
Page 14: Playing An External Device From The Digital Keyboard
Connecting to Audio Equipment Playing an External Device from CT-X9000IN: Outputting Sound the Digital Keyboard from a Microphone Connection requires commercially available connecting cords, You can connect a commercially available microphone* to the supplied by you. MIC IN jack and output the sound from the microphone •... -
Page 15: Operations Common To All Modes
■ Using the bl Dial Operations Common to All You can also change a displayed number or value by rotating Modes the dial. Other Functions of bm Number About this manual Keys Unless otherwise specifically noted, all of the procedures in The table below describes other functions that the bm number this manual assume that the Digital Keyboard is in its initial keys perform while the [NUM] indicator is not displayed. -
Page 16: Category Button
Operations Common to All Modes To navigate between categories 4 CATEGORY Button Press 5 TONE. The many tones of the Digital Keyboard are divided into 20 categories to help make it possible for you to find a particular tone quickly and easily. You can use the 4 CATEGORY While a tone name is displayed, hold down button to select the last tone you selected in a category. -
Page 17: Function Indicator
Operations Common to All Modes To modify characters FUNCTION Indicator Use the [1] (V) and [3] (W) bm number keys The [FUNCTION] indicator is displayed or flashes when you perform a Digital Keyboard function setting (page EN-107) or to move the cursor to the position of the other special setting operation. -
Page 18: Listening To Demo Play
Use bn [–] and [+] or the bl dial to change the Listening to Demo Play Touch Response setting value. This operation scrolls through the available Touch Press 5 TONE and 6 RHYTHM at the same Response settings: Off, Light, Normal, and Heavy. Since time. -
Page 19: Playing On The Keyboard
CT-X9000IN: To use the TONE Category Playing on the Keyboard buttons to select a category Selecting a Tone • You can use the eo TONE Category buttons to quickly and easily navigate between categories. Your Digital Keyboard comes with a large collection of tones. -
Page 20: Sounding Multiple Tones (Layer And Split
Playing on the Keyboard To split the keyboard between two tones Sounding Multiple Tones (Split) (Layer and Split) After confirming that the part indicator in the You can split the keyboard into left and right area and assign upper left corner of the display looks like different tones to each area, and also layer two tones to play at the same time. - Page 21 Playing on the Keyboard To move the keyboard split point To layer two tones Hold down dp SPLIT until “Split Pt” is After confirming that the keyboard part displayed. indicator in the upper left corner of the display looks like , select a tone.
- Page 22 Playing on the Keyboard To use split and layer together To change the tones assigned to each split/ layer part Perform steps 1 through 3 under “To split the Press 5 TONE. keyboard between two tones (Split)” (page EN-19). This displays (tone indicator).
-
Page 23: Selecting An Effect For A Tone (Reverb, Chorus, Delay
Playing on the Keyboard To select a digital effect Selecting an Effect for a Tone (Reverb, Chorus, Delay) • The procedure below explains how to select the reverb Your Digital Keyboard includes reverb, chorus, and delay (steps 2 and 3), chorus (4 and 5), and delay (6 and 7) effects, which you can use to enhance the sound of tones. - Page 24 Playing on the Keyboard ■ CT-X8000IN Reverb Effect List Setting ■ CT-X9000IN Setting Type Display Value Setting Setting Type Display Value Room 1 Room 1 Room 2 Room 2 Room 1 Room 1 Room 3 Room 3 Room 2 Room 2...
- Page 25 Playing on the Keyboard Chorus Effect List Delay Effect List ■ CT-X9000IN ■ CT-X9000IN Setting Setting Setting Type Display Setting Type Display Value Value Tone * Tone Tone * Tone Chorus 1 Chorus 1 Short 1 Short 1 Chorus 2...
-
Page 26: Using Equalization
You can use equalization to select from among presets that Value boost or cut specific frequency ranges. Tone * Tone The CT-X9000IN also includes a four-band equalizer that allows user-configured settings (User Equalizer). Short 1 Short 1 Short 2 Short 2... - Page 27 Playing on the Keyboard ■ User Equalizer Setting List CT-X9000IN: To configure User Equalizer settings Setting Item Display Settings Low-range EQ Low Press bk FUNCTION. Cutoff Frequency Low Freq 1 to 13 * Use the [1] (V) and [3] (W) bm number keys...
-
Page 28: Using The Metronome
Playing on the Keyboard To adjust the balance between metronome Using the Metronome and keyboard volume The metronome sounds a regular tone to mark time. Use the Perform the procedure under “To configure function settings metronome when you want to practice playing at a regular with the bk FUNCTION button”... -
Page 29: Changing Keyboard Response To Touch Pressure (Touch Response
Playing on the Keyboard To turn the arpeggiator off, press do AUTO Changing Keyboard Response to HARMONIZE/ARPEGGIATOR. Touch Pressure This causes the [ARPEGGIATOR] indicator to disappear. (Touch Response) Touch Response alters tone volume in accordance with • If the [AUTO HARMONIZE] indicator is displayed keyboard pressure (speed). -
Page 30: Controlling Sounds
• The Auto Harmonize (page EN-51) sound • You can connect a CASIO sustain pedal (“Separately depends on the UPPER 1 part setting. Available Accessories”, page EN-3) to the fo PEDAL1 jack. - Page 31 Controlling Sounds Depending on the selected pedal type, perform To connect a pedal to the fp PEDAL2/ one of the operations below. EXPRESSION jack Y Foot Switch Pedal Connect a pedal to the fp PEDAL2/ Select the pedal effect. EXPRESSION jack. (1) Use the [1] (V) and [3] (W) bm number keys to display “Pd2Efect”.
- Page 32 Controlling Sounds ■ Pedal Function List ■ Connectable Expression Pedals You can connect a commercially available expression pedal Setting Function that satisfies the specifications below to the fp PEDAL2/ Description Value (Display) EXPRESSION jack. Use of a pedal whose operation has Sustain Sustains notes played while the been confirmed (see below) is recommended.
-
Page 33: Sliding Smoothly Between Pitches (Portamento
Controlling Sounds Sliding Smoothly Between CT-X9000IN: dt MODULATION/ Pitches (Portamento) ASSIGNABLE button You can use the dt MODULATION/ASSIGNABLE button Portamento makes it possible to slide smoothly between notes as is done with string and woodwind instruments. to apply vibrato to notes (default setting). You can also change the function of the button so it change how DSP Press dm PORTAMENTO. - Page 34 Controlling Sounds To change the operation performed when To specify the keyboard part to which an dt MODULATION/ASSIGNABLE is pressed effect is applied when dt MODULATION/ ASSIGNABLE is pressed Press bk FUNCTION. Perform steps 1, 2, and 3 under “To change the Use the [1] (V) and [3] (W) bm number keys operation performed when dt MODULATION/ to display “Cntrller”, and then press [6]...
-
Page 35: Changing The Pitch In Semitone Steps (Transpose
Controlling Sounds Use bn [–] and [+] or the bl dial to specify a Changing the Pitch in Semitone DSP module. Steps (Transpose) Use the [1] (V) and [3] (W) bm number keys The transpose feature lets you raise or lower the overall pitch to display “DSPParam”... - Page 36 Controlling Sounds To configure the octave shift amount setting To use Quick Octave Shift for each part While holding down dr OCTAVE, press the Press dr OCTAVE. ds TRANSPOSE [w] or [q] button. • Pressing [w] shifts the specified keyboard parts one ...
-
Page 37: Performing Master Digital Keyboard And Individual Part Pitch Adjustment
Controlling Sounds Performing Master Digital Selecting a Scale Keyboard and Individual Part You can select from among 17 different scales, including Pitch Adjustment those that a suitable for classical music of specific eras, Arabian music, etc. Use the procedure below to perform master Digital Keyboard ■... - Page 38 Controlling Sounds To select the temperament of keyboard play To change the scale setting used for Auto Accompaniments Press bk FUNCTION. Perform steps 1 and 2 under “To select the Use the [1] (V) and [3] (W) bm number keys temperament of keyboard play”...
-
Page 39: Playing A Built-In Song Or A Song On A Usb Flash Drive (Song Bank Mode
Press ck PLAY/STOP. Playing a Built-in Song or a • This starts song playback. The playback tempo, Song on a USB Flash Drive current measure, and current beat are shown in the upper right corner of the display. (Song Bank Mode) Note Value Tempo Your Digital Keyboard comes with 30 built-in songs.* You can... -
Page 40: Looping Playback Of Specific Song Measures (A-B Repeat
Then you can practice by playing the muted part on the keyboard. The following types of songs can be used for such practice: built-in songs,* or CMF format (one type of CASIO MIDI file) songs* stored on a USB flash drive. - Page 41 Playing a Built-in Song or a Song on a USB Flash Drive (Song Bank Mode) Use bo PART SELECT to select a part to ■ Part Channel Information practice. In built-in songs and CMF format songs, parts where left-hand play is recorded and parts where right-hand play is recorded •...
-
Page 42: Playing Back A Song From A Usb Flash Drive
USB flash drive. For information about the procedure for EN-118). saving an audio file to a USB flash drive, see “Using a * Standard MIDI files (SMF format 0/1) and CASIO MIDI files Computer to Copy General Song Data to a USB Flash Drive” (CMF format) (page EN-118). -
Page 43: Using Auto Accompaniment (Rhythm Mode
To stop playback, press 8 AUDIO PLAY/ Using Auto Accompaniment STOP. (Rhythm Mode) This causes the [AUDIO PLAY] indicator to disappear. To exit the Audio Mode, press 7 SONG BANK With Auto Accompaniment, simply select the accompaniment rhythm you want and the matching accompaniment (bass, (AUDIO). -
Page 44: Using Auto Accompaniment
Using Auto Accompaniment (Rhythm Mode) CT-X9000IN: To use the RHYTHM Category Using Auto Accompaniment buttons to select a category To play an Auto Accompaniment • You can use the eq RHYTHM Category buttons to quickly Use the procedure under “Selecting a Rhythm”... - Page 45 Play other chords with your left hand as you play the melody with your right hand. • You can use “CASIO CHORD” or other simplified • You can use the procedure under “Muting Specific Parts chord fingering modes to play chords. See “To select a (Part Mode)”...
-
Page 46: Changing Auto Accompaniment Speed (Tempo
Using Auto Accompaniment (Rhythm Mode) To change the displayed note value Changing Auto Accompaniment Speed (Tempo) Long-press dl TAP TEMPO until the displayed note value changes. There are two ways to change the tempo. • Each long-press of dl TAP TEMPO cycles through •... -
Page 47: Creating A Song With An Auto Accompaniment (Accompaniment Pattern
Using Auto Accompaniment (Rhythm Mode) ■ Intro (One Type) Creating a Song with an Auto This is an accompaniment pattern that can be used at the Accompaniment beginning of a piece. After a multiple-measure intro accompaniment pattern sounds, accompaniment transition to (Accompaniment Pattern) Variation 1. -
Page 48: Starting And Stopping Auto Accompaniment With The Accompaniment Keyboard (Synchro Start, Synchro Stop
IN 3, bs VARIATION/FILL-IN 4). The indicator modes. and a number indicator (1 to 4) that corresponds to the • CASIO CHORD button you press flash on the display. • FINGERED 1 • FINGERED 2 Play the chord you want on the •... - Page 49 Using Auto Accompaniment (Rhythm Mode) ■ CASIO CHORD ■ FINGERED With CASIO CHORD, you can use simplified fingerings to With these input modes, you play chords on the play the four types of chords described below. accompaniment keyboard using their normal chord fingerings.
-
Page 50: Advanced Split Settings
Setting Chord Fingering Modes Display UPPER part keyboard, a LOWER part keyboard, and an value accompaniment keyboard. CASIO CHORD CASIO Cd You can specify a split point (page EN-20) as shown in the illustration below. FINGERED 1 Fingerd1 FINGERED 2... - Page 51 Using Auto Accompaniment (Rhythm Mode) ● Chord Point To specify the chord point The illustration below shows a keyboard with a chord point specified. The LOWER part keyboard range is not affected in Hold down dp SPLIT until “Split Pt” is this case.
-
Page 52: Using Recommended Tones And Tempos (One-Touch Presets
Using Auto Accompaniment (Rhythm Mode) To select the Auto Harmonize type Using Recommended Tones and Tempos (One-Touch Presets) Perform the procedure under “To turn on Auto Harmonize” and confirm that the [AUTO One-Touch Preset gives you one-touch access to tone and HARMONIZE] indicator is displayed. -
Page 53: Using Music Presets
Using Music Presets • With some music presets, selecting a number in step 3 Music Presets are a collection of setups with chord causes the [SYNC START] indicator to start to flash, progression data. With the touch of a button you can recall indicating that the Digital Keyboard is in synchro start one of 310 presets that include tone, rhythm, and other setting standby (page EN-47). -
Page 54: Using Phrase Pads
Using Phrase Pads Starting and Stopping Phrase Playback Before playing back a phrase, you must first change to the phrase set where the phrase is located if it is not already assigned to the phrase pads. For details, see “Changing to Another Phrase Set”... -
Page 55: Configuring Phrase Playback Setups
Using Phrase Pads To stop playback of all phrases Configuring Phrase Playback Setups To stop phrase playback while a multiple phrases are playing, press cr STOP. Phrase playback setups control how the phrase assigned to a phrase pad (1 to 4) plays when you press the pad. The setups To synchronize phrase playback with Auto you configure here are recorded to the corresponding pad. -
Page 56: Recording A Phrase
Using Phrase Pads Phrase Playback Setup Items Recording a Phrase A phrase is created by recording notes played manually on Setup Item the keyboard. Up to 16 measures can be specified for the Description Settings (Display) length of the phrase to be recorded, and up to approximately 1,000 notes can be recorded. -
Page 57: Configuring Phrase Recording Settings
Using Phrase Pads Press a cq PHRASE PAD button ([P1] to [P4]) Configuring Phrase Recording to specify the phrase number of the recording Settings destination. • This causes the indicator of the pad you press (P1 to If you change phrase recording settings, those settings will be P4) to flash on the display. -
Page 58: Managing Phrase Sets
Using Phrase Pads Managing Phrase Sets Editing a Phrase You can use the procedures in this section to copy and delete You can use the procedures in this section to edit individual phrase sets. phrases. You can delete or copy a phrase, and configure quantize, key shift, and mixer settings. - Page 59 Using Phrase Pads To copy a phrase To delete all data from a phrase except note events Use the procedure under “To enter the Phrase Editing mode” (page EN-57) to enter the Phrase Use the procedure under “To enter the Phrase Editing mode.
- Page 60 Using Phrase Pads To quantize a phrase To key shift a phrase Use the procedure under “To enter the Phrase Use the procedure under “To enter the Phrase Editing mode” (page EN-57) to enter the Phrase Editing mode” (page EN-57) to enter the Phrase Editing mode.
-
Page 61: Muting Specific Parts (Part Mode
To configure phrase mixer settings Muting Specific Parts (Part Mode) Use the procedure under “To enter the Phrase Editing mode” (page EN-57) to enter the Phrase Your Digital Keyboard produces Auto Accompaniment and Editing mode. keyboard play notes using multiple parts. You can use the part on/off function to easily mute and unmute one or more Long-press 9 PART (MIXER) until the parts. -
Page 62: Part On/Off Function Part Groups
Muting Specific Parts (Part Mode) Use bn [–] and [+] to select the part group of Part On/Off Function Part Groups the part you want to turn on or off. • For example, display the [RHYTHM] indicator. While Besides the Auto Accompaniment in the explanation above, the [RHYTHM] indicator is displayed, you can turn the Digital Keyboard also uses other parts in order to generate each Auto Accompaniment part on or off. -
Page 63: Using The Mixer
Select the part group whose mixer settings you Using the Mixer want to configure. (1) Press 9 PART and confirm that the indicator lamp Your Digital Keyboard produces Auto Accompaniment and to the left of the button is lit. keyboard play notes using multiple parts. You can use the (2) Use bn [–] and [+] to select the part group whose mixer function to make fine-adjustments to the volume, effect settings you want to configure. -
Page 64: List Of Parts For Each Mixer Part Group
Using the Mixer To exit the Mixer mode, press the [4] (EXIT) bm List of Parts for Each Mixer Part number key. Group The tables below show Mixer Mode part groups and the parts • The displayed, flashing, and not displayed status of mixer included in each group. -
Page 65: Advanced Mixer Settings
Using the Mixer ● SONG SYSTEM Part Group Advanced Mixer Settings These are the parts of the system track in songs recorded with the MIDI recorder. Setting Items for Each Part Group Part Number Corresponding Part UPPER 1 Initial default setting values are indicated by an asterisk (*). UPPER 2 Item Name Description... - Page 66 To sound only a selected part Registering and Restoring a Setup (Registration) Perform steps 1 through 4 under “To configure mixer settings” (page EN-62). You can use the registration function to register the setup of the Digital Keyboard (tone, rhythm, and other settings). You To sound only the part whose setting is being can recall a registered setup as required to perform a configured, press the [6] (ENTER) bm number...
-
Page 67: Registering And Restoring A Setup (Registration
• Pedal 1 and Pedal 2 effects (Pedal 2 type is not recorded) • Scale, scale fine tune, part fine tune, part coarse tune • dm PORTAMENTO button (on/off, setting mode) • CT-X9000IN: dt MODULATION/ASSIGNABLE button (on/off, setting mode) Bank number ●... -
Page 68: Recalling A Registered Setup
Registering and Restoring a Setup (Registration) Freeze Function Recalling a Registered Setup Recalling a registered setup normally overwrites all of the settings shown under “Registration Setting Items” (page To recall a setup EN-66). You can also use the freeze function to specify particular As required, press cn FREEZE to toggle the settings that should not be overwritten when a setup registration is recalled. -
Page 69: Using A Pedal To Cycle Through Multiple Setups (Registration Sequence
Registering and Restoring a Setup (Registration) After you are finished recalling the registration Using a Pedal to Cycle Through setups using the pedal, perform steps 1 Multiple Setups through 5 to turn off the registration sequence (Registration Sequence) function. This causes the [SEQ] indicator to disappear. Each press of the pedal cycles through the currently selected bank’s registrations (setups) in area number sequence. -
Page 70: Editing A Tone (User Tones
Repeat steps 3 and 4 above for each of the Editing a Tone (User Tones) editing items you want to change. • You can sound the tone you are editing by playing You can edit a built-in tone to create a user tone, and save up something on the keyboard. - Page 71 Editing a Tone (User Tones) Use the [1] (V) and [3] (W) bm number keys DSP Editing to select the DSP module whose parameters A DSP (Digital Signal Processor) is a type of effect that is you want to change. connected between the sound source and output.
- Page 72 Editing a Tone (User Tones) To rename a user tone To delete a user tone Select the user tone you want to rename. Select the user tone you want to delete. Hold down 8 RECORD/STOP until Hold down 8 RECORD/STOP until “ToneName”...
-
Page 73: Tone Editing Item List
Editing a Tone (User Tones) Tone Editing Item List Item Name Display Description Settings Attack Time Atk.Time Adjusts the time after a key is pressed from when the note 0 to 127 starts to sound until it reaches maximum volume. A larger value specifies a slower attack. - Page 74 Editing a Tone (User Tones) Item Name Display Description Settings Velocity Sense Vel.Sens Specifies how much the tone and/or volume should be –64 to 0 to 63 affected by keyboard touch (pressure). A larger positive value specifies more brightness and greater volume as keyboard touch becomes stronger.
-
Page 75: Creating An Auto Accompaniment (User Rhythm
Empty The storage locations and the number of rhythms that can be stored depend on the Digital Keyboard model. CT-X9000IN: Rhythm numbers 309 to 408 (up to 100 • The “Empty” blocks in the above illustration are special rhythms) memory areas (user areas) for editing, and one is provided CT-X8000IN: Rhythm numbers 309 to 358 (up to 50 rhythms) for each part. -
Page 76: Creating And Editing A User Rhythm
Creating an Auto Accompaniment (User Rhythm) Specify the number of measure and the time Creating and Editing a User signature of the accompaniment pattern you Rhythm want to create. (1) Press cs REGISTRATION [8] (EDIT MENU). (2) Use the [1] (V) and [3] (W) bm number keys to display “Element”, and then press [6] (ENTER). - Page 77 Creating an Auto Accompaniment (User Rhythm) Configure the tone and octave shift settings of To edit an existing rhythm and save it the part, if you want. (1) Select the tone you want to use for part recording. See “Selecting a Tone” (page EN-18). •...
- Page 78 Creating an Auto Accompaniment (User Rhythm) Depending on the accompaniment pattern you Configure the tone and octave shift settings of selected, perform one of the operations below. the part, if you want. (1) Select the tone you want to use for part recording. Y If you selected Variation 1 to 4 or Fill-in 1 to 4 See “Selecting a Tone”...
- Page 79 Creating an Auto Accompaniment (User Rhythm) To configure only the mixer settings of an To record keyboard play to each part existing rhythm and save it Select the built-in rhythm or previously-saved • The operation shown here is performed as the steps of the procedures below.
- Page 80 • dt MODULATION/ASSIGNABLE button operations This enters the Rehearsal Mode. are also included in the recording (CT-X9000IN only). • The Rehearsal Mode causes the keyboard to • What you record will play back when the display...
- Page 81 Creating an Auto Accompaniment (User Rhythm) ■ User Rhythm Recording Settings To configure mixer settings of a part being Initial default setting values are indicated by an asterisk (*). edited Item Name Description Settings (Display) • The operation shown here is performed as the steps of the Quantize Specify either recording of notes Off*, 4, 8,...
- Page 82 Creating an Auto Accompaniment (User Rhythm) To copy an existing accompaniment pattern To copy an existing rhythm part for editing for editing In the Rhythm Editing Mode, select the copy • You cannot copy parts included in an intro or an destination accompaniment pattern.
- Page 83 Creating an Auto Accompaniment (User Rhythm) Select the part you want to use as the copy To batch clear the recorded data in all parts source. included in a single accompaniment pattern (1) Press 9 PART and confirm that the lamp to the left of the button is lit.
-
Page 84: User Rhythm Part Playback Settings
[–] (NO). User Rhythm Part Playback • If there are already the maximum number of allowable user rhythms stored in memory (CT-X9000IN: 100, Settings CT-X8000IN: 50), the error message “Data Full” will appear when you press bn [–] (NO) to indicate that you cannot save the new rhythm. - Page 85 Creating an Auto Accompaniment (User Rhythm) User Rhythm Part Playback Setting Details ■ Chord conversion table (Table) Recording of each accompaniment pattern is normally performed using C major (root of C, major type). When playing an Auto Accompaniment, you can use a root other than C and a chord type other than major, if you want. This is accomplished by using a “chord conversion table”...
-
Page 86: Operations Affecting All The Accompaniment Patterns In A Rhythm
Creating an Auto Accompaniment (User Rhythm) ■ Break Point (Break Pt) Operations Affecting All the This parameter specifies the key, from C to B, that is the point Accompaniment Patterns in a at which Auto Accompaniment bass and chord notes drop one octave. - Page 87 Creating an Auto Accompaniment (User Rhythm) To batch clear data recorded in all the To copy a user rhythm accompaniment patterns of a rhythm Select the user rhythm you want to copy. Perform steps 1 and 2 under “To configure Hold down 8 RECORD/STOP until “Rhy mixer settings for a rhythm”...
-
Page 88: Using The Midi Recorder To Record
Solo 16 Empty Empty Recording • CASIO COMPUTER CO., LTD. takes no responsibility The data recorded to each track is shown below. for any damages, lost profits, or claims by third parties This type arising from the deletion of recorded data due to... -
Page 89: Starting A Recording
Using the MIDI Recorder to Record When starting from the Song Bank Mode Starting a Recording Press 7 SONG BANK to enter the Song Bank Recording can be stared from either of the modes below. Mode. ● Rhythm Mode Press 8 RECORD/STOP and then play something on the Use the bm number keys, bn [–] and [+], or the keyboard to start recording. -
Page 90: Recording Keyboard Play
Using the MIDI Recorder to Record Playing on the keyboard automatically starts Recording Keyboard Play recording. • Pressing ck START/STOP starts the rhythm and recording at the same time. • The [RECORD] indicator will start to flash during recording when the number of remaining note count is 100 or lower. When there are no more remaining notes, recording stops automatically and the [RECORD] indicator disappears. - Page 91 Using the MIDI Recorder to Record Select the solo track to which you want to To record a new solo track record. Specify the tempo to use at the start of (1) Long-press 8 RECORD/STOP. • This displays the recording setting screen that you recording.
- Page 92 Using the MIDI Recorder to Record Playing on the keyboard automatically starts To overdub another solo track while playing recording. back recorded tracks Starting playback of a recorded track simultaneously starts recording to the track you selected in step 5. Press 7 SONG BANK.
-
Page 93: Re-Recording Part Of A Recorded Track (Overdubbing, Punch-In Recording
Using the MIDI Recorder to Record To sound a pre-count or the metronome Re-recording Part of a Recorded Track (Overdubbing, Punch-in Press 8 RECORD/STOP. Recording) • If you started the operation from the Rhythm Mode, this enters recording standby. Advance to step 2. The recording operations described in the table below can be •... -
Page 94: Playing Back A Recorded Song
Using the MIDI Recorder to Record Press ck PLAY/STOP. To specify the recording start point and end This starts song playback. point, and then perform overdubbing or • Here, you could jump to step 9 of this procedure and punch-in recording immediately start recording. -
Page 95: Copying A Recorded Song, Deleting A Recorded Song Or Track
Using the MIDI Recorder to Record To mute specific tracks Copying a Recorded Song, Deleting a Recorded Song or Press 7 SONG BANK. Track Use the bm number keys, bn [–] and [+], or the bl dial to select the song number of a To copy a recorded song recorded song. -
Page 96: Song Editing Mode
Using the MIDI Recorder to Record To delete a recorded song Song Editing Mode Press 7 SONG BANK. Enter the Song Editing Mode to perform the operations below. • Editing an entire song in measure units (page EN-96) Use the bm number keys, bn [–] and [+], or the •... -
Page 97: Editing An Entire Song In Measure Units (Song Editing
Using the MIDI Recorder to Record To copy an entire song in measure units and Editing an Entire Song in Measure insert them into a specified location of the Units (Song Editing) same song Use the procedure below to edit an entire song (all of the Perform the procedure under “To enter the tracks included in the song) in measure units. -
Page 98: Editing A Recorded Song In Track Units
Using the MIDI Recorder to Record To delete a specific range of measures from a Editing a Recorded Song in Track song Units The editing operations in this section affect an entire track in a recorded song. • Performing this procedure deletes the measures in the specified range, shifting the measures following the deleted range forward to fill in the space that is created. -
Page 99: Editing A Track Of A Recorded Song In Measure Units
Using the MIDI Recorder to Record To delete specific data from a specified track Editing a Track of a Recorded Song in Measure Units • The operation below deletes only the data in the table You can quantize, key shift, delete, or perform other below from the specified tracks. - Page 100 Using the MIDI Recorder to Record Press [6] (ENTER). To delete a specified track in measure units This displays “Sure?” Perform the procedure under “To enter the Perform the procedure under “To exit the Song Song Editing Mode” (page EN-95). Editing Mode operation”...
-
Page 101: Editing A Recorded Song In Event Units (Event Editor
Using the MIDI Recorder to Record To copy a specified track in measure units Editing a Recorded Song in Event and insert them into a specified location of Units (Event Editor) the same track The MIDI recorder records operations as data called “events”. Perform the procedure under “To enter the For example, pressing a keyboard key causes multiple events to be recorded: the timing of the key press, the pressed key... - Page 102 Chord Chord type or “NonChord”* EN-100). *1 CT-X9000IN: 1 to 408, CT-X8000IN: 1 to 358 • Pressing ck PLAY/STOP while editing an event will *2 See “Auto Accompaniment Chord Event” (page EN-101). play back the recorded data from the beginning of the *3 All chord types that can be fingered on the accompaniment measure that includes the displayed event.
- Page 103 Using the MIDI Recorder to Record Y Note Events Y Chord Event (System Track Only) (1) Use the [2] (w) and [5] (q) bm number keys to (1) Use the [2] (w) and [5] (q) bm number keys to display a note event. display a chord event.
-
Page 104: Inputting Notes And Chords One-By-One (Step Input
Using the MIDI Recorder to Record To delete events in measure units Inputting Notes and Chords One- by-one (Step Input) Perform the procedure under “To enter the Song Editing Mode” (page EN-95). Step input is an event editor function. You can use step input to specify the length and pitch of each individual note (note Perform steps 2 and 3 under “To edit an event”... - Page 105 Using the MIDI Recorder to Record When you are editing the system track, you Specify the note value (event length) of the can specify the event input target part. event you are about to input in step 8. • See “Selecting a System Track Part” (page EN-105). To input this note value: Press this bm number key: •...
- Page 106 Using the MIDI Recorder to Record ■ Selecting a System Track Part Press cs REGISTRATION [1]. When the system track is specified as the event edit target This displays the [STEP] indicator and enters the Step track, you can use the buttons below to select the part to be Input Mode.
-
Page 107: Recorded Song Mixer Settings
Using the MIDI Recorder to Record Use the [2] (w) and [5] (q) bm number keys to Recorded Song Mixer Settings display the menu item you want to change. You can configure the mixer settings of each part of the •... -
Page 108: Configuring Function Settings
Configuring Function Settings Use the procedures in this section to configure master Digital Keyboard settings. The procedure uses the bk FUNCTION button. • When power is turned off by pressing 1P (power) or by triggering of Auto Power Off (page EN-9) while Auto Resume (page EN-10) is turned off, all settings, except for those below, are returned to their initial defaults. - Page 109 Configuring Function Settings Function Setting Item List Function Name Display Settings See Page Touch Response Touch 1 to 4 EN-28 Chord Mode ChordMod 1 to 6 EN-49 Phrase Pad Phr Pad – EN-53 Phrase set switching Phr Set 1 to 25 EN-53 Pad 1 Pad 1...
- Page 110 Configuring Function Settings Function Name Display Settings See Page CT-X9000IN: MODULATION/ASSIGNABLE Mod/Asgn – EN-32 Button operation Btn Act 1 to 2 EN-33 Button function Btn Func 1 to 2 EN-33 Value when modulation is on ModValue 0 to 127 EN-33...
- Page 111 Configuring Function Settings Function Name Display Settings See Page Split Split – EN-20, 49 Split Point Split Pt 36 to 96 EN-20 Lower Point Lower Pt 36 to 96 EN-50 Chord Point Chord Pt 36 to 96 EN-50 Chord Input Priority Mode Cd Prior On, Off EN-50...
- Page 112 Configuring Function Settings Function Name Display Settings See Page CT-X9000IN: Equalizer user settings User EQ – Low-range setting EQ Low – Low-range cutoff frequency Low Freq 1 to 13 Low-range gain Low Gain –12 to 12 Mid-range 1 setting EQ Mid1 –...
- Page 113 *1 Includes the same sub-menus as Pad 1. *2 Depends on the “Target DSP module” (DSPModle) specification. *3 Setting range depends on the Digital Keyboard model. Settings Function Name CT-X9000IN CT-X8000IN Reverb 1 to 33 1 to 25 Chorus 1 to 17...
-
Page 114: Examination Mode
Configuring Function Settings Examination Mode Batch Deleting Data from Digital Keyboard Memory The Examination Mode changes the operation of the Digital Keyboard as described below to provide support for those You can use the procedure below to return the data and taking a musical instrument grade test. -
Page 115: Usb Flash Drive
(MIDI file or WAV format audio file) copied to USB flash treaties. CASIO COMPUTER CO., LTD. shall not be drive using a computer held in any way liable for any use of this Digital –... -
Page 116: Formatting A Usb Flash Drive
USB Flash Drive To connect a USB flash drive to the Digital To format a USB flash drive Keyboard Insert the USB flash drive to be formatted into As shown in the illustration below, insert the the Digital Keyboard’s USB flash drive port. USB flash drive into the Digital Keyboard’s Press bk FUNCTION. -
Page 117: Usb Flash Drive Operations
USB Flash Drive To save Digital Keyboard data to a USB flash USB Flash Drive Operations drive You can use Digital Keyboard operations to perform data storage, data import, data delete, and data renaming Insert the USB flash drive into the Digital operations for a USB flash drive plugged into the Digital Keyboard’s USB flash drive port. - Page 118 USB Flash Drive To load data from a USB flash drive to Digital To delete USB flash drive data Keyboard memory Perform steps 1, 2, and 3 under “To save Perform steps 1, 2, and 3 under “To save Digital Keyboard data to a USB flash drive” Digital Keyboard data to a USB flash drive”...
-
Page 119: Using A Computer To Copy General Song Data To A Usb Flash Drive
Use the [1] (V) and [3] (W) bm number keys MUSICDAT folder. to display “Rename”, and then press [6] • Standard MIDI files (SMF format 0/1) or CASIO MIDI files (ENTER). (CMF format) • WAV format audio files (16 bit, 44.1 kHz) -
Page 120: Connecting A Computer
*3 Windows 8.1 (32-bit, 64-bit) *4 Windows 10 (32-bit, 64-bit) Configure the music software settings to select “CASIO USB-MIDI” as the MIDI device. ● USB port • For information about how to select the MIDI device, see the user documentation that comes with the music software you are using. -
Page 121: Midi Settings
Connecting a Computer Downloading Data Manager MIDI Settings Go to the CASIO WORLDWIDE site at the Keyboard Channel following URL. http://world.casio.com/ This parameter specifies the channel to be used when keyboard performance information is sent from this Digital At the site, select a geographic area or country. -
Page 122: Reference
• If there is no user rhythm stored in memory, Auto Accompaniment will not start when you press ck while a rhythm in the range of 309 to 408 (CT-X9000IN) / 309 to 358 (CT-X8000IN) is selected (page EN-74). • Turn power off and then back on to initialize all Digital Keyboard settings (page EN-9). - Page 123 Reference Symptom Action Some notes are cut off while they are playing. Notes are cut off whenever the number of notes being sounded exceeds the maximum polyphony value of 64 (32 for some tones). This does not indicate malfunction. The volume or tone setting I made has changed. •...
-
Page 124: Error Messages
Reference Error Messages Display Cause Action Err Limit You are attempting to record more than 999 Make your recordings up to 999 measures long. measures. Err Mem Full You are attempting a recording that exceeds the Keep song recordings with the allowable per-song allowable per-song limit. - Page 125 Reference Display Cause Action Err WrongDat The USB flash drive data is corrupted. – USB flash drive contains data that is not supported by – this Digital Keyboard. Err Format The USB flash drive format is not compatible with this •...
-
Page 126: Specifications
User-recorded Songs 10 (See the “MIDI Recorder” item of these specifications.) USB Memory Songs Playback of standard MIDI files (SMF format 0/1), CASIO MIDI files (CMF format) on a USB flash drive is supported. USB Audio Playback Playback of audio files on a USB flash drive is supported. - Page 127 Stereo standard jack (6.3 mm) Audio Input Jack Stereo mini jack (3.5 mm) Input impedance: 9 kΩ; Input sensitivity; 200 mV Line Out Jack (CT-X9000IN) Standard jacks (6.3 mm) × 2 Output impedance: 2.3 kΩ; Output voltage: 1.9 V (RMS) MAX Microphone Input Jack Standard jack (6.3 mm) (Connect a dynamic microphone.)
-
Page 128: Dsp Effect List
Reference DSP Effect List DSP Module List Module Module Name Display Description Number Mono 1-Band EQ Mono 1EQ This is a single-band monaural equalizer. Mono 2-Band EQ Mono 2EQ This is a dual-band monaural equalizer. Mono 3-Band EQ Mono 3EQ This is a three-band monaural equalizer. - Page 129 Reference DSP Parameter List Module Name Description Settings Display Parameter Data Mono 1-Band EQ This is a single-band monaural equalizer. EQ Freq EQ Frequency Adjusts the center frequency of Equalizer. EQ Gain EQ Gain Adjusts the gain of Equalizer. –12 to 00 to 12 In Level Input Level...
- Page 130 Reference Module Name Description Settings Display Parameter Data Stereo 3-Band EQ This is a three-band stereo equalizer. EQ1 Freq EQ1 Frequency Adjusts the center frequency of Equalizer 1. EQ1 Gain EQ1 Gain Adjusts the gain of Equalizer 1. –12 to 00 to 12 EQ2 Freq EQ2 Frequency Adjusts the center frequency of Equalizer 2.
- Page 131 Reference Module Name Description Settings Display Parameter Data Compressor Compresses the input signal, which can have the effect of suppressing level variation. Attack Attack Adjusts the time until compression goes into effect. A smaller 000 to 127 value causes prompt compressor operation, which suppresses the attack of the input signal.
- Page 132 Reference Module Name Description Settings Display Parameter Data Phaser Produces a distinctive pulsating, broad sound by using an LFO to change the phase of the input signal and then mixes it with the original input signal. Resonanc Resonance Adjusts the strength of feedback 000 to 127 Manual Manual...
- Page 133 Reference Module Name Description Settings Display Parameter Data Drive Rotary This is a rotary speaker simulator that makes overdrive possible. Type Type Selects the rotary speaker type. 0 to 3 OD Gain Overdrive Gain Adjusts overdrive gain. 000 to 127 OD Level Overdrive Level Adjusts the overdrive output level.
- Page 134 Reference Module Name Description Settings Display Parameter Data Reflection Simulates the initial reflection of reverberation. Applies acoustic presence to notes. WetLevel Wet Level Adjusts the level of the effect sound. 000 to 127 Feedback Feedback Adjusts the repeat of the reflected sound. 000 to 127 Tone Tone...
- Page 135 Reference Module Name Description Settings Display Parameter Data Auto Wah This is a “wah” effect that can automatically shift the frequency in accordance with the level of the input signal. In Level Input Level Adjusts the input level. The input signal can become distorted 000 to 127 when the level of the sound being input, the number of chords, or the Resonance value is large.
- Page 136 Reference Module Name Description Settings Display Parameter Data Distortion Distortion, wah, and amp simulator combined into a single effect. DistGain Dist Gain Adjusts the distortion input signal gain. 000 to 127 Dist Lvl Dist Level Adjusts the distortion output level. 000 to 127 Dist Low Dist Low...
- Page 137 Reference *5 (V: Number of variations) Settings Display Settings Display Settings Display Settings Display 1 FD-PRNST 2 DZ-V4 4 MB-TX+DI 2 VH-SP6 1 FD-TWRV1 2 DZ-HA 4 MS-VS80 3 VX-A15 1 RL-J12 4 EG-TWK 4 MS-J800 2 VX-A15TB 1 FD-TWD 3 EG-VEN 2 MS-J2401 3 VX-A30...
-
Page 138: Digital Keyboard Sound Source Configuration And Midi Channel Assignment
Reference Digital Keyboard Sound Source Configuration and MIDI Channel Assignment The sound source of the Digital Keyboard is divided among four part groups: KEYBOARD, RHYTHM, SONG SYSTEM, SONG SOLO. The roles assigned to each part of the part groups are a shown in the “Part” column of the table below. Part Part Group Part... - Page 139 Reference ■ External MIDI Device Operations by the Digital Keyboard • For the MIDI OUT channel of keyboard performance data output, the n-value specified by “Keyboard Channel” (page EN-120) is applied to the Upper 1 part. MIDI OUT channels for the following are based on the MIDI OUT channel of the Upper 1 part: Upper 2 = n+1, Lower 1 = n+2, Lower 2 = n+3, and Auto Harmonize = n+4.
-
Page 140: Operating Precautions
Reference Operating Precautions Be sure to read and observe the following operating precautions. ■ Location Avoid the following locations for this product. • Areas exposed to direct sunlight and high humidity • Areas subjected to temperature extremes • Near a radio, TV, video deck, or tuner The above devices will not cause malfunction of the product, but interference from the product can cause audio or video interference of a nearby device. -
Page 141: Appendix
Appendix Fingering Guide FINGERED 1, FINGERED 2 Chords Song List Title WORLD (CATEGORY : 01) WHEN THE SAINTS GO MARCHING IN AMAZING GRACE HOME ON THE RANGE Cdim SANTA LUCIA WALTZING MATILDA CAMPTOWN RACES Caug PIANO/CLASSICS (CATEGORY : 02) JE TE VEUX SONATA op.13 “PATHÉTIQUE”... - Page 142 Appendix FINGERED ON BASS, FULL RANGE CHORD Cadd9 In addition to the chords that can be fingered with FINGERED 1 and FINGERED 2, the following chords also are recognized. Cmadd9 A D m B D m C dim Ddim Cm69 A D dim A D 7 Fdim...
- Page 143 Appendix...
-
Page 144: Block Diagram
Appendix Block Diagram *1 Volume/Pan *2 Chorus Send *3 Delay Send *4 Reverb Send MIC IN (CT-X9000IN) SPEAKER PHONES LINE OUT *5 CT-X9000IN AUDIO IN... - Page 147 MA1804-B Printed in China...
Need help?
Do you have a question about the CT-X9000IN and is the answer not in the manual?
Questions and answers