Casio Casiotone CT-S200 User Manual
Hide thumbs
Also See for Casiotone CT-S200:
- User manual ,
- Manual (21 pages) ,
- Quick start manual (2 pages)
Table of Contents
Advertisement
Cover
CT - S200
USER'S GUIDE
Preparing a Power Supply
Selecting a Musical
Instrument Tone
Saving and Loading
Instrument Settings
(MY SETUP)
Playing with a Rhythm
Backing
CTS200-E-2A
Turning Power On or Off
Changing the Pitch in
Semitone Steps (Transpose)
Playing a Built-in Song
Linking with a Smart Device
(APP Function)
Connecting Headphones
(Sold Separately)
Fine Tuning Pitch (Tuning)
Playing in the Dance Music
Mode
Configuring Function Settings
EN
Connecting a Pedal
(Sold Separately)
Using the SUSTAIN Button
Using a Dance Music Voice
Advertisement
Table of Contents

Related Manuals for Casio Casiotone CT-S200


Summary of Contents for Casio Casiotone CT-S200
- Page 1 Cover CT - S200 USER’S GUIDE Preparing a Power Supply Turning Power On or Off Connecting Headphones Connecting a Pedal (Sold Separately) (Sold Separately) Selecting a Musical Changing the Pitch in Fine Tuning Pitch (Tuning) Using the SUSTAIN Button Instrument Tone Semitone Steps (Transpose) Saving and Loading Playing a Built-in Song...
- Page 2 About Music Score data You can download music score data as a PDF file from the CASIO website, which you can access using the URL or QR code below. You will then be able to view music scores on your smart device. You can jump from the PDF file table of contents directly to the music score you want, and you can print out scores as needed.
-
Page 3: Table Of Contents
Playing with a Rhythm Backing EN-23 Contents Rhythm ........EN-23 Playing a Rhythm . -
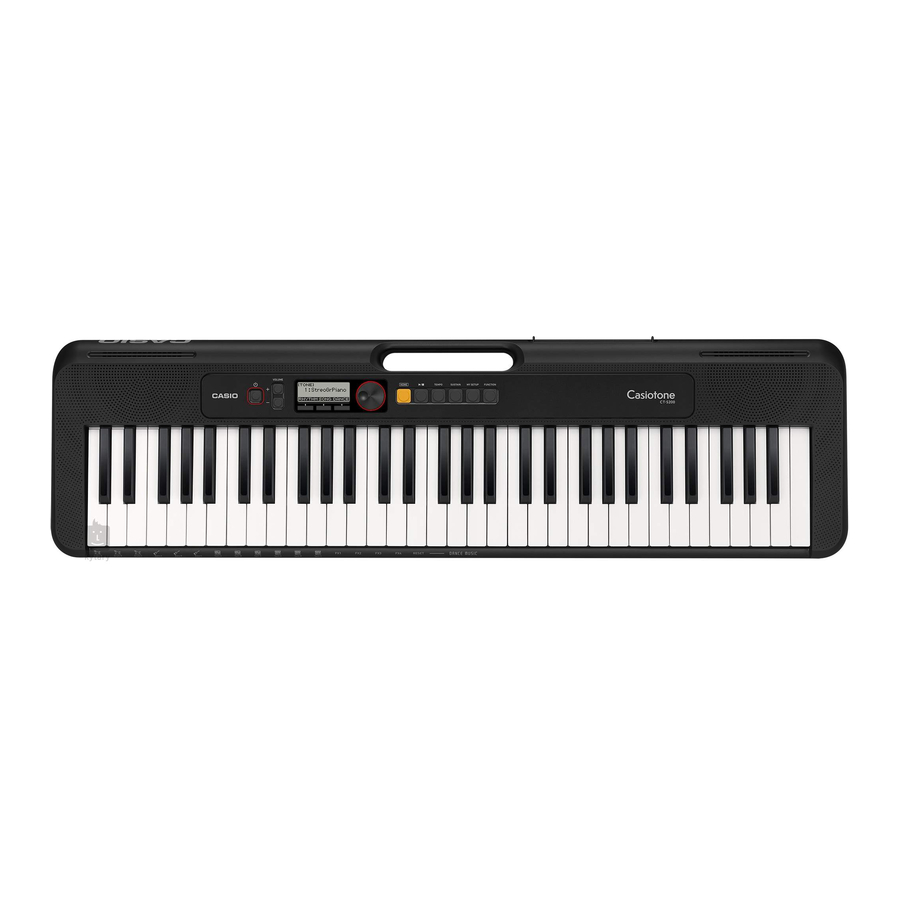
Page 4: General Guide
General Guide ■ Front Panel ☞EN-7 Dial 3 buttons ☞EN-7 HOME button ☞EN-6 VOLUME buttons ☞EN-8 a (Start/Stop) button ☞EN-9, 15, P(Power) button ☞EN-7 TEMPO button ☞EN-9, 16, 21, SUSTAIN button ☞EN-11 MY SETUP button ☞EN-13 FUNCTION button ☞EN-32 ■ Back DC 9.5V terminal ☞EN-4 PEDAL jack... -
Page 5: Getting Ready To Play
Using Batteries for Power Getting Ready to Play Preparing a Power Supply • Be sure to turn off power before loading batteries. • Use commercially available AA-size alkaline batteries Though either an AC adaptor or batteries can be used for or AA-size rechargeable nickel metal hydride batteries. -
Page 6: Preparing The Music Stand
Getting Ready to Play ■ Configuring the Battery Type Setting ■ Battery Level Indicator A battery icon appears on the display as shown below to let Press FUNCTION. you know when battery power is getting low. This displays the [FUNCTION] screen. Low Battery Power Use the U and I buttons to select “Battery”. -
Page 7: Connecting Headphones (Sold Separately
Operations Common to All Connecting Headphones (Sold Separately) Modes Plugging in headphones cuts off output from the built-in speakers, which means you can practice playing even late at Display Screen Contents night without disturbing others. • Be sure to turn down the Digital Keyboard volume level before connecting headphones. -
Page 8: Buttons
Playing on the Keyboard 3 Buttons Operations assigned to the three buttons along the bottom of Turning Power On or Off the display change according to the setting you are configuring. Operations currently assigned to the three buttons are indicated by labels above the buttons. Press P (Power). -
Page 9: Adjusting The Volume Level
Playing on the Keyboard Auto Power Off Adjusting the Volume Level While Auto Power Off is enabled, Digital Keyboard power will Use the VOLUME + and – buttons to adjust the turn off automatically after about 30 minutes of non-operation. volume level. -
Page 10: Using The Metronome
Playing on the Keyboard Specifying the Metronome Sound and Beats Using the Metronome Per Measure The metronome lets you play and practice along with a steady You can use the procedure below to configure a setting that beat to help keep you on tempo. You can also set a tempo sounds a chime on the first beat of each measure, and a click that is suitable for your practice. -
Page 11: Listening To Demo Play
Controlling the Sound of a Listening to Demo Play Performance You can use Demo Play to play built-in songs in sequence. While holding down TEMPO, press a. Selecting a Musical Instrument This displays the [DEMO] screen and starts song number Tone “1”. -
Page 12: Using A Pedal
Controlling the Sound of a Performance Using a Pedal Using the SUSTAIN Button A pedal can be used to change notes while playing. Under While sustain is enabled, notes are sustained longer when initial default settings, sustain is assigned to the pedal, so it keyboard keys are released. -
Page 13: Changing The Pitch In Semitone Steps (Transpose
Controlling the Sound of a Performance Changing the Pitch in Semitone Fine Tuning Pitch (Tuning) Steps (Transpose) You can use the procedure below to adjust the overall pitch of the Digital Keyboard by changing the frequency of A4 in 0.1Hz Transpose lets you raise or lower the overall pitch of the units. -
Page 14: Saving And Loading Instrument Settings (My Setup
Savable Settings Saving and Loading You can use MY SETUP to save the items below. Instrument Settings (MY • The function you are using (Tone, Rhythm, Song, Dance SETUP) Music) • Tempo • Tone number You can use MY SETUP to save the setup (tone, rhythm, and •... -
Page 15: Recalling From My Setup
Saving and Loading Instrument Settings (MY SETUP) Enabling MY SETUP Power On Recalling From MY SETUP Use the procedure below to enable MY SETUP power on, Press MY SETUP. which causes the MY SETUP settings to be applied whenever the Digital Keyboard is turned on. This displays the [MY SETUP] screen. -
Page 16: Playing A Built-In Song
Skip Forward and Skip Back Playing a Built-in Song Use the operations in this section to perform skip forward and skip back operations. Songs ■ Skip Forward With this Digital Keyboard, the term “song” is used to refer to a While a song is playing, press the FF button to skip forward. - Page 17 Playing a Built-in Song Changing a Song’s Tempo (Speed) Adjusting the Song Volume Level You can use the procedure below to change the tempo Use the procedure below to adjust the balance between the (speed) and slow down playback to practice difficult volume levels of song play and what you play on the passages, etc.
-
Page 18: Assigning The Song Tone To The Keyboard (Tone Sync
Playing a Built-in Song Changing the Keyboard Tone While a Song is Practicing a Song Part Playing You can turn off the right-hand part or the left-hand part of a song you are playing and practice along with the remaining While a song is playing, press HOME. -
Page 19: Sounding A Count In Time With A Song
Playing a Built-in Song Sounding a Pre-count Sounding a Count in Time with a Song While the song stopped, press the COUNT button. You can configure count settings to sound a count in time with Press the button a number of times until “PRE” appears a song and to sound a pre-count before a song starts. -
Page 20: Playing In The Dance Music Mode
Playing in the Dance Music Mode Dance Music Mode In the Dance Music Mode, you can create dance music by combining and playing multiple types of pattern phrases, and by applying effects. Pattern phrases of each part can be combined, making it possible to enjoy dance music like a DJ. Entering the Dance Music Mode (page EN-20) changes the functions of the keyboard keys as shown below. -
Page 21: Playing Dance Music
Playing in the Dance Music Mode Rotate the dial to select a song. Melody/Voice Keyboard Functions • After you rotate the dial once to select an option, you The right-side melody/voice keyboard can be used to play a also will be able to change the selection using the – melody along with pattern play, and, with the Voice Function, and + buttons. - Page 22 Playing in the Dance Music Mode Rotate the dial to adjust the Dance Music Changing the Dance Music Tempo volume level. You can use the tempo setting operation to change the tempo • You can specify a volume value from 0 to 127. of pattern play.
-
Page 23: Using The Recommended Tone
Playing in the Dance Music Mode Using the Recommended Tone Using Effects Pressing an Effect Switch key during pattern play applies one In the Dance Music Mode, long-press of the effects described below to the entire song. FUNCTION. Keyboard Key Function Effect, Description This momentarily displays “RECOMMENDED”... -
Page 24: Building Performance Tension
Playing with a Rhythm Building Performance Tension Backing While pattern play is in progress, you can use the build-up function to apply dance music effects and build up tension. You can use the procedures in this section to select the Function rhythm you want, and then automatically play Description... - Page 25 Playing with a Rhythm Backing Press a. Changing the Volume Level of a Rhythm This starts the rhythm and displays the beat. Use the procedure below to adjust the balance between the volume levels of keyboard play and the rhythm. Press FUNCTION.
-
Page 26: Using Recommended Rhythm Settings
Playing with a Rhythm Backing Changing the Keyboard Tone While a Changing the Rhythm Pattern Rhythm is Playing You can use the procedure below to add liveliness to your rhythm pattern by playing intro and ending patterns, fill-in While a rhythm is playing, press HOME. patterns, and variations of basic rhythm patterns. -
Page 27: Inserting A Fill-In Phrase
Playing with a Rhythm Backing Inserting a Fill-in Phrase Fingering a Chord to Play a Rhythm Accompaniment A “fill-in” is a short phrase played where you want to change the mood of a piece. A fill-in pattern can be used to create a Playing a chord with your left hand automatically adds bass link between two melodies or as an accent. - Page 28 Playing with a Rhythm Backing ■ CASIO CHORD Selecting a Chord Fingering Mode With CASIO CHORD, you can use simplified fingerings to You can select from among the six chord fingering modes play the four types of chords described below.
-
Page 29: Inserting An Intro Or An Ending
Playing with a Rhythm Backing ■ FINGERED Inserting an Intro or an Ending With this chord fingering mode, you play chords on the accompaniment keyboard using their normal chord fingerings. Use the procedure below to insert an intro or ending pattern of Note that some chords can also be formed using abbreviated a few measures. -
Page 30: Connecting With External Devices
Keyboard, do not connect both a USB cable and an audio cable at the same time. ■ Downloading the Smart Device App Download the Chordana Play from the CASIO website and install it on the smart device. https://support.casio.com/global/en/emi/manual/CT-S200/ Press FUNCTION to exit the setting screen. -
Page 31: Connecting To A Computer And Using Midi
Windows 10* macOS (OS X/Mac OS X) 10.7, 10.8, 10.9, 10.10, 10.11, select “CASIO USB-MIDI” as the MIDI device. 10.12, 10.13, 10.14 • For information about how to select the MIDI device, refer to the user documentation that comes with the *1 Windows 7 (32-bit, 64-bit) music software you are using. -
Page 32: Connecting With Audio Equipment
URL or QR code below. • If Digital Keyboard notes are distorted when they are https://support.casio.com/global/en/emi/manual/CT-S200/ sounded on an external audio device, lower the Digital Keyboard’s volume level. Digital Keyboard PHONES/OUTPUT jack (3.5mm stereo mini jack) Audio equipment, amplifier, etc. - Page 33 Intro/Ending Off, On ending when the rhythm is stopped. Chord Mode Specifies the chord fingering mode. Chord Mode CASIO Chord, Fingered 1, Fingered 2, Fingered on Bass, Fingered Assist, Full Range Chord Rhythm volume Adjusts the rhythm volume level. Rhythm Volume...
- Page 34 Configuring Function Settings Function Name Description Display Name Setting Options Power On Volume Specifies the power on volume level. PowerOnVolume 1 to 10 Level MY SETUP Power When enabled, automatically configures MY SETUP PowerOnMySetup Off, On settings when the Digital Keyboard is turned on. Local Control When enabled, mutes notes when something is played Local Control...
- Page 35 Configuring Function Settings Returning Settings to Their Initial Factory Checking Version Information Defaults Press FUNCTION. Press FUNCTION. This displays the [FUNCTION] screen. This displays the [FUNCTION] screen. Use the U and I buttons to select “Version”. Use the U and I buttons to select “Initialize”. This displays version information.
-
Page 36: Reference
Reference Troubleshooting Symptom Required Action Included Accessories I can’t find included items during unpacking. Carefully check inside all of the packing materials. Power Requirements Power does not turn on. • Check the AC adaptor or make sure that the batteries are facing correctly (page EN-4). -
Page 37: Product Specifications
Reference Symptom Required Action With certain volume levels and tones, the This is due to system limitations and does not indicate malfunction. sound of notes played in one keyboard range will sound different from those played in another keyboard range. With some tones, octaves do not change at This is due to system limitations and does not indicate malfunction. - Page 38 Reference Jacks USB Port Micro-B PEDAL jack Standard jack (6.3mm) (Pedal sustain, sostenuto, soft, start/stop) PHONES/OUTPUT jack Stereo mini jack (3.5mm) AUDIO IN jack Stereo mini jack (3.5mm) Input impedance: 10 kΩ, Input sensitivity: 200 mV AC adaptor terminal 9.5V DC Power Requirements 2-Way Power Batteries...
- Page 39 Reference AC Adaptor Handling Precautions Model: AD-E95100L 1. Read these instructions. 2. Keep these instructions on hand. 3. Heed all warnings. 4. Follow all instructions. 5. Do not use this product near water. 6. Clean only with a dry cloth. 7.
-
Page 40: Tone List
Reference Tone List Bank Bank Program Program Tone Name Select Tone Name Select Change Change PIANO STEEL STR.GUITAR STEREO GRAND PIANO 12 STR.GUITAR GRAND PIANO CHORUS STEEL GT BRIGHT PIANO JAZZ GUITAR MODERN PIANO OCT.JAZZ GUITAR DANCE PIANO CLEAN GUITAR 1 MELLOW PIANO CLEAN GUITAR 2 STRINGS PIANO... - Page 41 Reference Bank Bank Program Program Tone Name Select Tone Name Select Change Change BRASS SECTION 3 SYNTH-PAD MELLOW BRASS FANTASY 1 HARD BRASS FANTASY 2 BRASS SFZ WARM VOX BRASS & STRINGS WARM PAD SYNTH-BRASS 1 SINE PAD SYNTH-BRASS 2 SOFT PAD ANALOG SYNTH-BRASS 1 OLD TAPE PAD...
- Page 42 Reference Bank Bank Program Program Tone Name Select Tone Name Select Change Change GM E.PIANO 2 GM WHISTLE GM HARPSICHORD GM OCARINA GM CLAVI GM SQUARE LEAD GM CELESTA GM SAW LEAD GM GLOCKENSPIEL GM CALLIOPE GM MUSIC BOX GM CHIFF LEAD GM VIBRAPHONE GM CHARANG GM MARIMBA...
-
Page 43: Drum Assignment List
Reference Drum Assignment List DRUMS SET NAME Note No. STANDARD SET 1 STANDARD SET 2 DANCE SET BRUSH SET ORCHESTRA SET INDIAN SET C -1 E -1 F -1 A -1 B -1 C 0 E ... -
Page 44: Song List
Reference Song List Dance Music Mode List Title Pattern Name PIANO/CLASSICS FÜR ELISE ELECTRO DANCE 1 VALSE op.64 no.1 “PETIT CHIEN” ELECTRO DANCE 2 TURKISH MARCH (MOZART) ELECTRO DANCE 3 TRÄUMEREI BIG BEAT TECHNO 1 ETUDE op.10 no.3 “CHANSON DE L’ADIEU” BIG BEAT TECHNO 2 LIEBESTRÄUME no.3 SPEED SHUFFLE 1... -
Page 45: Rhythm List
Reference Rhythm List Rhythm name Rhythm name 8 BEAT BHAJAN STRAIGHT 8 BEAT INDIAN POP 1 8 BEAT INDIAN POP 2 16 BEAT INDIAN POP 3 16 BEAT INDIAN POP 4 16 BEAT SHUFFLE 1 QAWWALI 16 BEAT SHUFFLE 2 KERALA BALLAD RAJASTHANI... -
Page 46: Fingering Guide
Reference Fingering Guide Cadd9 ■ FINGERED 1, FINGERED 2 Chords Cmadd9 Cm69 Cdim *1 With FINGERED 2, interpreted as Am7. *2 With FINGERED 2, interpreted as Am7 b Caug *3 Inverted form not supported in some cases. *4 These fingerings are special fingerings for Digital Keyboard chord input, and so they are not suitable for normal keyboard play. -
Page 47: Chord Example List
Reference Chord Example List C / ( D D ) ( D ) /E D sus4 sus2 m7 D 7sus4 add9 madd9 dim7 *1 Root *2 Chord Type • Since the chord input range is limited, this model may not support some of the chords shown above. EN-46... - Page 48 Reference F / ( G D ) ( G ) /A D ( A ) /B D sus4 sus2 m7 D 7sus4 add9 madd9 dim7 *1 Root *2 Chord Type • Since the chord input range is limited, this model may not support some of the chords shown above. EN-47...
- Page 51 MA1908-A...
Need help?
Do you have a question about the Casiotone CT-S200 and is the answer not in the manual?
Questions and answers
Пошаговая инструкция по созданию автоаккомпанемента,
To create auto accompaniment on the Casio Casiotone CT-S200:
1. Press the Rhythm button to enter rhythm mode.
2. Use the Function button and the left/right buttons to navigate to Intro/Ending settings.
3. Turn the Intro/Ending option On using the dial.
4. Play a chord on the keyboard to start the accompaniment with an intro.
5. After the intro, the rhythm will continue in Variation 1.
6. Use the Fill-in and Variation buttons to change the rhythm pattern while playing.
7. To stop, press the Stop button, which will trigger an ending before stopping the rhythm.
This allows you to create dynamic auto accompaniment while playing.
This answer is automatically generated
Как создать автоаккомпанемент? Пошаговая инструкция.
To create auto accompaniment on the Casio Casiotone CT-S200:
1. Press the Rhythm button to enter rhythm mode.
2. Use the Function button and the left/right buttons to navigate to the Intro/Ending setting.
3. Turn the setting On using the dial.
4. Play a chord to start the rhythm with an intro.
5. Use the Fill-in and Variation buttons to modify the rhythm during playback.
6. Press the Stop button to trigger an ending instead of stopping immediately.
This allows you to create dynamic auto accompaniment while playing.
This answer is automatically generated
To Whom It may concern: I have a Casiotone Ct-S200 Casio Keyboard, and I was wondering **** I able to download Greek Rhythms on to it using a memmorie stick?
Is there a Windows 12 driver available for the Casio CT-S200? (for midi)
where is a tone for tokio drift