Table of Contents
Advertisement
Quick Links
Advertisement
Table of Contents

Related Manuals for Nidek Medical ConfoScan4


Summary of Contents for Nidek Medical ConfoScan4
- Page 1 ConfoScan4 Service Manual...
- Page 2 NIDEK TECHNOLOGIES Manual information: NAME: ConfoScan4 SERVICE MANUAL REVISION: DATE: May 22, 2012 REFERENCE: HW revision 2.4.0 (serial number >4501) NOTE: ConfoScan4 and CS4 are synonymous CS4 SERVICE MANUAL Page 2 of 72...
-
Page 3: Table Of Contents
NIDEK TECHNOLOGIES Table of content Safety Precautions _ __________________________________________________________ 8 1.1 General precautions __________________________________________________________ 8 1.2 Maintenance precaution _______________________________________________________ 8 1.3 Handling the optical system parts _______________________________________________ 9 1.4 Adjustment precautions _______________________________________________________ 9 1.5 Troubleshooting _ _____________________________________________________________ 9 Position of the CS4 Covers _ ___________________________________________________ 11 Embedded PC ______________________________________________________________ 12 ... - Page 4 NIDEK TECHNOLOGIES 14.3 Removing the optical head lamp fan ____________________________________________ 4 5 Remove the optical head ____________________________________________________ 46 15.1 Optical head ________________________________________________________________ 4 7 Removing the chinrest and the forehead rest ____________________________________ 49 Removing the chinrest sensor switches _________________________________________ 50 Remove the plastic cover CS4‐ST051 ___________________________________________ 52 Remove the robot assembly __________________________________________________ 53 19.1 Remove the robot plastic cover (CS4‐ST055) ______________________________________ 5 3 19.2 Remove the Robot Assembly __________________________________________________ 5 4 Remove the motion control board (COM‐EL005 & COM‐EL006) ______________________ 58 Remove the processor board mounting plate CS4‐ST121. _ __________________________ 61 ...
- Page 5 NIDEK TECHNOLOGIES Table of figures Figure 1 Overview of the device _ ____________________________________________________________________ 1 1 Figure 2 Second Overview of the device ______________________________________________________________ 1 1 Figure 3 Embedded PC ____________________________________________________________________________ 1 2 Figure 4 Motion Board ____________________________________________________________________________ 1 3 Figure 5 Fuses holder _____________________________________________________________________________ 1 4 Figure 6 CS4‐ST050 _ ______________________________________________________________________________ 1 5 Figure 7 Rear Cover CS4‐ST050 Removed _____________________________________________________________ 1 5 Figure 8 CS4‐ST123 ...
- Page 6 NIDEK TECHNOLOGIES Figure 49 Serial board CS4‐EL035 ___________________________________________________________________ 4 2 Figure 50 Optical head ____________________________________________________________________________ 4 3 Figure 51 Optical head ____________________________________________________________________________ 4 4 Figure 52 Screws ________________________________________________________________________________ 4 5 Figure 53 Head lamp fan screws ____________________________________________________________________ 4 5 Figure 54 Control board ___________________________________________________________________________ 4 6 Figure 55 Optical head ____________________________________________________________________________ 4 7 Figure 56 Service tool _____________________________________________________________________________ 4 8 Figure 57 Galvanometer __________________________________________________________________________ 4 8 ...
- Page 7 NIDEK TECHNOLOGIES NTRODUCTION This service manual provides information for after sales service of the ConfoScan4 (also called CS4). For proper after sales service, it is necessary to understand this manual thoroughly before the servicing. Refer to the ConfoScan4 Operator’s manual & Service Manual Annex together with this manual.
-
Page 8: Safety Precautions
NIDEK TECHNOLOGIES 1 Safety Precautions General precautions Servicing should be performed only by NIDEK trained personnel. Perform all servicing according to the procedure described in this manual. Failure to do so may cause unexpected accident or malfunction. Be sure to turn the power off and unplug the power cord during servicing, unless there is different instruction. -
Page 9: Handling The Optical System Parts
NIDEK TECHNOLOGIES Handling the optical system parts Do not disassemble or repair optical system parts. If the optical system parts need repairing, return the whole device to NIDEK. The person, who assembles, adjusts, or repairs the optical system will be responsible for the final result. - Page 10 NIDEK TECHNOLOGIES Symptom analysis Action The equipment does not operate Check the power voltage of the wall outlet and the power switch does not Check the fuses. light. Check the power switch of equipment. The equipment does not operated Check the power supply. while the power switch light is Check the power filter turned on.
-
Page 11: Position Of The Cs4 Covers
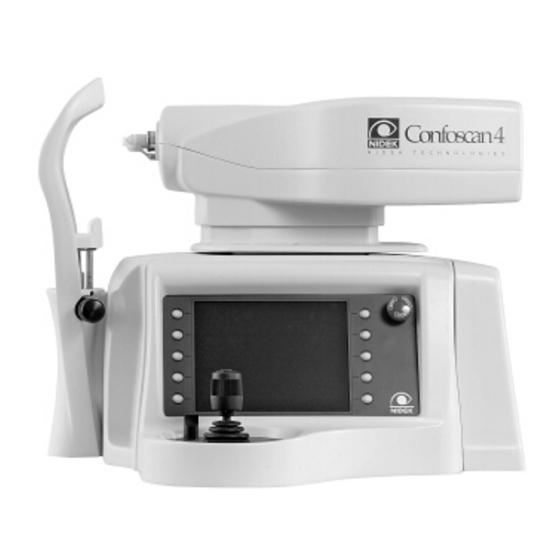
NIDEK TECHNOLOGIES 2 Position of the CS4 Covers Here below is shown the position of the device covers. The covers must be removed and mounted in a specific order. Follow the instructions. Figure 1 Overview of the device Figure 2 Second Overview of the device CS4 SERVICE MANUAL Page 11 of 72... -
Page 12: Embedded Pc
NIDEK TECHNOLOGIES 3 Embedded PC In this picture it is shown the Embedded PC CS4-EL074. Processor Card (Embedded PC) CS4-EL074 Serial interface card USB, Lan, VOut CS4-EL035 CS4-AS066 Power switchs CS4-AS065 Power plug Figure 3 Embedded PC CS4 SERVICE MANUAL Page 12 of 72... -
Page 13: Motion Control Board
NIDEK TECHNOLOGIES 4 Motion control Board Here below is shown the inner motion components of the device. Figure 4 Motion Board CS4 SERVICE MANUAL Page 13 of 72... -
Page 14: Remove The Fuses
NIDEK TECHNOLOGIES 5 Remove the fuses Open the fuses holder, under the power inlet, and remove the fuses. Figure 5 Fuses holder CS4 SERVICE MANUAL Page 14 of 72... -
Page 15: Remove The Rear Cover (Cs4-St050)
NIDEK TECHNOLOGIES 6 Remove the rear cover (CS4-ST050) Unscrew the 4 screws and remove the external cover. Figure 6 CS4-ST050 Figure 7 Rear Cover CS4-ST050 Removed CS4 SERVICE MANUAL Page 15 of 72... -
Page 16: Remove The Rear Metallic Internal Cover
NIDEK TECHNOLOGIES Remove the rear metallic internal cover Unscrew the 4 screw and remove the rear metallic internal cover (CS4-ST123). Figure 8 CS4-ST123 CS4 SERVICE MANUAL Page 16 of 72... -
Page 17: Remove The Electronic Board & Fan
NIDEK TECHNOLOGIES 7 Remove the electronic board & fan If you have not already done, perform the procedure no.: 6 Removing the rear external plastic cover 6.1 Removing the rear metallic internal cover Remove the fan Unscrew the 4 screws on the CS4-ST123, than you are able to remove the fan. Figure 9 Fan screws ... -
Page 18: Remove The Vga To Pal Board Cs4-El042
NIDEK TECHNOLOGIES Remove the VGA to PAL Board CS4-EL042 If you have not already done, perform the procedure 6, & 6.1. Disconnect the cables P1, P2, P3, from the board; unscrew the 4 nuts “N” than remove the board. Figure 11 VGA to PAL board CS4-EL042 ... -
Page 19: Figure 13 Bar Screws
NIDEK TECHNOLOGIES BAR SCREW Figure 13 Bar screws CS4 SERVICE MANUAL Page 19 of 72... -
Page 20: Remove The Signal Inlet Plate
NIDEK TECHNOLOGIES 8 Remove the signal inlet plate If you have not already done, perform the procedure 6, & 6.1. Disconnect the signal cables than unscrew the 2 screws back to the sheet metal. Figure 14 Signal inlet plate screws ... -
Page 21: Remove The Power Switch And The Power Inlet
NIDEK TECHNOLOGIES 9 Remove the power switch and the power inlet If you have not already done, perform the procedure: 6 Removing the rear external plastic cover 6.1 Removing the rear metallic internal cover Unscrew the 2 screws of the metal cover and remove it. Figure 16 Power switch metal cover ... -
Page 22: Figure 18 Power Inlet Plate Removed
NIDEK TECHNOLOGIES Disconnect the cables and remove the power switch and power inlet plate. Figure 18 power inlet plate removed Warning: when the power inlet metal cover is reassembled, pay attention to avoid any damage to the main voltage cables. You have also to connect properly the grounding cable (stranded wire) by fixing its screw. -
Page 23: Embedded Pc Assembly Cs4-Ap073
NIDEK TECHNOLOGIES 10 Embedded PC Assembly CS4-AP073 If you have not already done, perform the procedure no.: 6 Removing the rear external plastic cover 6.1 Removing the rear metallic internal cover 10.1 Removing the frame grabber In this picture are showed the cables that connect the frame grabber and the pc board to the device. -
Page 24: Remove The Frame Grabber Board (Cs4-El044)
NIDEK TECHNOLOGIES Remove the frame grabber board (CS4-EL044) 10.1 When you remove the parts; take note of wiring and connectors. When you replace the part; reconnect the new one in the same way. Remove the video cable connector (BNC) and the two fixing screws. -
Page 25: Remove The Embedded Pc (Cs4-El074)
NIDEK TECHNOLOGIES Remove the Embedded PC (CS4-EL074) 10.2 When you remove the part, take note of wiring and connectors (especially for USB, speaker, RS485 connectors). Remove the cables illustrated on the figure below (follow the sequence): Power connector RS232 ... -
Page 26: Figure 22 Embedded Pc Fixing Screws
NIDEK TECHNOLOGIES Unscrew the PC fixing screws (see figure below). Figure 22 Embedded PC fixing screws CS4 SERVICE MANUAL Page 26 of 72... -
Page 27: Figure 23 Cables Removing
NIDEK TECHNOLOGIES Remove the screws that fix the Motion board and the VGA, and then disconnect them. Figure 23 Cables removing Warning: Put it in safety place. This card contains unit’s calibration data. Do not change with other CS4 unit flash cards. Figure 24 Flash card CS4-EL076 CS4 SERVICE MANUAL Page 27 of 72... -
Page 28: Remove The Joystick Assembly Cs4-Ap036
NIDEK TECHNOLOGIES 11 Remove the Joystick assembly CS4-AP036 If you have not already done, perform the procedure: 6 Removing the rear external plastic cover To remove this cover you have to unscrew the 4 screws showed in the picture. Figure 25 CS4-ST056 ... - Page 29 NIDEK TECHNOLOGIES CS4 SERVICE MANUAL Page 29 of 72...
- Page 30 NIDEK TECHNOLOGIES The screw number 4 is under the equipment as shown in the picture. Figure 27 Screw n°4 When you remove the operator side plastic cover, pay attention to do not damage the joystick, and the cover. It is possible pull up a little bit the cover in order to gain space during the removing of the operator side plastic cover CS4-ST056.
-
Page 31: Remove The Joystick Assembly Step One
NIDEK TECHNOLOGIES Remove the joystick assembly step one 11.1 Before you have to unscrew the 2 screws and the nut (showed in the figure below). Figure 28 Joystick screw CS4 SERVICE MANUAL Page 31 of 72... -
Page 32: Remove The Joystick Assembly Step Two
NIDEK TECHNOLOGIES Remove the joystick assembly step two 11.2 Unscrew the four screws that fix the LCD panel. Open little bit as in the figure below (do not pull completely the LCD panel, because there are cables connected behind). Figure 29 LCD panel screw To open better the LCD panel and to gain more access inside the LCD box, disconnect the emergency stop button cable. -
Page 33: Remove The Joystick Assembly Step Three
NIDEK TECHNOLOGIES Remove the joystick assembly step three 11.3 Disconnection of the LCD flat cable and unscrew the ground cable. Figure 31 Disconnection of the LCD CS4 SERVICE MANUAL Page 33 of 72... -
Page 34: Figure 32 Joystick Cables
NIDEK TECHNOLOGIES Disconnect the 2 cables lamp intensity knob cable, push button and the joystick cable. Unscrew the screw that locks the joystick cable on the device. Figure 32 Joystick cables Remove the Joystick and push button assembly CS4-AP036 Figure 33 Joystick assembly CS4-AP036 CS4 SERVICE MANUAL Page 34 of 72... -
Page 35: Remove The Joystick Control Board (Cs4-El010)
NIDEK TECHNOLOGIES Remove the Joystick control board (CS4-EL010) 11.4 If you have not already done, perform the procedure: 6 Removing the rear external plastic cover 11 Removing the operator side plastic cover 11.3 Disconnect the Display LCD panel Remove all connectors from the board Figure 34 Joystick board connectors ... -
Page 36: Remove The Display Lcd Panel
NIDEK TECHNOLOGIES 12 Remove the Display LCD panel If you have not already done, perform the procedure: 6 Removing the rear external plastic cover 11 Removing the operator side plastic cover Unscrew the 4 screws (see figure below). Figure 36 Display screws ... -
Page 37: Figure 38 Ground Cable
NIDEK TECHNOLOGIES Unscrew the Ground cable Figure 38 Ground cable Remove the LCD panel buttons connector from the joystick board Figure 39 LCD panel buttons connector CS4 SERVICE MANUAL Page 37 of 72... -
Page 38: Figure 40 Lcd Lvds Shield & Connector
NIDEK TECHNOLOGIES Remove the LVDS connector from the LCD than the screw of the LVDS shield fixing. Figure 40 LCD LVDS shield & connector Remove the LCD inverter power cable and it shield fixing. Figure 41 LCD Inverter power cable Now the LCD panel is free for complete removing. -
Page 39: Remove The Serial Board (Cs4-El035)
NIDEK TECHNOLOGIES 13 Remove the serial board (CS4-EL035) If you have not already done, perform the procedure no.: 6 Removing the rear external plastic cover 6.1 Removing the rear metallic internal cover 11 Removing the operator side plastic cover Disconnect the 485 serial connector (flat cable coming from embedded PC) from the serial board as illustrated in the figure below Figure 42 Serial board screws CS4 SERVICE MANUAL... -
Page 40: Figure 43 Lcd Panel
NIDEK TECHNOLOGIES Unscrew the four screws that fix the LCD panel. Open a little bit as illustrated in the figure below (do not pull completely the LCD panel, there are cables connected behind). Figure 43 LCD Panel Unhook the clips and disconnect the emergency switch and cable from the red button (pay attention: do not bend to much the switch body retainers to avoid damages) Remove the ground cable (yellow/green). -
Page 41: Figure 45 Lcd Panel Buttons Flat Cable/Connector
NIDEK TECHNOLOGIES Figure 45 LCD panel buttons flat cable/connector Rotate the LCD panel to gain better access to the serial board metal plate support. To remove it, unscrew the 4 screws as shown in the picture below. Figure 46 Serial board screws CS4 SERVICE MANUAL Page 41 of 72... -
Page 42: Figure 47 Serial Board
NIDEK TECHNOLOGIES Take the sheet metal for unscrew the board. Figure 47 Serial board Disconnect the signal cables, the power cables and the ground connections. Unscrew the 4 screws that hold the board on the sheet metal. Figure 48 serial board Figure 49 Serial board CS4-EL035 CS4 SERVICE MANUAL Page 42 of 72... -
Page 43: Remove The Optical Head Covers
NIDEK TECHNOLOGIES 14 Remove the optical head covers Remove the optical head covers 14.1 Unscrew the 4 screws below the covers of the optical head, with supplied Allen wrench 3 mm (available on accessories box). Figure 50 Optical head CS4 SERVICE MANUAL Page 43 of 72... -
Page 44: Removing The Optical Head Bottom Cover (Cs4-St054)
NIDEK TECHNOLOGIES Removing the optical head bottom cover (CS4-ST054) 14.2 Unscrew the 3 screws on the optical head. You can remove the bottom cover only after removing the optical head. (Chapter 15) Figure 51 Optical head CS4 SERVICE MANUAL Page 44 of 72... -
Page 45: Removing The Optical Head Lamp Fan
NIDEK TECHNOLOGIES Removing the optical head lamp fan 14.3 If you have not already done, perform the procedure 14 &, 14.2 Unscrew the 5 screws and remove the lamp cover. Pay attention at the klixon (thermal sensor) and its cable. Figure 52 Screws ... -
Page 46: Remove The Optical Head
NIDEK TECHNOLOGIES 15 Remove the optical head Disconnect the 4 cables from the head control board (CS4-EL013) connectors: VIDEO OUT RS485 (remove also the cable shield fixing) CNM16 (remove also the cable shield fixing) OUT 1 Figure 54 Control board CS4 SERVICE MANUAL Page 46 of 72... -
Page 47: Optical Head
NIDEK TECHNOLOGIES Optical head 15.1 To remove the optical head, unscrew the 4 screws shown in the picture below. Figure 55 Optical head CS4 SERVICE MANUAL Page 47 of 72... -
Page 48: Figure 56 Service Tool
NIDEK TECHNOLOGIES Remove the optical head from the body of CS4, and place it in a safety position, or install it on the special tool (please contact NT Service). Figure 56 Service tool Pay attention to the galvanometer when the optical head is removed. Figure 57 Galvanometer CS4 SERVICE MANUAL Page 48 of 72... -
Page 49: Removing The Chinrest And The Forehead Rest
NIDEK TECHNOLOGIES 16 Removing the chinrest and the forehead rest If you have not already done, perform the procedure 6, 11, 19.1 Unscrew the 4 screws and disconnect the cable then, the ground wire. Remove the chinrest and the forehead rest. Figure 58 Chinrest CS4-AP035 Figure 59 Cable CS4-WI103 CS4 SERVICE MANUAL... -
Page 50: Removing The Chinrest Sensor Switches
NIDEK TECHNOLOGIES 17 Removing the chinrest sensor switches If you have already done, perform the procedure 6, 11, 19.1, 16 Unscrew the 2 screws and remove the sensor cover. Figure 60 Chinrest Unscrew the screws that hold the sheet metal and remove the sensor switches with their cable. -
Page 51: Figure 61 Switches Mp1-El028
NIDEK TECHNOLOGIES Figure 61 Switches MP1-EL028 CS4 SERVICE MANUAL Page 51 of 72... -
Page 52: Remove The Plastic Cover Cs4-St051
NIDEK TECHNOLOGIES 18 Remove the plastic cover CS4-ST051 If you have not already done, perform the procedure 14, 14.2, 15 Unscrew the 4 screws and remove them. Figure 62 CS4-ST051 Remove the raisable cover, the 4 springs and the 2 brackets assembly. Figure 63 Cover removed CS4 SERVICE MANUAL Page 52 of 72... -
Page 53: Remove The Robot Assembly
NIDEK TECHNOLOGIES 19 Remove the robot assembly Remove the robot plastic cover (CS4-ST055) 19.1 If you have not already done, perform the procedure no. 6. Unscrew the 4 screws, and remove the cover. Figure 64 CS4-ST055 The screws no. 3 & 4 are under the equipment. ... -
Page 54: Remove The Robot Assembly
NIDEK TECHNOLOGIES Remove the Robot Assembly 19.2 If you have not already done, perform the procedure number: 11 Removing the operator side plastic cover 19.1 Removing the robot plastic cover 14 Removing the optical head upper cover 14.2 Removing the optical head bottom cover 15 Removing the optical head 18 Removing the raisable cover Unscrew the 6 screws over the robot assembly. -
Page 55: Figure 67 Robot Screws
NIDEK TECHNOLOGIES For unlock the robot unscrew also the two screws showed in the picture below. Figure 67 Robot screws Remove the cable fixed on the chassis unscrewing the screw as shown in the picture below. Figure 68 Robot cables CS4 SERVICE MANUAL Page 55 of 72... -
Page 56: Figure 69 Motion Board
NIDEK TECHNOLOGIES Disconnect the RS232 cable connector, the power connector and the safety signal connector on the motion control board COM-EL005. Also cut the cable ties. (View chapter 20) Figure 69 Motion board CS4 SERVICE MANUAL Page 56 of 72... -
Page 57: Figure 70 Robot Cs4-Ap002
NIDEK TECHNOLOGIES Raise and remove the robot assembly. Pay attention when you put the robot assembly on the table top, avoid any kind of damage. Figure 70 Robot CS4-AP002 Figure 71 Chassis CS4 SERVICE MANUAL Page 57 of 72... -
Page 58: Remove The Motion Control Board (Com-El005 & Com-El006)
NIDEK TECHNOLOGIES 20 Remove the motion control board (COM-EL005 & COM-EL006) If you have not already done, perform the procedure no.: 6 Removing the rear external plastic cover 19.1 Removing the robot plastic cover Disconnect the RS232 cable connector, the power connector and safety signal connector on the motion control board. -
Page 59: Figure 74 Motion Board Com-El006
NIDEK TECHNOLOGIES Disconnect all the motors connectors and home sensor connectors. Figure 74 Motion board COM-EL006 Remove the motion control board by unscrewing three nuts (use a 5 mm nuts screw driver). Pay attention to the three plastic washers under the nuts. Figure 75 Motion board screws CS4 SERVICE MANUAL Page 59 of 72... -
Page 60: Figure 76 Board Plate
NIDEK TECHNOLOGIES Board disconnected Figure 76 Board Plate The motion board is composed by two PCBs “COM-EL005 & COM-EL006”, pay attention to the cylindrical spacer between the two boards. The two PCBs may be separated. Figure 77 Cylindrical spacers CS4 SERVICE MANUAL Page 60 of 72... -
Page 61: Remove The Processor Board Mounting Plate Cs4-St121
NIDEK TECHNOLOGIES 21 Remove the processor board mounting plate CS4-ST121. If you have not already done, perform the procedure no. 6 Removing the rear external plastic cover 6.1 Removing the rear metallic internal cover 10.1 Removing the frame grabber board 10.2 Removing the processor board (embedded PC) Unscrew the shield of the LVDS cable (PC side) Unscrew the 2 screws that fix the Embedded PC mounting plate to the base. -
Page 62: Removing The Power Supply (Cs4-El050)
NIDEK TECHNOLOGIES 22 Removing the power supply (CS4-EL050) If you have not already done, perform the procedure no.: 6 Removing the rear external plastic cover 6.1 Removing the rear metallic internal cover 10.1 Removing the frame grabber board 10.2 Removing the Embedded PC 19 Removing the robot assembly 21 Removing the processor board mounting plate 8 Removing the signal inlet plate... -
Page 63: Figure 81 Power Supply Grounding Bar Removal
NIDEK TECHNOLOGIES Unscrew the 2 screws that fix the electric ground bar inside the rear box. Figure 81 Power supply grounding bar removal CS4 SERVICE MANUAL Page 63 of 72... -
Page 64: Figure 82 Power Supply
NIDEK TECHNOLOGIES Unscrew the 4 screws that fix the power supply to the chassis. Figure 82 Power supply While removing the last screws, take with the hand the power supply on the other side of the chassis. Do not pull to remove completely the power supply, because there is the output wires still connected. -
Page 65: Figure 84 Power Supply
NIDEK TECHNOLOGIES Unscrew the three screws indicated in the picture below to remove the power supply metal cover (pay attention to the fan cable attached). Figure 84 Power supply Unscrew all the cable connections and remove the power supply (CS4-EL050). Figure 85 Power supply CS4 SERVICE MANUAL Page 65 of 72... -
Page 66: How To Update Embedded Software
NIDEK TECHNOLOGIES 23 How to update embedded Software Warning 23.1 Disable the Windows Firewall. (Windows Firewall may cause problems such as locking the SW or frequently disconnections between PC & CS4). Installation steps 23.2 Insert the cd upgrade into the cd driver; installation wizard will start as shown in the pictures. First step 23.3 Click next on the welcome windows... -
Page 67: Second Step
NIDEK TECHNOLOGIES Second step 23.4 Click next to start the installation upgrade tool Third step 23.5 File installing CS4 SERVICE MANUAL Page 67 of 72... -
Page 68: Fourth Step
NIDEK TECHNOLOGIES Fourth step 23.6 Click finish to terminate the installation Fifth step 23.7 After those steps the upgrade windows tool will appear, click update again. Pay attention; check the IP address of CS4 CS4 SERVICE MANUAL Page 68 of 72... -
Page 69: Seventh Step
NIDEK TECHNOLOGIES Seventh step 23.8 File installing Eighth step 23.9 At the end the window of “successfully update” will appear. Click ok and reboot the CS4 device. CS4 SERVICE MANUAL Page 69 of 72... -
Page 70: Cable List
NIDEK TECHNOLOGIES 24 Cable list W I 0 0 EL013 CCD Video cable W I 0 0 Video-out cable W I 0 1 EL010 Joystick cable W I 0 1 Power lamp cable W I 0 2 Power lamp cable W I 0 3 USB cable W I 0... -
Page 71: Board List
NIDEK TECHNOLOGIES 25 Board list E L 0 1 0 Control joystick board E L 0 1 3 Head control board E L 0 1 8 Hall sensors board E L 0 3 1 Fuse E L 0 3 4 Fan Box E L 0 3 5 RS485 interface... -
Page 72: Assembly List
NIDEK TECHNOLOGIES 26 Assembly list Robot Assembly CS4-AP002 LCD Aassembly CS4-AP003 Chin and Fore Rest Assembly CS4-AP004 Joystick Assembly CS4-AP005 Posterior Panel Assembly CS4-AP009 W Assembly CS4-AP051 Halogen Lamp Assembly CS4-AP052 Shells Cover Kit CS4-AP069 CS4-AP073 PC Assembly Tool for dimensional 40x calibration CS4-AS100_1.
Need help?
Do you have a question about the ConfoScan4 and is the answer not in the manual?
Questions and answers