Table of Contents
Advertisement
Nidek Medical Products, Inc®
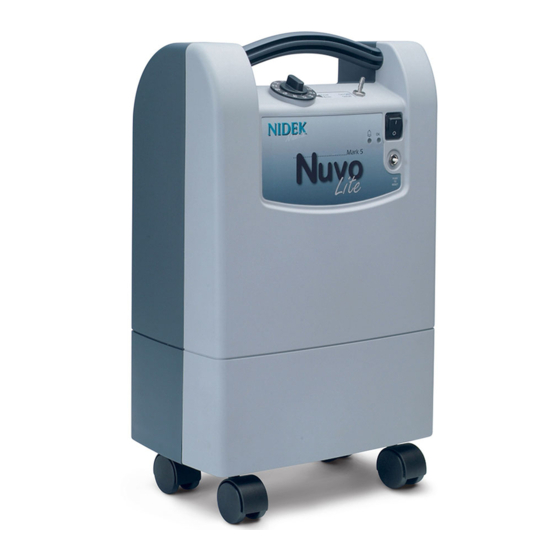
Mark 5 Nuvo® Lite Family of Oxygen Concentrator
Service Manual for Serial Numbers beginning 013-
XXX
Manual Number 2010-8407 Revision D
Nidek Medical Products, Inc.
3949 Valley East Industrial Drive Birmingham, Alabama 35217 USA
Telephone: (205) 856-7200 • 24-Hour Fax: (205) 856-0533
Nidek Medical is a trademark of Nidek Medical Products, Inc.
Mark 5 Nuvo® Lite is a registered trademark of Nidek Medical Products, Inc
Advertisement
Table of Contents

Related Manuals for Nidek Medical Mark 5 Nuvo Lite Family


Summary of Contents for Nidek Medical Mark 5 Nuvo Lite Family
- Page 1 3949 Valley East Industrial Drive Birmingham, Alabama 35217 USA Telephone: (205) 856-7200 • 24-Hour Fax: (205) 856-0533 Nidek Medical is a trademark of Nidek Medical Products, Inc. Mark 5 Nuvo® Lite is a registered trademark of Nidek Medical Products, Inc...
- Page 2 Table of Contents General Safety Instructions Production and Use of Oxygen Use and Maintenance of the Device Standards and Regulations Section 1.0 Introduction Home Service Provider Responsibility Important Notice and Symbol Explanations Functional Specifications Section 2.0 Operational Check and Concentration Test Description of Operation Operation Check Alarm System...
- Page 3 Circuit Board Replacement 5.7.1 Alarm Circuit Board Removal 5.7.2 Timing Circuit Board Removal Product Regulator Check and Setting 5.8.1 Product Regulator Cleaning or Rebuilding Pressure Monitoring Board Replacement Circuit Breaker Replacement 5.10 5.10.1 Circuit Breaker Removal 5.10.2 Circuit Breaker Installation I/0 (ON/OFF) Power Switch Replacement 5.11 5.11.1 I/0 (ON/OFF) Power Switch Removal...
-
Page 4: Production And Use Of Oxygen
Production and use of oxygen Oxygen is not a flammable gas, but accelerates the combustion of materials. To prevent fire risks, the MARK 5 NUVO Lite should be kept away from flames, incandescent sources or sources of heat (including cigarettes) and combustible products such as oil, grease, solvents, aerosols, etc. Do not use in an explosive atmosphere. -
Page 5: Home Service Provider Responsibility
Service providers have a responsibility to evaluate any complaints received from their direct customers. ( Ref. CFR 820.198 ). Nidek Medical does not have direct links to your customers. Your evaluation should include the following: Determine if the complaint warrants action by Nidek Medical, •... -
Page 6: Important Notice And Symbol Explanations
Be available to service each patient at any time. Maintain the MARK 5 NUVO Lite in accordance with Section 4.0. Repair components and replace parts only as outlined in this manual. Use only Nidek Medical parts for replacement in MARK 5 NUVO Lite Oxygen Concentrators. -
Page 7: Functional Specifications
Read the accompanying documents; particularly the User's Guide Store, ship and use the device in an upright condition No smoking within 2 meters (six feet) of this device, oxygen-carrying tubing, or accessories. Indicates an alarm signal for low oxygen concentration or other problem Do not use any oil or grease on or near the device Functional Specifications Dimensions:... -
Page 8: Alarm System
Operational Check Nidek Medical runs each device through a burn in period and tests every MARK 5 NUVO Lite Oxygen Concentrator thoroughly after manufacture before releasing it for shipment. As the Home Service Provider, it is your responsibility to perform the following test to ensure that no damage occurred in shipping or handling. -
Page 9: Power Failure Alarm Test
Test the unit upon delivery to a patient and at periodic intervals. Home Service Providers, based on their expertise and documentation, may establish and implement their own plans for checking oxygen concentration. Consult Nidek Medical’s Service and Maintenance Log (A- 11) for the recommended maximum intervals for testing. -
Page 10: General Instructions
Patient Instructions General Instructions It is important that patients thoroughly understand how to operate the Nidek Medical MARK 5 NUVO Lite unit. This enables proper treatment as prescribed by a qualified, licensed physician. You must explain that the purpose of this therapy is to alleviate symptoms. If patients experience any discomfort or the unit alarm sounds, they must notify their Home Service Provider and/or physician immediately. -
Page 11: Cabinet Air Filter
Nidek Medical does not require preventive maintenance on the concentrator. You do not need to perform any maintenance as long as the MARK 5 NUVO Lite unit remains within specifications at the prescribed flow rate. -
Page 12: Routine Maintenance
Retest the MARK 5 NUVO Lite before you return it to your inventory. Service Components The design of the Nidek Medical MARK 5 NUVO Lite Oxygen Concentrator allows for easy access and removal of most components. This allows you to perform scheduled maintenance, repair, and replacement of parts with minimal time and effort. -
Page 13: Caster Replacement
15,000 hours. You can continue a patient’s therapy on the MARK 5 NUVO Lite unit as long as the oxygen concentration level at the prescribed liter flow rate is within Nidek Medical’s specification limits. Refer to Section 2.4. -
Page 14: Compressor Replacement
A ir F lo w _ _ _ _ _ _ _ _ _ _ _ _ _ _ M e te r _ _ _ _ _ _ _ _ _ _ _ _ _ _ _ _ _ _ _ _ _ 0 to 1 0 0 l/m in _ _ _ _ _ _ _ _ _ _ _ _ _ _... -
Page 15: Capacitor Replacement
Perform the compressor removal procedure in reverse order. Leak test all connections. 5.3.2 Capacitor Replacement The capacitor helps the compressor to start and run more efficiently. If the compressor cannot start, the capacitor may be defective and require replacement. The capacitor should be replaced at each compressor service. -
Page 16: Sieve Bed Removal
2. Remove the upper cabinet back. 3. Disconnect the compressor discharge 5/16” tube from the top of the solenoid valve and the product tube from the regulator 4. Unplug the solenoid valve electrical leads at the solenoids 5. Lift the module up and out of the cradle. 5.5.2 Sieve Bed Installation To install the sieve beds, follow the sieve bed removal procedure in reverse order. -
Page 17: Product Regulator Check And Setting
standard ESD safety procedures. These procedures include the following: • Handle the PCB by the edges only. • Work on a grounded ESD mat. • Wear a grounded wrist strap. • Store PCB in anti-static bags only. 5.7.1 Circuit Board Removal (Note that the Circuit Board on the OCSI unit is different to the Circuit Board on the standard unit.) Set the I/0 (ON/OFF) switch to the 0 (OFF) position, and unplug the power cord. -
Page 18: Pressure Monitoring Board Replacement
2. Remove the back cabinet. 3. Remove the regulator from the tee on top of the solenoid valve assembly. 4. Adjust the product regulator fully counterclockwise to unload the spring. This makes disassembly and reassembly easier. 5. Remove the diaphragm. (Clean or replace it.) 6. -
Page 19: I/0 (On/Off) Power Switch Installation
3. Disconnect the I/0 (ON/OFF) switch leads from the back of the switch being careful to note the position of each. 4. Push on the back of the power switch, while holding in its four retaining tabs, and remove the switch through the front of the control panel. -
Page 20: Air Pressure Test (P1)
Troubleshooting Air Pressure Test (P1) Testing the operating pressure is a useful diagnostic tool when a concentrator has low purity and requires servicing. Units functioning normally do not require operating tests. Use the following procedure to test the operating pressure of the unit. 1. -
Page 21: High Air Pressure (P1)
P2 TEST PORT P1 TEST PORT 6.1.2 Test Ports 6.1.1 High Air Pressure (P1) Higher than normal operating pressure may indicate any of the following: ● A restrictive exhaust muffler, which does not allow the waste (purge) gas to exit the system freely. -
Page 22: Low Product Pressure
Testing the product pressure is a useful diagnostic tool when a concentrator has low purity and requires servicing. Units functioning normally do not require operating tests. Use the following procedure to test the product pressure of the unit. 1. Set the I/0 (ON/OFF) switch to the 0 (OFF) position, and unplug the power cord. 2. -
Page 23: Troubleshooting Chart
Before reviewing the troubleshooting chart, the following steps may be useful to isolate any malfunctions: 1. Turn the concentrator on. If unit does not turn on, refer to troubleshooting chart. 2. Make sure all filters are clean. 3. Connect test pressure gauge to the outlet fitting of the unit. The pressure should read 7.1 psig (49 kPa) ±... - Page 24 Low Oxygen Concentration Verify Oxygen Flow Rate Measure Air Pressure Low Pressure High Pressure Replace Air Inlet Filter Replace M uffler Check for Foams Leaks Check Check the Control Compressor Valve Normal Air Pressure Measure the Oxygen Pressure Low Pressure High Pressure Replace Check for...
- Page 25 PROBLEMS POSSIBLE CAUSES SOLUTIONS Defective sieve beds. Replace sieve beds. Compressor runs with Restriction in exhaust muffler. intermittent high pressure alarm and low oxygen Replace or clean muffler. Defective valve. concentration. Replace sieve module Defective control valve. Replace sieve module. Compressor relief valve releases (popping sound).
- Page 26 PROBLEMS POSSIBLE CAUSES SOLUTIONS Restriction in humidifier or Replace humidifier or tubing. Limited or Iow flow. tubing. Product regulator set too low. Adjust regulator setting. Leak. Leak test and repair leak. Weak compressor. Check system pressure, and rebuild or exchange compressor.
-
Page 27: Tool Kit, Oxygen Purity Testing And Pressure Test
3/8-inch combination wrench. ● For checking the Oxygen purity at the Concentrator. Nidek Medical recommends oxygen analyzer Part # 6500-4220 ● An accurate pressure test gauge to take both P-1 and P-2 pressure readings on the MARK 5 NUVO Lite unit should be kept available at all times. This gauge kit allows connections to the pressure test locations. -
Page 28: A-1: Flow Schematic – Ocsi Option
Flow Schematic OCSI Option Flow Schematic Standard Non-OCSI Option 2010-8407 Rev D SEPTEMBER 2015 28 of 40... - Page 29 Notes: Compressor Resistance 230V: ~290 Ohms 115V: ~ 10 Ohms Fan Resistance 230V: ~715 Ohms 115V: ~275 Ohms Wire Colors R = Red BL = Blue BR = Brown GR = Green YL = Yellow 230 V shown with jumper from terminal 2 to 3 on J2.
- Page 30 COMPRESSOR ASSEMBLY Reference I.D. Description Unit Req’d 2010-8407 Rev D SEPTEMBER 2015 30 of 40...
- Page 31 8400-1513 SHUNT, VOLTAGE SELECTION 8400-0110 BRACKET,COMPRESSOR 8400-0152 FITTING,COMPRESSOR 8400-1052 FITTING,COMPRESSOR (NIDEK COMPR.) 8400-0116 SPRING, COMPRESSION 8400-0197 EXCHANGER,HEAT 8400-1097 EXCHANGER,HEAT (NIDEK COMPR.) 8400-1161 TUBING,5/16ODx3/16IDx12.5"LG. 8400-1163 FITTING HX 9250-1330 CORD, POWER, EUROPLUG 230 V 9250-1311 CORD,POWER, TYPE "K" PLUG, 115 V US 8400-1332 CORD, POWER, CHINA 230 V 8400-1340...
- Page 32 CABINET, FRONT ASSEMBLY (OCSI & non-OCSI) 2010-8407 Rev D SEPTEMBER 2015 32 of 40...
- Page 33 Reference I.D. Description Unit Req’d 8400-0102 CABINET, FRONT 8400-0104 COVER, RESONATOR 8400-0107 O-RING, RESONATOR COVER 8400-1700 VALVE, FCV 1/8-5.0 LPM 8400-1331 KNOB,FLOW 0.125 TO 5.0 FLOW 9251-1332 RING,LOCK-OUT 9251-1335 CLIP,D STYLE 8400-1020 FITTING, OXYGEN OUTLET 8400-0128 HOSE, COMPRESSOR SUCTION 8400-1029 NUT 3/8-24 O2 OUTLET LITE 7631-1053 FILTER, FINAL PRODUCT...
- Page 34 BACK CABINET ASSEMBLY 2010-8407 Rev D SEPTEMBER 2015 34 of 40...
- Page 35 Reference I.D. Description Unit Req’d 8400-0101 CABINET, BACK LOWER 8400-0103 CABINET, BACK UPPER 8400-1025 FILTER,CABINET INLET 8400-0108 FILTER FRAME 8400-0022 RETAINER, CORD HOOK&LOOP 8400-0029 RETAINER,CORD BUCKLE 8400-0023 RETAINER,CORD RIVET 8400-1180 FILTER AIR COMPRESSOR 8400-0113 MODULE BUMPER 8400-0114 CLAMP, POWER CORD 8400-0115 SCREW, #14x 1"LG PLASTITE A-7-A...
- Page 36 MODULE ASSEMBLY 2010-8407 Rev D SEPTEMBER 2015 36 of 40...
- Page 37 Reference I.D. Description Unit Req’d 8400-2060 REGULATOR, 2-PORT 8400-1165 FITTING VALVE 5/16"X3/8 8400-1200 VALVE ASSY 8400-1236 TEE,ADAPTER NYLON 8400-1253 O-RING, REGULATOR TEE -204 8644-9401 PLUG, 1/4~ ODT PUSH IN 8400-8009 MODULE (LESS VALVES) A-8-A PARTS MODULE ASSEMBLY REPLACEMENT 2010-8407 Rev D SEPTEMBER 2015 37 of 40...
- Page 38 Nidek Medical Oxygen Concentrator Service and Maintenance Log Model Number ________________ Serial Number ___________________ Initial Inspection 1. Upon receipt, check the unit for shipping Between-Patient Maintenance damage. Notify shipping company if damaged. 1. Remove oxygen tubing, cannula, and humidifier 2. Verify that cabinet air filter and the inlet air filter bottle and discard.
- Page 39 Nidek Medical Oxygen Concentrator Service and Maintenance Log Please maintain a log of all Serial maintenance activities performed on Number___________Model_____________ this unit. Date Hours % O2 Alarms Additional Information (Work Done, Filter Changes, Check Comments, etc) Inspection Prior to Putting Into Service...
- Page 40 3949 Valley East Industrial Blvd. Birmingham, Alabama 35217 2010-8407 Rev D SEPTEMBER 2015 40 of 40...
Need help?
Do you have a question about the Mark 5 Nuvo Lite Family and is the answer not in the manual?
Questions and answers