Table of Contents
Advertisement
Quick Links
Advertisement
Table of Contents

Related Manuals for HikRobot X86 Open Platform


Summary of Contents for HikRobot X86 Open Platform
- Page 1 X86 Open Platform Quick Start Guide...
- Page 2 X86 Open Platform Quick Start Guide · Regulatory Information FCC Information Please take attention that changes or modification not expressly approved by the party responsible for compliance could void the user’s authority to operate the equipment. FCC compliance: This equipment has been tested and found to comply with the limits for a Class A digital device, pursuant to part 15 of the FCC Rules.
- Page 3 X86 Open Platform Quick Start Guide · product to your local supplier upon the purchase of equivalent new equipment, or dispose of it at designated collection points. For more information see: www.recyclethis.info 2006/66/EC (battery directive): This product contains a battery that cannot be disposed of as unsorted municipal waste in the European Union.
- Page 4 X86 Open Platform Quick Start Guide · Available Model X86 Open Platform Symbol Convention The symbols that may be found in this document are defined as follows. Symbol Description Provides additional information to emphasize or supplement important points of the main text.
- Page 5 X86 Open Platform Quick Start Guide · material or similar package. Using Environment In order to reduce the risk of fire or electric shock, do not let the device get wet or damp. Do not drop objects onto the device and avoid vigorous vibration.
- Page 6 X86 Open Platform Quick Start Guide · Cleaning Do not touch the image sensor directly. If the sensor needs to be cleaned, use a clean rag and wet it with alcohol, then gently wipe off the dirt; if the device is not in use, cover the image sensor with dust cover for protection.
-
Page 7: Table Of Contents
4.1 Main Window ......................17 4.2 Set Parameters......................18 4.3 Debug Device ....................... 19 Chapter 5 Development Guide ..................... 21 5.1 Enter X86 Open Platform ..................... 21 5.2 Operation Process ......................21 5.2.1 Adjust Image ....................... 21 5.2.2 Use SDK ....................... 22 5.2.3 Use Third-Party Software .................. -
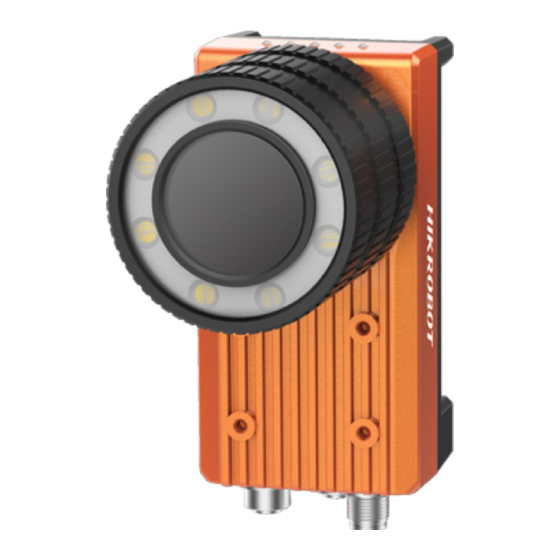
Page 8: Chapter 1 Overview
The dimension of the X86 open platform without light source and lens cover is shown in Figure 1-1. Figure 1-1 X86 Open Platform without Light Source and Lens Cover The dimension of the X86 open platform with light source and lens cover is shown in Figure 1-2. Φ 1 1 3.2... -
Page 9: Interface
X86 Open Platform Quick Start Guide · The lens mount of the device is C-mount. 1.2 Interface The device has a RJ45 gigabit Ethernet interface with aviation connector, a 12-pin power and I/O interface, a 17-pin expansion interface. All interfaces are designed with screw threads to tighten connection between the device and cables, and thus avoid influence caused by vibration. - Page 10 X86 Open Platform Quick Start Guide · Figure 1-4 Power and I/O Interface Table 1-2 Pin Definitions Signal I/O Type Description Color DC-PWR Power supply DC power + White Power supply Power ground Brown OPTO_OUT0 Output I/O isolated output 0...
- Page 11 X86 Open Platform Quick Start Guide · The device has 3 opto inputs, and 3 opto outputs. I/O interface input wiring method is shown in Figure 1-5. Input voltage ranges from 5 VDC to 30 VDC. If the input device is NPN signal (suspended or power negative), IN_COM should be connected with input device power positive, and signal line with corresponding input interface.
-
Page 12: Expansion Interface
X86 Open Platform Quick Start Guide · 1.4 Expansion Interface If the device has a 17-pin expansion interface, its interface and the respective pin definitions are shown below. Figure 1-7 Expansion Interface Table 1-3 Pin Definitions Signal Description Color VGA red ground... -
Page 13: Indicator
X86 Open Platform Quick Start Guide · Signal Description Color VGA_BLUE_CONN VGA blue Light green USB + USB + Green USB - USB - White VGA_DDCLK_CONN DDC clock Grey VGA _+V5S_CONN VGA power The cable color here refers to the color of cable supplied. If cable of other manufacturers is used, the cable color may differ, and the actual cable you purchased shall prevail. - Page 14 X86 Open Platform Quick Start Guide · Table 1-4 Indicator Description Name Indicator Description Power Indicator The indicator is solid blue when the device is powered on. Network Connection The indicator is solid green when the network is Indicator connected.
-
Page 15: Chapter 2 Device Installation
X86 Open Platform Quick Start Guide · Chapter 2 Device Installation 2.1 Accessory You need to prepare following accessories before installation. Table 2-1 Recommended Accessories Name Quantity Description Power and I/O cable × 1 It refers to the 12-pin power and I/O cable. -
Page 16: Install Device
X86 Open Platform Quick Start Guide · Instructions on disassembling lamp cup Press the clip in the arrow direction to disassemble the lamp cup Figure 2-1 Install Lens Instructions on disassembling lamp cup Press the clip in the arrow direction... - Page 17 X86 Open Platform Quick Start Guide · 安装方式一示意图 Figure 2-3 Installation Method 1 Figure 2-4 Installation Method 2 安装方式三示意图 Figure 2-5 Installation Method 3...
-
Page 18: Wiring
X86 Open Platform Quick Start Guide · 2.4 Wiring Follow steps below to wire the device. Steps: 1. Use 8-pin RJ45 network cable with aviation connector to connect the device to a switch or a network interface card (NIC). Figure 2-6 Connect Network Cable 2. - Page 19 X86 Open Platform Quick Start Guide · 4. If the expansion interface board is used for power supply, you only need to connect the power cord to corresponding interfaces of the expansion interface board. Expansion Interface Smart Camera Board 12-pin Power Cable...
-
Page 20: Chapter 3 Client Installation And Setting
X86 Open Platform Quick Start Guide · Chapter 3 Client Installation and Setting 3.1 Install MVS Client The MVS client software for X86 open device is compatible with 32/64-bit Windows XP/7/10 operating systems. Software version in this manual is V3.0.0. If other versions are used, the graphic user interface may differ. - Page 21 X86 Open Platform Quick Start Guide · 3. Enable Jumbo Frame. Figure 3-2 Set Jumbo Packet 4. Click Open in the Internet Protocol, select Obtain an IP address automatically, and click OK to save. Figure 3-3 Local NIC Settings 5. Click Apply to take the settings into effect.
-
Page 22: Set Ip Address
X86 Open Platform Quick Start Guide · 3.3 Set IP Address Purpose: The online device in the same local subnet with the PC running the software will be displayed in the device list. Before you start: Make sure the device is powered on and connected to the network. -
Page 23: Connect Device To Mvs
X86 Open Platform Quick Start Guide · You can modify the IP address of the device if its status is free. When switching between static IP and DHCP, you need to restart the device manually. Change the IP address if the modified IP address conflicts with another device's IP address in the same local subnet. -
Page 24: Chapter 4 Device Setting
X86 Open Platform Quick Start Guide · Chapter 4 Device Setting 4.1 Main Window After connecting to the device, the MVS client can read the device attributes and display them in tree format. The main window and its description are shown in Figure 4-1 and Table 4-1 respectively. -
Page 25: Set Parameters
X86 Open Platform Quick Start Guide · Area Name Description Display current device list, and provide icons for Device List Panel connecting/disconnecting device, start/stop acquisition, and refreshing device list. Device Display the network interface information and the Information Panel device information. -
Page 26: Debug Device
X86 Open Platform Quick Start Guide · Table 4-2 Attribute Description Attribute Description You can view device information, edit its name and Device Control reset the device. You can view device’s frame rate, and set exposure, Image Setting gain, brightness, Gamma, etc. - Page 27 X86 Open Platform Quick Start Guide · Load Parameters: Click User Set Control, and select a user set in User Set Selector. Click Execute in User Set Load to load parameters Set User Default: Set default parameter by selecting parameter from drop-down list of User Set Default.
-
Page 28: Chapter 5 Development Guide
Chapter 5 Development Guide 5.1 Enter X86 Open Platform Function development needs to be configured inside the X86 open platform. You can use a VGA or HDMI cable to connect display and external devices, or use a personal computer to operate via remote desktop. -
Page 29: Use Sdk
Quick Start Guide · Figure 5-2 MVS Client 2. Use the client to connect to the platform, and refer to the user manual of X86 open platform for details to adjust image. 5.2.2 Use SDK The X86 open platform SDK contents are integrated with the MVS client. -
Page 30: Chapter 6 Trouble Shooting
X86 Open Platform Quick Start Guide · Chapter 6 Trouble Shooting Table 6-1 Trouble Shooting Trouble Possible Reason Solution No device found Device is not started up Check device power wiring (observe when running the normally, or network PWR indicator), and check network client. - Page 31 UD11165N-A...
Need help?
Do you have a question about the X86 Open Platform and is the answer not in the manual?
Questions and answers