Extron electronics TLP Pro 320M Setup Manual
Hide thumbs
Also See for TLP Pro 320M:
- User manual (47 pages) ,
- Setup manual (7 pages) ,
- Setup manual (4 pages)
Table of Contents
Advertisement
Quick Links
TLP Pro 320M • Setup Guide
Overview
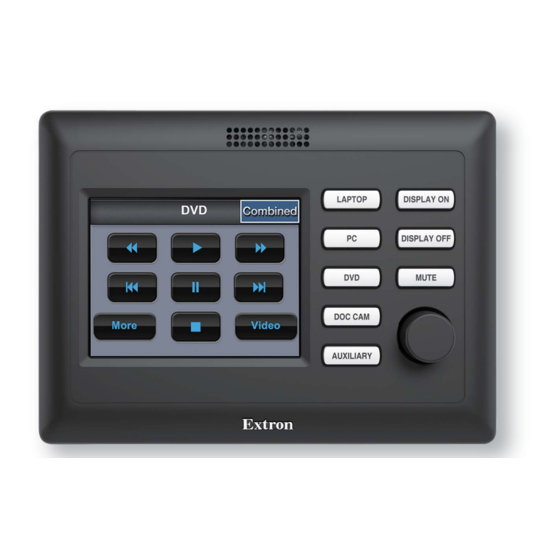
The Extron TLP Pro 320M is a 3.5 inch wall mounted touchpanel with an 320x240 resistive touchscreen. It is ideal for any AV
application requiring a compact touchpanel with flexible mounting options and a fully customizable interface. This guide provides
instructions for experienced installers to mount and install a TLP Pro 320M touchpanel. For more complete instructions, see the
TLP Pro 320M User Guide, at www.extron.com.
Setup Checklist
Get Ready
…
Download and install the latest version of the following software:
GUI Designer — For designing layouts for Extron TouchLink Pro touchpanels and third party touch interfaces
Global Configurator Plus and Professional — For setting up and configuring the control processor and touchpanel
Toolbelt — For device discovery, device information, firmware updates, certificate management, and configuration of network
settings, system utilities, and user management for TouchLink Pro devices.
Global Scripter — Provides an integrated development environment for Extron control systems programming, including an
Extron-exclusive Python library (ControlScript) and Global Scripter modules to get you started.
More information about all four software programs is available in the TLP Pro 320M User Guide.
…
Obtain the following network information from your network administrator:
…
DHCP status (on or off). If DHCP is off, you will also require
…
IP address
…
Usernames — By default these are either admin or user.
Passwords — The factory configured passwords for all accounts on this device have been set to the device serial
…
number. Passwords can be changed during configuration. They are case sensitive.
NOTE:
If the device is reset to default settings, the passwords are reset to the default password, which is extron
(for either admin or user).
…
Make a note of the touchpanel MAC address.
…
Extron touchpanels come with a factory-installed Secure Sockets Layer (SSL) security certificate. IEEE 802.1X authentication is
also supported once enabled. See the TLP Pro 320M User Guide for more information.
Mount and Cable All Devices
ATTENTION:
•
Do not power on the touchpanels until you have read the Attention in the "Power Supply" section of the TLP Pro 320M
User Guide.
•
Ne branchez pas les écrans tactiles avant d'avoir lu la mise en garde dans la section « sources d'alimentation » du
TLP Pro 320M User Guide.
…
Mount the units. There are several mounting options for TouchLink Pro touchpanels (see
…
Connect cables to the touchpanels (see
…
Connect the power cords and power on all devices.
Set Up the Touchpanels for Network Communication
…
Connect the PC that you will use for setup, the control processor, and the touchpanel to the same Ethernet subnetwork.
…
Use the
and related settings for the touchpanel.
Configure the Touchpanels
The Global Configurator Help File and the GUI Designer Help File provide more detailed information, including an introduction to the
software and sections on how to start a project and configuration.
…
Subnet mask
(see page 4) or Toolbelt to set the DHCP status and, if necessary, the IP address, subnet mask, gateway,
…
Gateway
on page 4).
on page 2).
1
Advertisement
Table of Contents

Related Manuals for Extron electronics TLP Pro 320M


Summary of Contents for Extron electronics TLP Pro 320M
- Page 1 Overview The Extron TLP Pro 320M is a 3.5 inch wall mounted touchpanel with an 320x240 resistive touchscreen. It is ideal for any AV application requiring a compact touchpanel with flexible mounting options and a fully customizable interface. This guide provides instructions for experienced installers to mount and install a TLP Pro 320M touchpanel.
- Page 2 Wall-Mounting or Furniture-Mounting The TLP Pro 320M can also be mounted directly to the wall or directly into furniture, such as a podium or table, without a kit. The following instructions describe how to mount directly into drywall. The procedure for furniture mounting is similar.
- Page 3 D D D Removing the Bezel To release the bezel from the TLP Pro 320M using the Extron removal tool: Insert the flat edge of the tool into either of the notches in the bottom surface of the bezel (see...
- Page 4 « Power Supply » du TLP Pro 320M User Guide. Reset button — This recessed button allows the unit to be reset. The TLP Pro 320M has four reset modes (see below) that are initiated by pressing the reset button. For more information about these different modes, see the TLP Pro 320M User Guide.
Need help?
Do you have a question about the TLP Pro 320M and is the answer not in the manual?
Questions and answers