Table of Contents
Advertisement
Quick Links
TLP 710CV and TLE 710 • Setup Guide
Overview
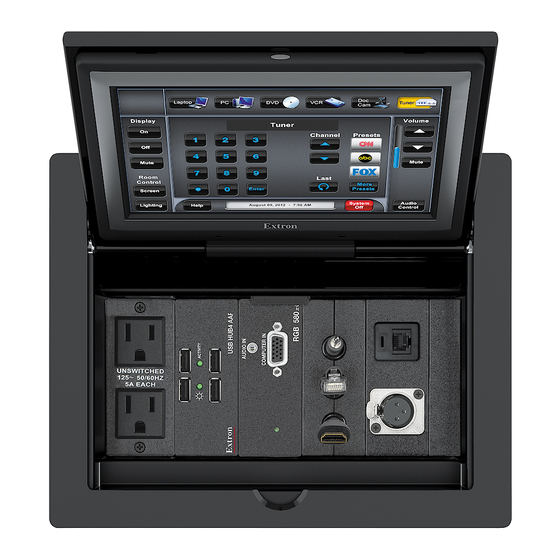
The Extron TLP 710CV 7-inch Cable Cubby
convenient pullout cables. The TLP 710CV also provides simple and versatile configuration and control for a range of IP Link
control systems using a touch screen. The touchpanel communicates through an Ethernet connection to a configurable IP Link
control processor. Video and audio input is provided by a twisted pair cable connected to an MTP transmitter.
NOTE:
The network output must connect via a network switch, hub, or router to an Ethernet LAN or the Internet, with
an Extron IP Link controller on the same network. Suggested controllers include IPL T S series (for example, IPL T S4),
IPL 250, IPL T CR48, IPL T SFI244, or IPCP series.
The first four pages of this guide provides basic instructions for experienced installers to mount either the TLP 710CV or the
TLE 710. The last four pages show initial configuration for the TLP 710CV. For reference material and full instructions about
configuring the touchpanel, see the TLP 710CV User Guide (see www.extron.com).
Tools Required for Installation
Marking Pen
Tape Measure
Safety Glasses
Phillips Screw Driver
Included Parts
AC Power Module*
Pass-through AAPs
†
Blank AAPs
1-space bracket kit
2-space bracket kit
3-space bracket kit
NOTES:
*
Inside the US, the TLP 710CV may be purchased with or without an AC power module. If required, a power module for
the TLE 710 must be purchased separately. Outside the US, see
your country.
Active or Passive AAPs must be purchased separately (see www.extron.com).
†
The Power over Ethernet injector is provided only with the TLP 710CV.
‡
TouchLink
®
™
Vacuum Cleaner
Square
1/4" Hex Nut Driver
1
0
3
3
6
6
0
1
3
4
T
N OU
R LA
PW
1
1
touchpanel and TLE 710 enclosure provide AV connectivity using
Planning
Before making any cuts, select the best location for the
‡
TLP 710CV or TLE 710.
Ensure that the edge that opens on the lid is oriented correctly.
‡
Ensure there is enough space for all the system cables and
‡
components, including cable retractors, if they are to be
installed.
Decide on the method for cutting a hole in the table:
‡
Hand router and template
z
CNC wood router
z
Jigsaw and paper template
z
Verify that you have the correct template or dimensions.
‡
Check all relevant regulations.
‡
Ensure the installation complies with local, state, and
z
national building and electrical codes.
Ensure the installation complies with the Americans with
z
Disabilities Act or other accessibility requirements.
TLP 710CV or TLE 350
Power over Ethernet
(PoE) Injector
‡
LA N-
IN
(TLP 710CV only)
www.extron.com
AC Power Module*
#4−40 Screws
and Nuts
AAP Shelf Bracket Kits
Extron
1 Pos
Table Clamps
Removal Tool
to find an AC power module for
®
Blank AAPs
Pass-thru AAPs
Zip Ties
(2 brackets/kit)
2 Pos
3 Pos
1
Advertisement
Table of Contents

Summary of Contents for Extron electronics TouchLink TLP 710CV
- Page 1 TLP 710CV and TLE 710 • Setup Guide Overview The Extron TLP 710CV 7-inch Cable Cubby TouchLink touchpanel and TLE 710 enclosure provide AV connectivity using ® ™ convenient pullout cables. The TLP 710CV also provides simple and versatile configuration and control for a range of IP Link ®...
- Page 2 TLP 710CV and TLE 710 • Setup Guide (Continued) Mounting the TLP 710CV and TLE 710 Step 1 — Obtain Cut-out Dimensions ATTENTION: • The table should be cut only by licensed and bonded craftspeople. • Make certain the correct cut-out dimensions are being used before proceeding to the next step. Extron is not responsible for mounting holes that are incorrectly cut.
- Page 3 Step 3 — Run all Cables Run all cables necessary to support the AC connector, the cables stored in the cubby, and all planned AAP connectors. Run the cables below the table and through the hole that was cut in Step 2. Leave enough slack in the cables to connect or route them before the cubby is installed in the table.
-
Page 4: Step 8 - Mounting The Enclosure
TLP 710CV and TLE 710 • Setup Guide (Continued) Step 7 — Install the AAP Assembly From under the table, push the first AAP assembly through the bottom of the enclosure. The holes in the rear bracket must align with the bottom row of holes on the rear face of the enclosure. - Page 5 Connecting the TLP 710CV NOTE: The rest of this guide applies only to the TLP 710CV (not to the TLE 710). The cable connections are located in a panel on the bottom of the TLP 710CV: MTP connector LAN and PoE connector LAN / PoE POWER External power supply connector...
-
Page 6: Front Panel Features
TLP 710CV and TLE 710 • Setup Guide (Continued) Step 12 — Power on the TLP 710CV for the First Time Power on all the devices connected to the TLP 710CV. Insert the removal tool in the When the 12 VDC power supply or the PoE power slot at one top corner and supply is switched on, the TLP 710CV will boot up and, loosen the bezel away from... -
Page 7: Initial Configuration
Initial Configuration Before use, configure the touchpanel, using the on-screen menus. Remove the bezel, using the Extron removal tool. Press the Menu button once ( in the figures on page 6). The Main menu screen opens. Main Sleep timer: 005 Min Auto Backlight Active Volume... -
Page 8: Calibration Screen
(Inside India Only) (Inside Europe Only) +86.21.3760.1566 FAX Extron USA - West Extron USA - East +1.714.491.1500 +1.919.850.1000 +31.33.453.4040 +91.80.3055.3777 +31.33.453.4050 FAX +91.80.3055.3737 FAX +1.714.491.1517 FAX +1.919.850.1001 FAX © 2013 Extron Electronics All rights reserved. www.extron.com 68-2117-50 Rev. C 04 13...


Need help?
Do you have a question about the TouchLink TLP 710CV and is the answer not in the manual?
Questions and answers