Table of Contents
Advertisement
Quick Links
Advertisement
Table of Contents

Related Manuals for Kogan KAGFLWAS10A


Summary of Contents for Kogan KAGFLWAS10A
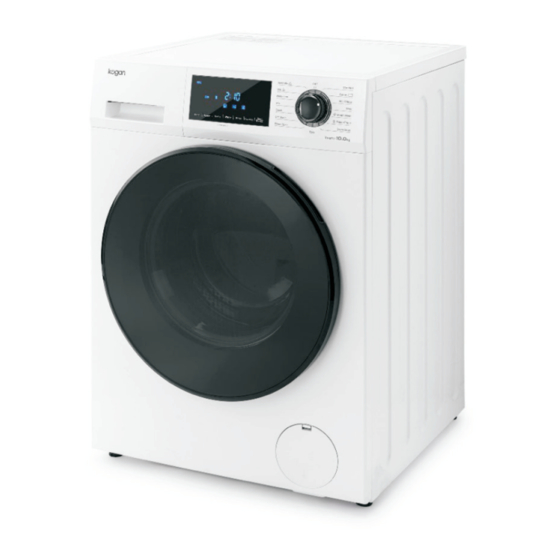
- Page 1 10KG FRONT LOAD INVERTER WASHING MACHINE KAGFLWAS10A...
-
Page 3: Safety And Warnings
Warning Thoroughly read these safety instructions before use. The items indicated here are very important safety precautions, which must be followed. Kogan.com cannot be held liable for any damage caused by non-compliance with the warning and safety instructions or resulting from incorrect use or operation. - Page 4 Ensure the washing machine is disconnected from the power outlet until after maintenance or repair work has been carried out. If the supply cord is damaged, it must be replaced by the Kogan.com or a service •...
- Page 5 Correct use To avoid the risk of personal injury or damage to the washing machine, do not • install it in any damp areas or somewhere which is exposed to rain. Do not install the washing machine in areas with direct sun light, in which plastic or •...
- Page 6 Safety with children Keep children away from the washing machine at all times. Do not allow children • to play on or near the machine and its controls. Always supervise children whilst you are using it. Older children may only use the washing machine if its operation has been clearly •...
- Page 7 OVERVIEW Control Panel Top Cover Drawer (for detergent or fabric softener) Control Knob Door Glass Case Body Door Door Seal Drain Hose Drainage Pump Damper Adjustable Feet Drain Pump Filter Note: Unscrew the drain pump filter to allow the water to drain out when the machine is not used for an extended period.
- Page 8 Power Cord Cold Water Inlet Valve Transit Bolts Rear Cover Note: The illustrations in this user guide are intended for reference only and may differ from actual product.
-
Page 9: Installation
INSTALLATION Packaging Remove all the packaging (Including the foam base). • Properly dispose of all the packaging and keep them out of the reach of children. • Some condensation may appear on the packaging plastic bag and the door glass. •... - Page 10 Removing transit bolts Remove all the transit bolts from the rear of the machine. • Plug the holes using the supplied transit bolt caps. • Transit Bolts Note: Strong vibration, noise or failures may occur if the transit bolts are not removed. Keep the transit bolts for future transportation.
-
Page 11: Installation Place Requirement
Installation place requirement A concrete floor is the most suitable surface for the washing machine, being far less • prone to vibrations during the spin cycle than other surfaces. The machine must be level and securely positioned. The distance between the •... -
Page 12: Level Adjustment
Level adjustment The machine must stand perfectly level on all four feet to ensure safe and proper operation. Incorrect installation may increase electricity and water consumption and may cause the machine to move during usage. The level can be adjusted using the Adjustment feet on the bottom of the machine Locknuts Loose Locked... - Page 13 Drain hose connection 1. Direct into a sink: If the outlet spigot has not been used before, remove the blanking plug (if present). • Push the drain hose onto the spigot and secure with a clip if required, ensure a loop •...
- Page 14 Water inlet connection Connect the supplied inlet hose to a tap with a 3/4” thread. Do not use any old existing hoses. Installation should comply with your local water authority and building regulations’ requirements. When there is a single inlet valve at the back of the machine, it must be connected to a cold-water supply.
-
Page 15: Operation
OPERATION Control panel 1. Control Knob Turn this knob clockwise or anti-clockwise to select the required wash program. (Note: At the end of a wash cycle, the knob must be returned to the “O” position). 2. Start/Pause ( Press this button to start or pause a wash cycle. The door can't be opened once the machine has started. - Page 16 6. Delay: Press this button to set the delay time of starting a wash cycle from 1 hour up to 24 hours. 7. Speed: Press this button to change the spin speed. 8. Temp: Press this button to change the wash temperature. Note: Do not turn the knob to the position “o”...
- Page 17 Control panel display Digital display: This area will show the remaining time, delay hour and temperature. Inlet timeout: This icon will be displayed when the water inlet sensor times out. Please check the water tap and make sure it is open. Delay: This icon will display when a delay timer has been set.
- Page 18 The selectable options and functions of different programs Weight Time Rinse Program Temp (°C) Spin speed (rpm) (kg) (min) times 00/20/30/40/ 0/600/800/1000/ Standard 60/95 1200/1400 00/20/30/40/ 0/600/800/1000/ *Cotton 60/95 1200/1400 0/600/800/1000/ Anti-Allergy 1200/1400 Wool 00/20/30/40 0/600 00/20/30/40/ 0/600/800/1000/ Steam Wash 60/95 1200/1400 Steam Fresh...
- Page 19 Function Options Program Pre- Anti- Wash+ Soft Rinse+ Water+ Weight Delay wash Ironing Standard (0/5/10/15/20min) (+25min) Cotton (0/5/10/15/20min) (+25min) Anti-Allergy (0/5/10/15/20min) Wool (0/5/10/15min) Steam (0/5/10/15/20min) Wash Steam Fresh Drum Clean Spin Rinse/Spin DIY Wash (0/5/10/15/20/25/30 (+25min) min) Quick (0/5/10/15min) (0/5/10/15/20min) (+25min) Bulky Item (0/5/10/15/20min)
-
Page 20: Machine Preparation
First use Before washing clothes for the first time, you must run a complete cycle without clothes. Connect the power and turn on the tap. Turn the knob to position “Standard” and press the “Start/Pause” button. This will remove any water left in the machine during manufacturing. Machine preparation Connect the inlet hoses and turn on the tap(s). - Page 21 Put clothes into the washer Unfold the laundry and load clothes loosely into the machine. Mixing both large and small items gives better wash results and also helps distribute the load evenly during spinning. The most efficient use of energy and water is achieved when a full load is washed. However, do not overload as this causes creases and reduces cleaning efficiency.
- Page 22 The right quantity of washing products used will depend on the following: The quantity of laundry • The dirt level of the laundry • Light: No visible dirt or stains. Possible slight odour. Normal: Visible dirt and/or just a few slight stains. Heavy: Highly visible dirt and stains.
- Page 23 Washing program chart Program Washing symbol Fabric Cotton, linens or cotton mix fabrics, e.g. Standard towelling, underwear, T-shirts etc. Cotton, linens or cotton mix fabrics, e.g. table Cotton linen, underwear, T-shirts etc. Washing clothes at 95°C, which would help Anti-Allergy for sterilisation and disinfection.
- Page 24 Note: This machine is fitted with a balance control device, which ensures the machine is stable during the spin. To protect the machine, it will cut in if the laundry is not evenly distributed in the drum. The laundry is redistributed by reversing the rotation of the drum. This may happen several times before the unbalance icon disappears and normal spinning can resume.
-
Page 25: Cleaning And Care
CLEANING & CARE Disconnect the machine from the power socket before cleaning the machine. The washing machine must not be hosed down. Cleaning the exterior Clean the exterior with a mild non-abrasive cleaning agent or soapy water using a well wrung-out cloth. - Page 26 Cleaning the drawer housing Use a bottle brush to remove any detergent residues inside the drawer housing. Cleaning the water inlet filter Using long nose pliers, withdraw the plastic filter. Clean the filter and return it back securely. These filters should be checked every 6 months or more often if there are frequent interruptions to the water supply.
- Page 27 Cleaning the drain pump filter Disconnect the machine from the power socket and open the lower cover with a screwdriver. Place a container under the pump. Unscrew and remove the filter. Clean the filter carefully. Note: This filter should be cleaned every 2 months or when there is a fault that displays “E03”...
-
Page 28: Specifications
Important: If the machine is exposed to temperatures below 0°C, certain precautions should be taken. Turn off the water tap. Unscrew the inlet hose. Unhook the drain hose from the rear support and position the end of this hose and that of the inlet hose in a bowl. -
Page 29: Troubleshooting
TROUBLESHOOTING Error Problem Possible Cause Solutions Code 1. The water tap is not open. “E01” is on 1. Open the water tap. The machine 2. The drain hose is put down. 2. Hook up the hose. fills overtime. 3. The water inlet valve is screen. - Page 30 1. The connection between 1. Check the connection and “E10” is on Inverter fails to the inverter and wire is not ensure it is secure. start secure. 2. Change the inverter screen. 2. The inverter is damaged. 3. Restart the machine “H: AC"...
- Page 31 NOTES...
- Page 32 Need more information? We hope that this user guide has given you the assistance needed for a simple set-up. For the most up-to-date guide for your product, as well as any additional assistance you may require, head online to help.kogan.com...
Need help?
Do you have a question about the KAGFLWAS10A and is the answer not in the manual?
Questions and answers