Table of Contents
Advertisement
Advertisement
Table of Contents

Subscribe to Our Youtube Channel
Related Manuals for Kogan KAWWASHT10A


Summary of Contents for Kogan KAWWASHT10A
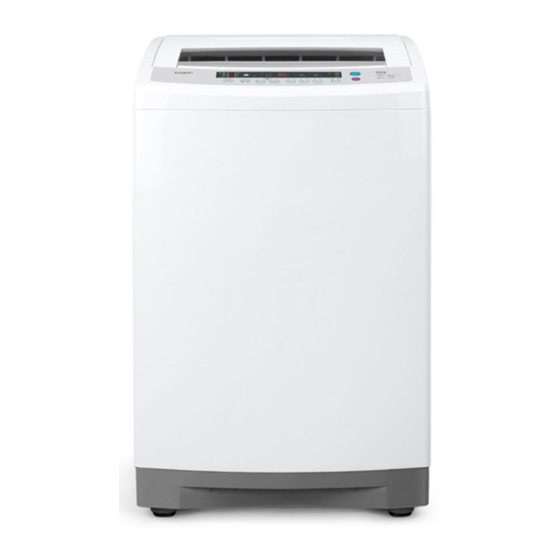
- Page 1 10KG TOP LOAD WASHING MACHINE KAWWASHT10A & KAWWASHT10B...
- Page 3 SAFETY & WARNINGS Read Carefully and Keep for Future Reference Read this user guide thoroughly before first use, even if you are familiar with this type of product. The safety precautions enclosed reduce the risk of fire, electric shock and injury when correctly adhered to.
- Page 4 • Improper installation may result in the risk of fire, electric shock and/or injury. Kogan.com assume no liability for any eventual damages caused by improper installation. • The appliance is designed for domestic use only. It is not suitable for commercial or trade use.
- Page 5 • Any damage or malfunction resulting from foreign objects is not covered by your warranty and may lead to expensive repairs. Kogan.com assume no liability for any eventual damages caused by improper or faulty use. •...
- Page 6 OVERVIEW Accessories Back View Handle (One on each side) 2 Level Indicator Wash/Spin Tub 3 Softener Dispenser 10 Detergent Box 4 Control Panel Cold and Hot Water Buttons 5 Housing 12 Hot Water Supply Hose 6 Adjustable Leg 13 Cold Water Supply Hose 7 Rollers (One on each back corner) 14 Drain Hose Not Shown: Base Cover, Screws, User Guide and Warranty Card.
- Page 7 INSTALLATION Unpacking Tips • This product has been packaged to protect it against transportation damage. Keep the original packaging carton in a safe place. It will help prevent any damage if the product needs to be transported in the future. If it is to be disposed of, recycle it and all other packaging materials as per the regulations.
- Page 8 Levelling the Washer Install the washer on a stable and level surface, in a dry location, out of sunlight. The inbuilt levelling indicator will help you determine whether levelling is necessary. If so, adjust the adjustable leg (at the front right side of the machine), as illustrated in the below image.
- Page 9 Connecting the Water Inlet Hoses Install the water inlet hoses to your hot and cold-water taps. Check and ensure that the sealing washers are firmly in place. Attach the straight end of the hose to your water taps. Make sure to attach the hot water supply hose (with Red markings) to the hot water tap and the cold-water supply hose (with Blue markings) to the cold-water tap.
- Page 10 Ensure to use only the new (supplied) hoses with your new appliance. Do not use a hose from an existing machine or one that has been used previously. • If the hoses are too short for your set-up, contact Kogan.com to purchase a longer hose.
- Page 11 Installing the Drain Hose The drain hose and drain pump filter are located at the back of the machine as shown in the image. Pinching the two bands of the clamp on the drain hose, connect it to the drain hose connection at the back of the washer.
- Page 12 Using the Rollers The washing machine is equipped with two rollers at the back that you can use to move the machine more easily. Tilt the washing machine by about 30 degrees and push forward or pull backward, while holding the machine securely on both sides with your hands, as illustrated in the image.
- Page 13 OPERATION Control Panel Detergent Indicator These indicators show the quantity of the powder detergent to use. See the Detergent and Load Recommendations section for details. Display Status Display Result During washing, it shows the time Remaining time is 20 minutes remaining When setting soak and wash processes, this indicator shows the...
- Page 14 Rinse Indicator This indicator shows the number of rinses. Display Result Rinsing 2 times Spin Indicator This indicator shows the spin time in minutes. Maximum of 9 minutes. Display Result Spinning time is 9 minutes Start/Pause Button • Press this button to start the washer operation. •...
- Page 15 Program/Child Lock Button • Press this button to choose the washing program. The relevant indicator light will start flashing. • This button is also used to set the child lock function. See the Child Lock section for details. • The machine automatically sets it for certain washing processes such as Normal, Heavy Duty, Custom and Wool wash programs.
- Page 16 Normal Usage Before washing, remove any coins, keys, and other hard items from pockets. Close any zippers to prevent damaging your clothes and the wash tub. Brush dirt and sand off clothes and turn pockets inside out. Sort your washing into appropriate loads: whites, coloureds, cottons, delicates, heavily soiled, etc.
- Page 17 Program Selection Guide Default Settings for Individual Wash Processes Washing Program Suitable Items Spin Time Time Rinse Type (minutes) (minutes) 2x Water saver Normally soiled clothing rinse Normal 5-40 5-26 and other items 4x Shower rinse Dependent on the custom 2x Water saver Custom settings...
- Page 18 Detergent and Load Recommendations • We suggest you use detergent in the amounts recommended below. Too little will give poor washing results, but too much will affect rinse performance and may cause overflow of suds, which could interfere with machine operation. Caution: Do not overfill detergent.
- Page 19 Customising a Program This washing machine is equipped with a fuzzy logic function that automatically chooses certain wash cycle processes for the Normal, Heavy Duty, Custom and Wool programs. You do not have to adjust them yourself, however, if you want to adjust these values, follow the below instructions: Prepare your washing according to steps 1 to 4 of the Normal Usage section.
- Page 20 Blanket Program Use this program for washing blankets or other bulky items. It will automatically select the highest water level (90L), but you can adjust this manually down to 62L according to the size of your items. Press the Power button and open the washer lid. Press the Program button repeatedly until the indicator for the Blanket program flashes.
- Page 21 Preset Timer (Delayed Washing) This washing machine has a 0-24 hour preset function, which you can set to determine the time when the washing program will finish. It is, in effect, like a ‘delayed start’ function, but you set the time period when you want the washing process to finish rather than to start. Notes: •...
- Page 22 Adding Detergent to a Preset Wash When using the preset wash, we recommend you use powder detergent. Do not add detergent directly to the wash tub ahead of the wash time. Follow the instructions below: • Washing detergent: Either put detergent into the detergent box or if you prefer to put it directly into the wash tub, wrap the powder in a small cloth.
- Page 23 Water Power The water power affects the pause time of the pulsator and hence the intensity of the wash. It is automatically selected for the wash and rinse process; however, you can also adjust it yourself (except for the Delicate and Blanket programs). To adjust the water power level: Press the Start/Pause button, then press the Soak/Variable Wash button.
- Page 24 Ultrasonic Function • This top load washing machine is equipped with an ultrasonic pump, which generates thousands of vibrations per second into the wash tub. These vibrations help remove stains and dirt without chemical stain removers, thus reducing the required detergent amount and wash time. •...
- Page 25 • If the machine still does not start the set program, check whether there has been a power failure or whether the fuse or circuit breaker has been activated. Note: If none of the solutions help you solve the problem, then contact Kogan.com for support and maintenance.
- Page 26 • Close the washer lid. Turn off the power at the machine, then contact Other problems. Kogan.com Note: Press the Start/Pause button once to release the emergency stop and cancel the error message. Press it again to restart the operation.
- Page 27 CLEANING & CARE To prolong the service life of the washing machine, keep it in good condition and perform regular maintenance. For any type of cleaning and maintenance, make sure the washing machine is disconnected from the mains power supply. Cleaning the Washing Machine (when required) •...
- Page 28 Cleaning the Water Inlet Valve (suggested interval: every 6 months) To avoid blockage of the mesh filter at the water inlet after long time use, follow the below instructions: Detach the water inlet hose, making sure you have turned off the water supply at the taps beforehand.
- Page 29 Drain Pump Maintenance We recommend that you clean the drain pump filter regularly (at least once a month) to avoid blockages created by bobby pins, coins, and excess lint. Follow the below instructions: Disconnect the washer from the power source. If necessary, wait until the water has cooled down.
- Page 30 Storage If the appliance is not going to be used for an extended period, follow the below instructions to store the machine: Unplug the machine from the power supply and disconnect all hoses. Clean the machine and filters as described in this section. Let the machine air-dry thoroughly.
- Page 31 SPECIFICATIONS Dimensions 601 mm (W) x 626mm (D) x 985mm (H) Capacity 10kg (maximum weight of dry wash load) Weight 47kg Water Consumption 90 litres (at maximum load) Power Source 230-240V~ 50Hz Power Consumption 450W Required Water Pressure 0.03MPa - 0.8MPa (0.3kgf/cm - 8kgf/cm Liquid Ingress Protection IPX4...
- Page 32 Need more information? We hope that this user guide has given you the assistance needed for a simple set-up. For the most up-to-date guide for your product, as well as any additional assistance you may require, head online to help.kogan.com...
Need help?
Do you have a question about the KAWWASHT10A and is the answer not in the manual?
Questions and answers