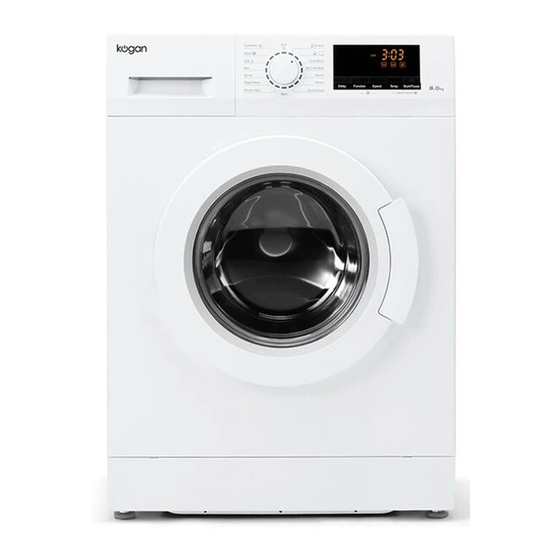
Summary of Contents for Kogan KAGFLWASH8A
- Page 1 Kogan 8kg Front Load Washing Machine KAGFLWASH8A It is essential to read this manual carefully before it is installed and used for the first time.
- Page 2 This washing machine conforms to current safety requirements. Inappropriate use can, however, lead to personal injury and damage to property. To avoid the risk of accidents and damage to the washing machine, please read this manual carefully before using it for the first time. They contain important information on its installation, safety, use and maintenance.
-
Page 4: Technical Safety
Read and understand thoroughly these safety instructions before use. The items indicated here are very important safety precautions, which must be followed. We cannot be held liable for damage caused by non-compliance with the warning and safety instructions or resulting from incorrect use or operation. -
Page 5: Correct Use
Correct use To avoid the risk of personal injury or damage to the washing machine, do not install it in place where it is damp and where it suffers from rainfall. Do not install the washing machine in place where it suffers from the sun directly, in which plastic or components will be damaged. - Page 6 Door glass Door seal Unscrew the drain pump filter to let water run out when the machine is not used for a long time. Connection Cable cold water inlet valve The drawing of machine in the manual is only used for instruction. It may be vary from the model you buy.
- Page 7 Remove all the packing ( including the foam base) or the vibration and noise may occur. Dispose all the wrappage safely and keep them out of the reach of children. Danger of suffocation! It is normal that water drops appear on the packing plastic bag and the door glass, which are resulted from the water left in the tub for checking out.
-
Page 8: Drain Hose Connection
A concrete floor is the most suitable installation surface for a washing machine, being far less prone to vibration during the spin cycle than wooden floorboards or a carpeted surface. The machine must be level and securely positioned. The distance between the machine and wall must be more than 10 cm. -
Page 9: Water Inlet Connection
2. Connected securely to a standpipe. Firstly form a hook in the end of the drain hose using the “U” piece” supplied. Place the drain hose into your standpipe, which should have an internal diameter of approximately 38mm thus ensuring there is an air break between the drain hose and standpipe. When discharging into a standpipe ensure that the top of the standpipe is no more than 90cm and no less than 60cm above floor level. - Page 10 95℃ Anti-Bac 1. Start/Pause Press this button to start or pause a wash cycle. The door can not be open when the machine start.The time will not be recalculated for restarting.If the washing program ending more than 10 minutes without any operation ,the machine automatically into sleeping state,Click this button to wake up the screen.
- Page 11 For your safety, please not turn the knob to the position “ ” and get clothes while the machine is running. Because the temperature of water may be high and it may scald you. The door lock will open automatically at the end of a wash cycle while the tem- perature of the drum is cool down.
- Page 12 these: Turn the knob to position “Cotton”. Press “ start / pause ” . It can remove the water which is left in the tub because of manufacturer’s checking out. 3. Place the drain hose well. 1. Sort the laundry by colour and by care label. Most garments have a textile care label in the collar or side seam.
- Page 13 1. Open the drawer and add adequate detergent into main wash compartment marked “ ” or “ ”. 2. Add the fabric softener into compartment marked “ ” or “ ” . Do not exceed the maximum level mark. 3. Add the detergent into the pre-wash compartment marked “ ”...
- Page 14 Washing programme chart Programme Washing symbol Fabric Cottons, linens or cotton mix fabrics, e.g. table linen, towelling, underwear, T-shirts etc. Small loads of items which require freshening up and which can be washed in a Cotton programme. This programme can be used for rinsing items which can be Rinse+Spin washed in a Cotton programme.
-
Page 15: Cleaning The Drawer
Disconnect the machine from the mains electricity supply and withdraw the plug from the socket before cleaning the machine. The washing machine must not be hosed down. Clean the exterior with a mild non-abrasive cleaning agent or soap and water using a well wrung-out cloth. - Page 16 Cleaning the drawer housing Use a bottle brush to remove detergent residues inside the drawer housing. Use pointed nose pliers to withdraw the plastic filter. Clean, put back and secure. These filter should be checked every 6 months or so, or more often if there are frequent interruptions to the water supply.
- Page 17 Problem Possible Cause Error Code 1. The water tap is not open. 1. Open the water tap. The machine “E01” is on the 2. The drain hose is put down. 2. hook up the hose. fills overtime. screen. 3. The water inlet valve is damaged. 3.
- Page 18 KAGFLWASH8A 220V-240V~50,Hz 8.0kg Rated power 2100W Water pressure 0.02-0.8MPa 65kg/69kg 595X545X845 Energy-efficient test program entrance guide: choose the program “ ”,set the temperature to “60℃”,and select the spin speed to “1200rpm”. Note: Data can vary from the nominal values given depending on water pressure, water hardness, water inlet temperature, room temperature, type and volume of load, fluctuations in the electricity supply and any extra options selected.


Need help?
Do you have a question about the KAGFLWASH8A and is the answer not in the manual?
Questions and answers