Table of Contents
Advertisement
Quick Links
Advertisement
Table of Contents

Subscribe to Our Youtube Channel
Related Manuals for Kogan KATTLWASH9A


Summary of Contents for Kogan KATTLWASH9A
- Page 1 9KG TOP LOAD WASHING MACHINE KATTLWASH9A & KATTLWASH9B...
-
Page 2: Table Of Contents
Safety & warnings Components Overview Installation Operation Before first use Cleaning & care Specifications Troubleshooting... -
Page 3: Safety & Warnings
Children should be supervised to ensure that they do not play with the appliance. • If the power cord is damaged, cease use immediately and contact help.Kogan.com for support. • When installing this appliance, only use the new hose-sets supplied. Old hose-sets should not be reused. - Page 4 You must clearly understand the work involved and have the necessary skills to carry it out. If you are in doubt, contact help.Kogan.com for support or contact a licenced professional for advice. •...
- Page 5 This appliance must be grounded. In the event of malfunction or breakdown, grounding will reduce the risk of electric shock by providing a path of least resistance for electric current. GROUNDED • This appliance is equipped with a cord having an equipment-grounding conductor and grounding plug.
- Page 6 • If the appliance is flooded, cease operation, cut the power immediately and contact help.Kogan.com for support. If the appliance emits a strange noise, a burning smell or smoke, cease operation, cut the power immediately and contact help.Kogan.com for support. Failing to do so may result in electric shock or fire.
-
Page 7: Components
COMPONENTS Accessories Water supply hose (x2) Drain hose Bottom cover Self-tapping screw (x2) Cable tie User Guide... -
Page 8: Overview
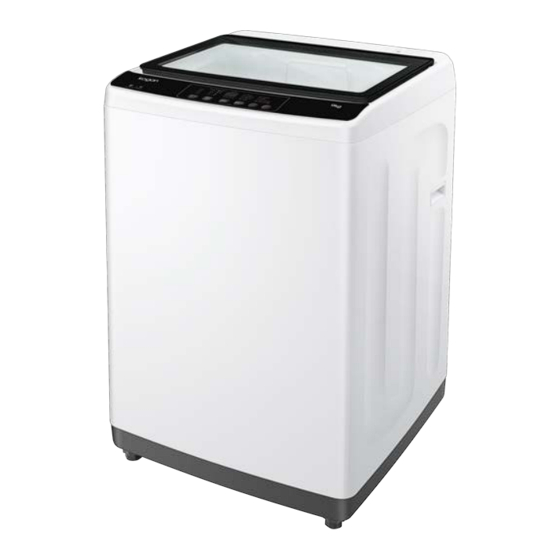
OVERVIEW Water supply Dispenser hose drawer Spin tub Power cord Control Panel Lint Filter Body Pulsator Drain hose Adjustable foot WARNING: Place washing powder directly into the dispenser drawer. Be sure to only use the new water supply hoses. Old water hoses should not be reused. -
Page 9: Installation
INSTALLATION WARNING: Excessive Weight Hazard. • Two or more people are required to move and install the washing machine. • Attempting to do this on your own may result in injuries. Remove the packaging • Pull the carton straight up and over the top of the washing machine. •... - Page 10 Install the bottom plate The bottom plate will help reduce machine noise and ensure optimal performance from the washing machine during operation. Screw Carefully lay the washer on its back. Attach the plate to the bottom of the machine as shown in the figure above. Secure the plate in place using the 2 self-tapping screws.
- Page 11 Install the drain hose • Install the hose clamp onto the drain hose. • Attach the drain hose to the drain outlet on the rear of the washing machine and use the hose clamp to secure it firmly in place. •...
- Page 12 Install the water supply hose For one-touch faucet connectors, follow the steps below: Rubber Loosen the upper connector Upper Connector seal screw. screw Middle connector Note: If the diameter of the water faucet is too large remove the guide Guide plate plate.
- Page 13 Connect the water supply hose to the water inlet valve on the rear of the washing machine. Ensure there are no kinks in the Water hose and that it is not being supply hose crushed. Repeat Steps 1-5 for the remaining water supply hose.
- Page 14 Connect the water supply hose to the water inlet valve on the rear of the washing machine. Ensure there are no kinks in the hose and that it is not being crushed. Repeat Steps 1-5 for the remaining water supply hose. WARNING: Do not overtighten the hoses.
-
Page 15: Operation
OPERATION The operation panel Water Level/Detergent Amount Delay Hour Soak 05 Curtain 01 Mixed Wash 06 Baby 02 Standard Rinse 07 Drum Clean 03 Delicate Spin 08 Drum Drying 04 Quick Residual Minute Process Water Level Delay Program A Dehydration Temp A. - Page 16 D. The “Delay” button • The display shows the time remaining (in minutes) before the cycle will finish. • Push the “Delay” button and the display will show the remaining time for the cycle to finish (in hours). The indicator flashes to indicate that the delay function is operating. •...
- Page 17 Programs Program Properties Program Properties Used for washing heavy Washing mixed fabrics Mixed Curtain fabrics such as curtains or laundry. blankets. Default program, strong cleaning ability. Too Suitable for baby's Standard Baby vigorous for cotton and clothes. linen fabrics. Delicate items that are Drum Cleans the dirt from the Delicate...
- Page 18 WARNING • To guarantee safety, ensure the power point has been properly earthed before use. • Ensure the lid is closed when machine is running otherwise it will automatically stop during spin process and display an error code. • The washer will not work until the water reaches the set water level. •...
-
Page 19: Before First Use
BEFORE FIRST USE Preparation before washing Dry-cleaning Check if the laundry has any special washing instructions. Tie any long strips, fasten buttons and close zippers. The weight of the laundry shall not exceed the rated capacity. Loosen the laundry before placing it evenly in the tub. When the machine is running buttons and studs may cause noise. -
Page 20: Cleaning & Care
CLEANING & CARE A special circulation water flow is designed for this washer; thus, dirt and debris will collect onto the filter. Ensure the filter is cleaned at least once every two weeks. Disconnect the water Remove the inlet valve Clean the filter with a brush supply hose from the filter. - Page 21 Cleaning the pump filter Clean the pump filter at least every two months. Place a rag or towel under the wash filter to avoid wetting the floor. Rotate the filter counter-clockwise and pull it out. Rinse under water and remove any dirt or debris from the filter.
-
Page 22: Specifications
580(W) x 590 (D) x970(H) TROUBLESHOOTING Common occurrences If the machine encounters an error or alarms, refer to the following list. If the problem persists, contact help.Kogan.com for support. Do not dismantle the machine without professional skills. Situation Cause The spinning is intermittent when Redistribute the load evenly. - Page 23 Reset circuit breaker or replace fuse. Do not increase fuse capacity. If the problem is a circuit overload, consult a qualified electrician or contact help.Kogan.com for support. There is some water in the tub This is residual water remaining after the before the first use.
- Page 24 1200mm. The lid is not Close the lid. closed. The water level Contact help.Kogan.com for support. sensor has failed. The machine is Clothing needs to be evenly distributed inside not balanced. tub or the machine needs to be levelled.
- Page 25 NOTES...
- Page 28 Need more information? We hope that this user guide has given you the assistance needed for a simple set-up. For the most up-to-date guide for your product, as well as any additional assistance you may require, head online to help.kogan.com...
Need help?
Do you have a question about the KATTLWASH9A and is the answer not in the manual?
Questions and answers