Advertisement
Quick Links
Professional installation is highly recommended
Save These Instructions. This manual will help you to obtain efficient, dependable
service from the heater, and enable you to order repair parts correctly. Keep in a safe
place for future reference.
SAFETY NOTICE: If this heater is not properly installed, a house fire may result.
For your safety, follow the installation instructions. Never use make-shift
compromises during the installation of this heater. Contact local building or fire
officials about permits, restrictions and installation requirements in your area.
CAUTION! Please read this entire manual before you install or use your new
room heater. Failure to follow instructions may result in property damage, bodily
injury, or even death. Improper Installation Could Void Your Warranty!
ALL PICTURES SHOWN ARE FOR ILLUSTRATIVE PURPOSES ONLY. ACTUAL
PRODUCT MAY VARY DUE TO PRODUCT ENHANCEMENT.
This manual is subject to change without notice.
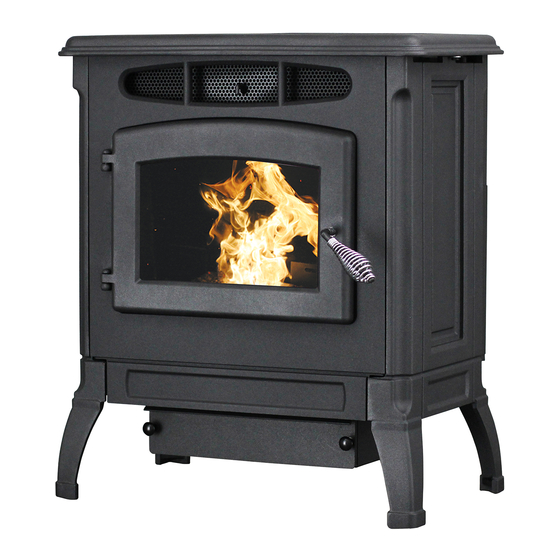
Model: SP4000
227 Industrial Park Rd. • South Pittsburg, TN 37380 •
Phone: 800-750-2723 • Web: www.breckwell.com
Report Number: F20-599
Certified to ASTM Std E1509-12 (2017) and
Certified to ULC S627-00 and (UM) 84-HUD
Approved for mobile home installation in USA and
Canada
U.S. Environmental Protection Agency
Certified to comply with 2020 particulate
Ce produit peut vous exposer à des agents chimiques, y compris au monoxyde de
carbone, lesquels sont reconnus dans l'État de la Californie comme causant le cancer et
emissions standards.
des malformations congénitales ou autres dommages au fœtus. Pour obtenir plus de
renseignements, veuillez consulter le site www.P65warnings.ca.gov
CALIFORNIA PROPOSITION 65 WARNING:
This product can expose you to chemicals including carbon monoxide, which
is known to the State of California to cause cancer, birth defects and/or other
reproductive harm. For more information, go to www.P65warnings.ca.gov
R
853004-1902G
Advertisement

Related Manuals for Breckwell SP4000


Summary of Contents for Breckwell SP4000
- Page 1 State of California to cause cancer, birth defects and/or other reproductive harm. For more information, go to www.P65warnings.ca.gov This manual is subject to change without notice. 227 Industrial Park Rd. • South Pittsburg, TN 37380 • Phone: 800-750-2723 • Web: www.breckwell.com 853004-1902G...
- Page 2 INTRODUCTION This manual describes the installation and operation of the Breckwell, SP4000 wood heater. This heater meets the 2020 U.S. Environmental Protection Agency's crib wood emission limits for wood heaters sold after May 15, 2020. Under specific test conditions this heater has been shown to deliver heat at rates ranging from 4,814 to 32,788 Btu/hr, 0.49 g/hr, and 63% efficiency.
-
Page 3: Safety Precautions
(Per H.U.D. requirements). Check with local building officials. the grounding plug. Do not route the electrical cord underneath, • Breckwell grants no warranty, implied or stated, for the in front of, or over the stove. installation or maintenance of your stove, and assumes no •... -
Page 4: Installation
INSTALLATION Canada: Floor protector should comply with CAN/ULC standards. SPECIFICATIONS Needs to extend 18” to the front, 8” beyond each side of the unit. Width 25-1/4” Clearances are measured from the sides, back and face (door Height 29-1/2” opening) or stove body). DO NOT USE MAKESHIFT MATERIALS OR COMPROMISES IN THE Depth 24-1/4”... - Page 5 in the appliance. Inadequate draft may cause backpuffing into the room and ‘plugging’ of the chimney. Inadequate draft will cause the appliance to leak smoke into the room through appliance and chimney connector joints. An uncontrollable burn or excessive temperature indicates excessive draft. Take into account the chimney’s location to insure it is not too close to neighbors or in a valley which may cause unhealthy or nuisance conditions.
- Page 6 12” MINIMUM CLEARANCE TO ROOF HORIZONTALLY THROUGH WALL After lining up for hole in roof, cut either around or square hole in VERTICAL ROOF VENT roof, always 3” larger all the way around pipe. Install upper edge NOTE: See “VENTING” and follow L-Vent chimney manufacturer’s ATTIC and sides of flashing under roofing materials, nail to the roof INSULATION...
- Page 7 Attach the L-Vent adapter, a section of pipe and clean out tee, making sure the clean out tee is centered in the chimney flue area. Position the stove, adhering to the clearances shown. Measure and build chimney top plate. Cut out holes for chimney pipe, and if used the outside air pipe.
-
Page 8: Operation
OPERATION PANEL CONTROLS incrementally change on the bar graph starting from level “1” to “4”. The blowers and automatic fuel supply are controlled from a panel NOTE: When dropping more than 2 heat level settings (i.e. 4 to 1) on this unit. The control panel functions are as follows. push the ‘High Fan’... - Page 9 11. Unseasoned wood; or installation and elevation. Once fire is established adjust for desired flame increasing the amount the damper is open as 12. Paper products, cardboard, plywood, or particleboard. The the heat setting is increased (see “Damper Control”). prohibition against burning these materials does not prohibit the use of fire starters made from paper, cardboard, saw dust, wax Adjust feed rate to desired setting by pressing “Feed Rate and similar substances for the purpose of starting a fire in an...
- Page 10 • Cleaning heat exchanger tubes – see instructions in • Remove control board from stove. “CLEANING”. • The two thermostat wires connect to the terminal block on the • Scrape ashes from burnpot. lower left side of the back of the control board. SHUTDOWN PROCEDURE •...
-
Page 11: Maintenance
be stored within 12” of the stove. • Do not open stove door when operating unless necessary. This will create a dirty, inefficient burn and could allow smoke • DO NOT STORE OR USE FLAMMABLE LIQUIDS, ESPECIALLY spillage or sparks to escape. GASOLINE, IN THE VICINITY OF YOUR STOVE. - Page 12 SMOKE AND CO MONITORS Burning wood naturally produces smoke and carbon monoxide(CO) emissions. CO is a poisonous gas when exposed to elevated concentrations for extended periods of time. While the modern Auger Combustion combustion systems in heaters drastically reduce the amount of Shaft Blower CO emitted out the chimney, exposure to the gases in closed or...
- Page 13 collect in the exhaust venting system. The exhaust venting Use this as a guide under average-use conditions. Gasket around system should be inspected at least once every year or ton of door and door glass should be inspected and repaired or replaced pellets burned to determine if cleaning is necessary.
-
Page 14: Troubleshooting Guide
TROUBLESHOOTING GUIDE When your stove acts out of the ordinary, the first reaction is to call for help. This guide may save time and money by enabling you to solve simple problems yourself. Problems encountered are often the result of only five factors: 1) poor fuel; 2) poor operation or maintenance; 3) poor installation;... - Page 15 TROUBLESHOOTING GUIDE STOVE SHUTS OFF AND THE #3 LIGHT FLASHES Possible Causes: Possible Remedies: (Unplug stove first when possible) The hopper is out of pellets. Refill the hopper. If burning on the low setting, you may need to close the damper all the way The air damper is too far open for a low feed setting.
- Page 16 TROUBLESHOOTING GUIDE STOVE FEEDS PELLETS, BUT WILL NOT IGNITE Possible Causes: Possible Remedies: Push the air damper in closer to the side of the stove for startup. In some situations it may be necessary to have the damper completely closed for Air damper open too far for ignition.
- Page 17 TROUBLESHOOTING GUIDE STOVE WILL NOT FEED PELLETS, BUT FUEL FEED LIGHT COMES ON AS DESIGNED Possible Causes: Possible Remedies: Remove the control board. If the fuse appears to be bad, replace it with a 5 Fuse on control board blew Amp 125 Volt fuse.
- Page 18 TROUBLESHOOTING GUIDE • GLASS “SOOT’S” UP AT A VERY FAST RATE • FLAME IS LAZY, DARK, AND HAS BLACK TIPS • AFTER STOVE HAS BEEN ON FOR A WHILE, THE BURNPOT OVERFILLS Possible Causes: Possible Remedies: Stove or vent pipe is dirty, which restricts airflow through Follow all cleaning procedure in the maintenance section of the owner’s the burnpot.
-
Page 19: Electrical Diagram
ELECTRICAL DIAGRAM... -
Page 20: Replacement Parts
REPLACEMENT PARTS... - Page 21 REPLACEMENT PARTS Part # Description 69965 Burnpot 25589 Maintenance Tool 80607 Ignitor Cartridge 891987 Damper Knob, Plastic 610330 Circuit Board / Control Panel 80642 Auger Motor 80549 Pressure Switch 80647 Distribution Blower 80641 Exhaust Blower 80610 Thermodisc 60T21 Low Limit 80683 Thermodisc, High Temp AG-RCN...
- Page 22 NOTES...
- Page 23 NOTES...
-
Page 24: Service Record
SERVICE RECORD Service Record It is recommended that your heating system is serviced regularly and that the appropriate Service Interval Record is completed. SERVICE PROVIDER Before completing the appropriate Service Record below, please ensure you have carried out the service as described in the manufacturer’s instructions. - Page 25 1. Le numéro de pièce ___________________________________________________________ 2. La description de la pièce ______________________________________________________ 3. Le numéro de modèle _________________________________________________________ 4. Le numéro de série ____________________________________________________________ 227 Industrial Park Rd. • South Pittsburg, TN 37380 • Phone: 800-750-2723 • Web: www.breckwell.com...
Need help?
Do you have a question about the SP4000 and is the answer not in the manual?
Questions and answers