Breckwell SP22 Manual
Hide thumbs
Also See for SP22:
- Instruction and operation manual (60 pages) ,
- Owner's manual (31 pages)
Advertisement
Quick Links
Please read this entire manual before installation and use of this appliance. Failure to follow these instructions could result in property
damage, bodily injury, or even death. Contact your local building or fire officials about obtaining permits, restrictions and installation
Save these instructions. This manual will help you to obtain efficient, dependable service from the heater, and enable you to order repair
If your heater is not properly installed, a house fire may result. For everyone's safety, follow all Installation and Operating Directions.
Never use makeshift compromises during the installation of this appliance. Contact your local building or fire officials about restrictions
Ce produit peut vous exposer à des agents chimiques, y compris au monoxyde de
and installation inspection requirements in your area. These Pellet Stove Room Heaters have been designed for use in the US and
carbone, lesquels sont reconnus dans l'État de la Californie comme causant le cancer et
des malformations congénitales ou autres dommages au fœtus. Pour obtenir plus de
renseignements, veuillez consulter le site www.P65warnings.ca.gov
CALIFORNIA PROPOSITION 65 WARNING:
This product can expose you to chemicals including carbon monoxide, which
is known to the State of California to cause cancer, birth defects and/or other
reproductive harm. For more information, go to www.P65warnings.ca.gov
Certified to ASTM E1509-12 (2017),
and Certified to ULC S627, 2000, and
ULC S628
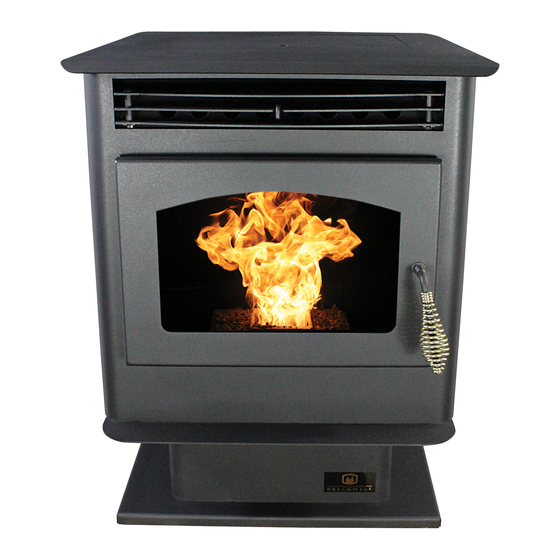
Model : SP22
inspection requirements in your area.
parts correctly. Keep in a safe place for future reference.
Canada and are suitable for mobile homes.
227 Industrial Park Rd. • South Pittsburg, TN 37380 •
Phone: 800-750-2723 • Web: www.breckwell.com
U.S. Environmental Protection Agency
Certified to comply with 2020 particulate
emissions standards.
852178G-1603J
Advertisement

Related Manuals for Breckwell SP22


Summary of Contents for Breckwell SP22
- Page 1 For more information, go to www.P65warnings.ca.gov Certified to ASTM E1509-12 (2017), and Certified to ULC S627, 2000, and 227 Industrial Park Rd. • South Pittsburg, TN 37380 • ULC S628 Phone: 800-750-2723 • Web: www.breckwell.com 852178G-1603J...
- Page 2 INTRODUCTION This manual describes the installation and operation of the Breckwell, SP22 wood heater. This heater meets the 2020 U.S. Environmental Protection Agency's crib wood emission limits for wood heaters sold after May 15, 2020. Under specific test conditions this heater has been shown to deliver heat at rates ranging from 4,814 to 32,788 Btu/hr, 0.49 g/hr, and 63% efficiency.
-
Page 3: Safety Precautions
The exhaust system should be checked, at a minimum, at least • Breckwell grants no warranty, implied or stated, for the twice a year for any build up of soot or creosote. installation or maintenance of your stove, and assumes no... -
Page 4: Installation
INSTALLATION 36” (915 mm) max. Freestanding * WITH HORIZONTAL EXHAUST Width 22-1/2” (572 mm) 38” (966 mm) min. Backwall Height 28-1/2” (724 mm) 3” 48” With Depth 24” (610 mm) 77 mm *1” Vertical (1220 mm) 26 mm Exhaust Weight 185 lbs (84 kg) min. - Page 5 WHEN OUTSIDE AIR IS NOT USED Freestanding Installations - The stove must be placed on a continuous (grouted joints) noncombustible material such as ceramic tile, If outside air is not used, it is important that combustion air is easily cement board, brick, 3/8” (10 mm) millboard or equivalent, or other available to the air inlet.
- Page 6 FREESTANDING INSTALLATIONS Locate terminations: a) not less than 3 feet (0.9 m) above any forced air inlet located within 10 feet (3 m); b) not less than 4 feet (1.2 m) ASSEMBLING PEDESTAL OR LEG SET below or horizontally from, or one foot above, any door, window or If using a pedestal, follow the instructions inside the units pedestal gravity air inlet into any building;...
- Page 7 Install the tee on the bottom of the vertical pipe system and lower it down the chimney until the center branch of the tee is level with the center of the hole in the masonry, as shown. BRECKWELL ZC ADJUSTABLE LEGS FIGURE 14...
- Page 8 EXHAUST PIPE HEARTH INSTALLATION ASSEMBLING THE FLASHING SET Attach flashing, route power cord out the side nearest a 120V FIGURE 14 receptacle. Slide the insert in. Follow the instructions packaged with the flashing set. TOP PLATE (SEAL TO CHIMNEY TOP WITH 3”...
- Page 9 AS A BUILT-IN FIREPLACE lips, screen or door tracks and damper assemblies. These items must be reinstalled to restore the fireplace to its original operating The figures describe this stoves installation vented into either condition if the insert is removed and not replaced. The removal of a special chase built outside an outer wall or a false inside wall.
-
Page 10: Operation
Refer to the “Venting” section of this manual for proper to serious performance problems. This stoves electrical system is exhaust configurations. designed for 120V AC with no more than 5% variation. Breckwell CAUTION: THE STRUCTURAL INTEGRITY OF THE MOBILE HOME cannot accept responsibility for poor performance or damage due FLOOR, WALL AND CEILING/ROOF MUST BE MAINTAINED. - Page 11 Poor quality pellets could damage • This button when pushed will set the pellet feed rate, hence the auger. Breckwell cannot accept responsibility for damage the heat output of your stove. The levels of heat output will due to poor quality pellets.
- Page 12 DAMPER CONTROL TAMPER WARNING The damper control rod is necessary due to the varied burn This wood heater has a manufacturer-set minimum low burn rate characteristics of individual installations, different pellet brands that must not be altered. It is against federal regulations to alter and pellet feed rates.
- Page 13 THERMOSTAT INSTALLATION Attempts to achieve heat output rates that exceed heater design specifications can result in permanent damage to the heater. • A MILLIVOLT THERMOSTAT IS REQUIRED. WARNING: DURING THE START UP CYCLE; 1) DO NOT OPEN • Unplug stove from power outlet. THE VIEWING DOOR;...
-
Page 14: Maintenance
MAINTENANCE FAILURE TO CLEAN AND MAINTAIN THIS UNIT AS INDICATED CAN SMOKE AND CO MONITORS RESULT IN POOR PERFORMANCE AND SAFETY HAZARDS. NEVER Burning wood naturally produces smoke and carbon monoxide(CO) CLEAN WHEN HOT. emissions. CO is a poisonous gas when exposed to elevated NOTE: Inspect burn pot periodically to see that holes have not concentrations for extended periods of time. - Page 15 NOTE: When removing the upper baffles do not remove the screws; The creosote should be removed with a brush specifically designed just loosen them enough to allow the baffles to be removed. for the type of chimney in use. A qualified chimney sweep can Periodically, you must vacuum ashes from this chamber.
-
Page 16: Troubleshooting Guide
TROUBLESHOOTING GUIDE When your stove acts out of the ordinary, the first reaction is to call for help. This guide may save time and money by enabling you to solve simple problems yourself. Problems encountered are often the result of only five factors: 1) poor fuel; 2) poor operation or maintenance; 3) poor installation;... - Page 17 TROUBLESHOOTING GUIDE STOVE SHUTS OFF AND THE #3 LIGHT FLASHES Possible Causes: Possible Remedies: (Unplug stove first when possible) The hopper is out of pellets. Refill the hopper The air damper is too far open for a low feed If burning on the low setting, you may need to close the damper all the way (push the setting.
- Page 18 TROUBLESHOOTING GUIDE SMOKE SMELL COMING BACK INTO THE HOME Possible Causes: Possible Remedies: Inspect all vent pipe connections. Make sure they are sealed with RTV silicone that has a temperature rating of 500°F or higher. Also, seal joints with UL-181-AP foil There is a leak in the vent pipe system.
- Page 19 TROUBLESHOOTING GUIDE GLASS “SOOTS” UP AT A VERY FAST RATE FLAME IS LAZY, DARK AND HAS BLACK TIPS AFTER STOVE HAS BEEN ON FOR A WHILE, THE BURNPOT OVERFILLS Possible Cause: Possible Remedies: Stove or vent pipe is dirty, which restricts airflow Follow all cleaning procedure in the maintenance section of the owner’s manual.
- Page 20 TROUBLESHOOTING GUIDE HIGH LIMIT SWITCH KEEPS TRIPPING Possible Causes: Possible Remedies: The convection blower is overheating and tripping Clean any dust off the windings and fan blades. If oiling the blower does not help, the the internal temperature shutoff. blower may be bad The highest level setting is designated for use over short periods of time.
-
Page 21: Electrical Diagram
ELECTRICAL DIAGRAM MOLEX CONNECTOR ONG GRY PNK BLU YEL ONG GRY BRN BRN WHT BLK BROWN MOLEX CONNECTOR DETAIL BROWN POF THERMODISC GROUND AIR SWITCH HOPPER HIGH TEMP. IGNITOR SWITCH THERMODISC PURPLE AUGER MOTOR WHITE COMBUSTION CONVECTION BLOWER BLOWER POWER OUTLET DETAIL LOOKING FROM THE REAR WHITE WHITE... -
Page 22: Replacement Parts
REPLACEMENT PARTS Part # Description 88208 Blower Blanket 610054 Top Plate Assembly 69969 Igniter Housing Assembly 88217 Top Insulation 80461 Power Supply Cord 27777 Exhaust Diverter 88202 Igniter Housing Gasket 891121 Pressure Switch Tubing 610058 Pedestal Assembly 27033 PSS Fs Side Sheet Left 25589 Poker, Burnpot 27035... - Page 23 REPLACEMENT PARTS...
-
Page 24: Service Record
SERVICE RECORD Service Record It is recommended that your heating system is serviced regularly and that the appropriate Service Interval Record is completed. SERVICE PROVIDER Before completing the appropriate Service Record below, please ensure you have carried out the service as described in the manufacturer’s instructions. - Page 25 1. Le numéro de pièce ___________________________________________________________ 2. La description de la pièce ______________________________________________________ 3. Le numéro de modèle _________________________________________________________ 4. Le numéro de série ____________________________________________________________ 227 Industrial Park Rd. • South Pittsburg, TN 37380 • Phone: 800-750-2723 • Web: www.breckwell.com...
Need help?
Do you have a question about the SP22 and is the answer not in the manual?
Questions and answers