Table of Contents
Advertisement
Quick Links
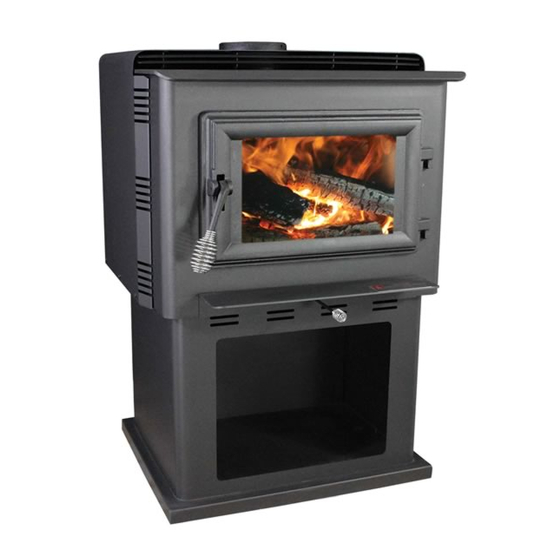
Owner's Operation and Instruction Manual
US ENVIRONMENTAL PROTECTION AGENCY PHASE II CERTIFIED WOODSTOVE
CAUTION!
Please read this entire manual before you
install or use your new room heater.
to follow instructions may result in property
damage, bodily injury, or even death.
Improper Installation Could Void
Your Warranty!
THIS MANUAL WILL HELP YOU TO OBTAIN EFFICIENT, DEPENDABLE SERVICE FROM THE HEATER, AND ENABLE YOU
TO ORDER REPAIR PARTS CORRECTLY. KEEP IN A SAFE PLACE FOR FUTURE REFERENCE.
French version is available for download from the U. S. Stove website: http://www.Breckwell.com/
S
C
U
S
BRECKWELL
Exceptional Heat, Outstanding Value
MODELS: SW2100, SW3100
SAFETY TESTED TO UL 1482-2011 and ULC-S627-2000
WASHINGTON STATE APPROVED
MOBILE HOME APPROVED (U.S. ONLY)
Failure
SAVE THESE INSTRUCTIONS
United States Stove Company
227 Industrial Park Road
P.O. Box 151
South Pittsburg, TN 37380
SAFETY NOTICE:
If this heater is not properly installed, a house
fire may result. For your safety, follow the in-
stallation instructions. Never use make-shift
compromises during the installation of this
heater. Contact local building or fire officials
about permits, restrictions and installation
requirements in your area.
®
TESTED &
PORTLAND,
LISTED BY
OREGON, USA
SW2100 Report #: 215-S-29c-4
SW3100 Report #: 215-S-23c-4
851981
Advertisement
Table of Contents

Related Manuals for Breckwell SW2100


Summary of Contents for Breckwell SW2100
- Page 1 THIS MANUAL WILL HELP YOU TO OBTAIN EFFICIENT, DEPENDABLE SERVICE FROM THE HEATER, AND ENABLE YOU TO ORDER REPAIR PARTS CORRECTLY. KEEP IN A SAFE PLACE FOR FUTURE REFERENCE. French version is available for download from the U. S. Stove website: http://www.Breckwell.com/ United States Stove Company TESTED &...
- Page 2 Black or Blued Steel 2100°F (650°C) Minimum Chimney Hieght : 12’ (3.7m) Maximum Log Length : 21” (53.4cm) Dimensions ” Overall : SW2100 23” x 27 ” x 34 (58cm x 69cm x 87cmm) Depth x Width x Height : ” SW3100 ” x 27 ”...
- Page 3 WARRANTY INFORMATION CARD Name__________________________________________ Telephone #: (_____)_____________ City____________________________________________ State_______ Zip_________________ Email Address __________________________________________________________________ Model # of Unit________________________________ Serial #___________________________ Fuel Type: qWood qOther _________________________ qCoal qPellet qGas Place of Purchase (Retailer)______________________________________________________ City____________________________________________ State_______ Zip_________________ If internet purchase, please list website address___________________________________ Date of Purchase _______________________________________________________________ Reason for Purchase: qAlternative Heat...
- Page 4 Ê É Fold Here Fold Here Fold Here PlACE STAMP HERE United States Stove Company P.O. Box 151 South Pittsburg, TN 37380 Ussc...
- Page 5 1. Mount the flue collar to the top of the unit as shown using the (3) 5/16-18 x 1-1/2 bolts, (3) washers, and (3) weld tabs provided in the parts box. Firebrick Configuration: 1. Replace the Firebrick as shown in the illustration below. Side view of flue collar 5/16-18 x 1-1/2 mount to heater top BOLT HEATER WELD Brick Configuration SW2100 SW3100 Ussc...
-
Page 6: Assembly Instructions
Then attach it to the adapter on the appliance. Make a 2” x 6” (51mm x 152mm) cutout through both the oor protector and home’s ooring within the perimeter of the appliance’s base. SW2100 Foot Print Non-Combustible Floor SW3100 Foot Print Rodent Screen FLOOR PROTECTOR Home’s Floor “Combustion Air thru Unit Base”... -
Page 7: Installation
INSTALLATION SAFETY NOTICE • IF THIS STOVE IS NOT PROPERLY INSTALLED, A HOUSE FIRE MAY RESULT. TO REDUCE THE RISK OF FIRE, FOLLOW THE INSTALLATION INSTRUCTIONS. • CONSULT YOUR MUNICIPAL BUILDING DEPARTMENT OR FIRE OFFICIALS ABOUT PERMITS, RESTRICTIONS AND INSTALLATIONS REQUIREMENTS IN YOUR AREA. • USE SMOKE DETECTORS IN THE ROOM WHERE YOUR STOVE IS INSTALLED. • KEEP FURNITURE AND DRAPES WELL AWAY FROM THE STOVE. • NEVER USE GASOLINE, GASOLINE-TYPE LANTERN FUEL, KEROSENE, CHARCOAL LIGHTER FLUID, OR SIMILAR LIQUIDS TO START OR “FRESHEN UP” A FIRE IN THIS HEATER. KEEP ALL SUCH LIQUIDS WELL AWAY FROM THE HEATER WHILE IT IS IN... -
Page 8: Floor Protector
4” brick C=1.25, R=1/1.25=0.8 1/8” mineral board K=0.29, R=1/0.29 x 0.125=0.431 Total R = Rbrick + Rmineral = 0.8 + 0.431 = 1.231 Total R is greater than 1.2, the system is acceptable. The floor protector should exceed the stove as follows: The floor protector must be listed to UL1618 Model Front Sides Rear SW2100 25” 8” ¶6” (635mm) (203mm) (152mm) SW3100 26” 8”... -
Page 9: Clearances To Combustibles
CLEARANCES TO COMBUSTIBLES It is of utmost importance that the clearances to combustible materials be strictly adhered to during installation of the stove. Refer to the tables below : Single Wall Pipe (Double Wall Pipe) Model SW2100 20(14) 22(20) 22.5(16.5) 32(30) -
Page 10: Chimney Connector (Stove Pipe)
CHIMNEY CONNECTOR (STOVE PIPE) Your chimney connector and chimney must have the same diameter as the stove outlet (6”). If this is not the case, we recommend you contact your dealer in order to insure there will be no problem with the draft. - Page 11 CHIMNEY Your wood stove may be hooked up with a 6” factory built or masonry chimney. If you are using a fac- tory built chimney, it must comply with UL 103 or CSA-B365 standard; therefore it must be a Type HT (2100°F). It is extremely important that it be installed according to the manufacturer’s specifications. If you are using a masonry chimney, it is important that it be built in compliance with the specifica- tions of the National Building Code. It must be lined with fire clay bricks, metal or clay tiles sealed together with fire cement. (Round flues are the most efficient). The interior diameter of the chimney flue must be identical to the stove smoke exhaust. A flue which is too small may cause draft problems, while a large flue favours rapid cooling of the gas, and hence the build-up of creosote and the risk of chimney fires. Note that it is the chimney and not the stove which creates the draft effect; your stove’s performance is directly dependent on an adequate draft from your chimney.
-
Page 12: Factory Built Chimney
FACTORY BUILT CHIMNEY : When a metal prefabricated chimney is used, the manufacturer’s installation instructions must be followed. You must also purchase (from the same manufacturer) and install the ceiling support package or wall pass-through and “T” section package, firestops (where needed), insulation shield, roof flashing, chimney cap, etc. Maintain proper clearance to the structure as recommended by the manufacturer. The chimney must be the required height above the roof or other obstructions for safety and proper draft operation. -
Page 13: Masonry Chimney
MASONRY CHIMNEY : Ensure that a masonry chimney meets the minimum standards of the National Fire Protection As- sociation (NFPA) by having it inspected by a professional. Make sure there are no cracks, loose mortar or other signs of deterioration and blockage. Have the chimney cleaned before the stove is installed and operated. When connecting the stove through a combustible wall to a masonry chim- ney, special methods are needed. - Page 14 Combustible Wall Chimney Connector Pass-Throughs Method A. 12” (304.8 mm) Clearance to Combustible Wall Mem- ber: Using a minimum thickness 3.5” (89 mm) brick and a 5/8” (15.9 mm) minimum wall thickness clay liner, construct a wall pass- through. The clay liner must conform to ASTM C315 (Standard Specification for Clay Fire Linings) or its equivalent. Keep a mini- mum of 12”...
-
Page 15: Outside Combustion Air
OUTSIDE COMBUSTION AIR For mobile home installations, your wood stove must be have a fresh air intake installed. This type of installation is also required in air tight houses and houses with negative pressure problems. You can either purchase a dryer venting kit from your local hardware supply or cut a hole in the flooring protector and home’s floor as shown in the illustration at the beginning of this manual. Outside combustion air may be required if : 1. -
Page 16: Testing Your Wood
WOODSTOVE UTILIZATION Your heating unit was designed to burn wood only; no other materials should be burned. Waste and other flammable materials should not be burned in your stove. Any type of wood may be used in your stove, but specific varieties have better energy yields than others. Please consult the following table in order to make the best possible choice. TYPE WEIGHT PER CORD EFFICIENCY SPLITS MILLIONS (LBS. CU. FT., RANKING BTU’s/CORD DRY) Hickory 4500 Well 31.5 White Oak 4100 Fair 28.6... -
Page 17: The First Fires
When you have achieved a good bed of hot embers, we recommend the following burn procedures: SW2100 Primary Air Settings... -
Page 18: To Prevent Creosote Build Up
WARNINGS • NEVER OVERFIRE YOUR STOVE. IF ANY PART OF THE STOVE STARTS TO GLOW RED, OVER FIRING IS HAPPENING. READJUST THE AIR INTAKE CONTROL AT A LOWER SETTING. • THE INSTALLATION OF A LOG CRADLE or GRATES IS NOT RECOMMENDED IN YOUR WOOD STOVE. BUILD FIRE DIRECTLY ON FIREBRICK. • NEVER PUT WOOD ABOVE THE FIREBRICK LINING OF THE FIREBOX. RELOADING Once you have obtained a good bed of embers, you should reload the unit. In order to do so, open the air controls to maximum a few seconds prior to opening the stove’s door. -
Page 19: Ash Disposal
ASH DISPOSAL Ashes should be removed from the stove every few days or when ashes get to 2 to 3 inches deep. Always empty the stove when it is cold, such as in the morning. Ashes should be placed in a steel container with a tight fitting lid. The closed container of ashes should be placed on a non combustible floor or on the ground, well away from all combustible materials, pending final disposal. If the ashes are disposed of by burial in soil or otherwise locally dispersed, they should be retained in the close... - Page 20 REPAIR PARTS (SW2100) 11 12 13 Ussc...
- Page 21 REPAIR PARTS LIST (SW2100) Part No. Part No. Description Description Qty. Qty. Part No. Part No. Description Description Qty. Qty. 891749 Weld., Main Body 88042 1/4” Rope Gasket 86643 Tube (Ø5/32) . Secondary Air 69665 Assembly, Pedestal 88146 Board, Ceramic Fiber...
- Page 22 REPAIR PARTS (SW3100) 18 19 10 11 Ussc...
- Page 23 REPAIR PARTS LIST (SW3100) Part No. Part No. Description Description Qty. Qty. Part No. Part No. Description Description Qty. Qty. 891529 Weld., Main Body 40292A 6” Flue Collar 86643 Tube (Ø5/32) . Secondary Air 88042 1/4” Rope Gasket 88138 Board, Ceramic Fiber 83431 Weld Tab 86645...
-
Page 24: How To Order Repair Parts
HOW TO ORDER REPAIR PARTS THIS MANUAL WILL HELP YOU OBTAIN EFFICIENT, DEPENDABLE SERVICE FROM YOUR HEATER, AND ENABLE YOU TO ORDER REPAIR PARTS COR- RECTLY. KEEP THIS MANUAL IN A SAFE PLACE FOR FUTURE REFERENCE. WHEN WRITING, ALWAYS GIVE THE FULL MODEL NUMBER WHICH IS ON THE NAMEPLATE ATTACHED TO THE HEATER. WHEN ORDERING REPAIR PARTS, ALWAYS GIVE THE FOLLOWING INFOR- MATION AS SHOWN IN THIS LIST: 1. THE PART NUMBER 2. THE PART DESCRIPTION 3. THE MODEL NUMBER: _______________________ 4. THE SERIAL NUMBER: _______________________ US Stove Company 227 Industrial Park Road P.O. Box 151 South Pittsburg, TN 37380 Phone: (800) 750-2723 Web: www.BRECKWELL.com Ussc...
Need help?
Do you have a question about the SW2100 and is the answer not in the manual?
Questions and answers