Table of Contents
Advertisement
Owner's Instruction and Operation Manual
Model Number:
SP24i
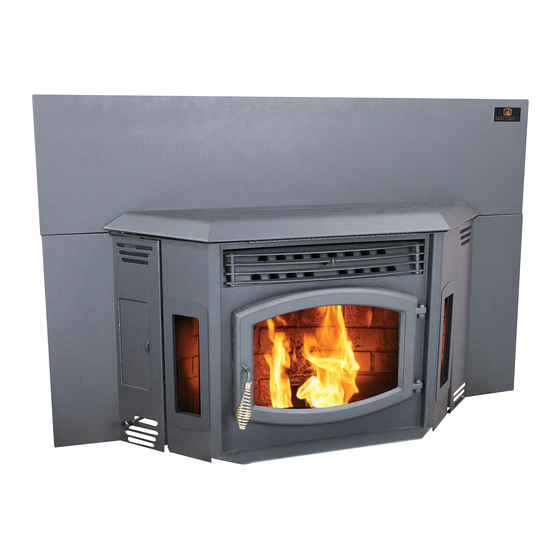
* All Pictures In This Manual Are For Illustrative Purposes Only. Actual Product May Vary.
SAFETY NOTICE: If this heater is not properly installed, a house fire may result. For your
safety, follow the installation instructions. Never use make-shift compromises during the
installation of this heater. Contact local building or fire officials about permits, restrictions
and installation requirements in your area. NEVER OPERATE THIS PRODUCT WHILE
UNATTENDED.
CAUTION! Please read this entire manual before you install or use your new room
heater. Failure to follow instructions may result in property damage, bodily injury, or
even death. Improper Installation Will Void Your Warranty!
U.S. Environmental Protection Agency
Certified to comply with 2020 particulate
emissions standards.
© 2020 Breckwell Hearth South Pittsburg, TN 37380
Save These Instructions In A Safe Place For Future Reference.
THIS MANUAL IS SUBJECT TO CHANGE WITHOUT NOTICE.
CALIFORNIA PROPOSITION 65 WARNING:
This product can expose you to chemicals including carbon
monoxide, which is known to the State of California to cause
cancer, birth defects, and/or other reproductive harm. For
more information, go to
www.breckwell.com
852188J-4404J
www.P65warnings.ca.gov
PH. 423-403-4031
Advertisement
Table of Contents

Related Manuals for Breckwell SP24i


Summary of Contents for Breckwell SP24i
- Page 1 State of California to cause emissions standards. cancer, birth defects, and/or other reproductive harm. For more information, go to www.P65warnings.ca.gov THIS MANUAL IS SUBJECT TO CHANGE WITHOUT NOTICE. © 2020 Breckwell Hearth South Pittsburg, TN 37380 www.breckwell.com PH. 423-403-4031...
- Page 2 INTRODUCTION This manual describes the installation and operation of the Breckwell, SP24(i) wood heater. This heater meets the 2020 U.S. Environmental Protection Agency’s crib wood emission limits for wood heaters sold after May 15, 2020. Under specific test conditions this heater has been shown to deliver heat at rates ranging from 4,814 to 32,788 Btu/hr, 0.49 g/hr, and 63% efficiency.
-
Page 3: Installation Checklist
Your Wood Stove should be installed by a qualified installer only. An NFI qualified Installer can be found at www.nficertified. org/public/find-an-nfi-pro/ For customer service, please contact your Breckwell dealer or visit www.Breckwell.com COMMISSIONING CHECKLIST This checklist is to be completed in full by the qualified person who installs this unit. Keep this page for future reference. -
Page 4: Installation
INSTALLATION FOR CUSTOMER ASSISTANCE CALL YOUR BRECKWELL DEALER OR EMAIL: WWW.BRECKWELL.COM SAFETY NOTICE CAUTION: • IF THIS STOVE IS NOT PROPERLY INSTALLED, A HOUSE • DO NOT UNPLUG THE STOVE IF YOU SUSPECT A FIRE MAY RESULT. TO REDUCE THE RISK OF FIRE, MALFUNCTION. -
Page 5: Floor Protection
A rodent guard (minimum 1/4” wire mesh)/wind hood must be used at the terminus. Back Wall to Stove *2” 51 mm Wall to Vent Pipe 3” 77 mm Stove Corner To Wall 3” 77 mm * With Horizontal Exhaust © 2020 Breckwell Hearth... - Page 6 4. Rotate exhaust assembly and reinstall. Reuse the four depends on the length of the chimney, local geography, screws to secure the exhaust chamber to the exhaust nearby obstructions and other factors. Too much draft may blower. © 2020 Breckwell Hearth...
-
Page 7: Equivalent Vent Length (Evl)
This is a pressurized exhaust system. All vent connector 4. Install L-Vent wall thimble per L-Vent manufacturer’s joints must be sealed with 500°F (260°C) RTV silicone instructions. sealant to ensure consistent performance and avoid smoke © 2020 Breckwell Hearth... - Page 8 7 feet above grade when located adjacent to a public walkway. Mobile VERTICAL home installations must use a spark arrester. INSTALL KIT © 2020 Breckwell Hearth...
-
Page 9: Vertically Into Existing Chimney System
Use RTV, metallic tape, and a minimum of three self-taping screws at all joint NOTE: THIS connections to ensure a tight seal. PELLET METHOD IS 5. Position the stove, adhering to the clearances provided VENT PREFERRED in this manual. © 2020 Breckwell Hearth... -
Page 10: Installation Through Side Of Masonry Chimney
1/4” stainless steel 1. You will need a pipe length equal to the chimney height sheet metal screws. Seal all joints and seams around (from hearth) plus 6 inches. If outside combustion the collar. © 2020 Breckwell Hearth... - Page 11 2. Attach cerablanket wrap to that end of vent pipe that maintained. will connect to the stove. Use 12-inch lengths of light gauge metal wire (not included) or metallic tape. This is to protect interior components from excess heat. © 2020 Breckwell Hearth...
-
Page 12: Installation In To A Factory Built (Metal) Fireplace
Means must be provided for removal of the insert to clean the chimney flue. A permanent metal warning label must be attached to the back wall of the fireplace opening stating the following: © 2020 Breckwell Hearth... -
Page 13: Operation
10 and up to 15 minutes, depending on when graph the low feed rate is at its “highest” setting. (Approx. Proof of Fire is reached. The fire should start in about 5 1.1 to 1.2 pounds per hour) to 7 minutes. © 2020 Breckwell Hearth... -
Page 14: Manual Mode
A thermostat may help you maintain a constant house temperature automatically. A millivolt thermostat is required. The control panel can be set up two ways to operate your stove in thermostat mode. © 2020 Breckwell Hearth... -
Page 15: Proper Fuel
5/16” diameter, length no greater than 1.5”, not less than air holes are plugged. Clean the firebox, and then reinstall 8,200 BTU/lb, moisture under 8% by weight, ash under burn pot. Clean door glass if necessary (a dry cloth or paper © 2020 Breckwell Hearth... -
Page 16: Opening Door
Providing correct combustion air will go out and the two digit display will begin flashing will reduce the frequency of cleaning your glass door and “E3” prevent the rapid buildup of creosote inside your stove and © 2020 Breckwell Hearth... -
Page 17: Maintenance Tool
A. To recognize an overheat situation in the stove and shut down the fuel feed or auger system. B. In case of a malfunctioning convection blower, the high- temperature thermodisc will automatically shut down the auger, preventing the stove from overheating. © 2020 Breckwell Hearth... - Page 18 If a vacuum is used to clean your stove, we suggest using TRAINED TECHNICIAN. the AV15E AshVac vacuum. The AV15E AshVac is designed for ash removal. Some regular vacuum cleaner (i.e. shop vacs) may leak ash into the room. DO NOT VACUUM HOT ASH. © 2020 Breckwell Hearth...
-
Page 19: Maintenance
This accumulates in the horizontal portion of an exhaust Remove optional imitation log set, if in use. Remove burn pot by grasping and pulling straight out. © 2020 Breckwell Hearth Empty ashes from burn pot. Scrape burn pot with cleaning tool. Make sure FIGURE 24 burnpot holes are not plugged. -
Page 20: Blower Motors
Check the hopper periodically to determine if there is any your authorized dealer to obtain a can of suitable high- sawdust (fines) that is building up in the feed system or temperature paint. © 2020 Breckwell Hearth... -
Page 21: Spring Shutdown
Other information that may be needed would be the part number and part description of the item(s) in question. Part numbers and descriptions can be found in the “Repair Parts” section of this manual. Once this information has been gathered you can contact your Breckwell dealer or visit www.Breckwell.com Model Information Model Number Dealer’s Name... -
Page 22: Troubleshooting Guide
The control board is not sending power to the POF There should be a 5-volt (approximately) current going to the POF thermodisc or other auger system components. thermodisc after the stove has been on for 10 minutes. © 2020 Breckwell Hearth... -
Page 23: Smoke Smell Coming Back Into The Home
Circuit board malfunction. fine. If there is NOT power being sent to the blower when it shuts off during operation, then you have a bad control board. © 2020 Breckwell Hearth... - Page 24 Bad control board If there is not a full current going to the auger motor when the fuel feed light is on, you have a bad control board. © 2020 Breckwell Hearth...
- Page 25 RATE Only) If the stove is being burned on one of the two lower settings, advance to the next trim setting and try burning the stove. © 2020 Breckwell Hearth...
-
Page 26: Smoke Smell Or Soot Build-Up
Also clean your stove, following instructions in “MAINTENANCE”. If problem persists, contact your dealer. ATTENTION: THIS WOOD HEATER NEEDS PERIODIC INSPECTION AND REPAIR FOR PROPER OPERATION. IT IS AGAINST FEDERAL REGULATIONS TO OPERATE THIS WOOD HEATER IN A MANNER INCONSISTENT WITH OPERATING INSTRUCTIONS IN THIS MANUAL. © 2020 Breckwell Hearth... -
Page 27: Repair Parts
REPAIR PARTS © 2020 Breckwell Hearth... - Page 28 610341 Louver Assembly 80642 Drive Motor (1 RPM CCW) 27649 Bay Window Trim Piece 892231 Auger Flight 88174 Side Gasket 891132 Agitator Bushing 892614 Side Glass SP24I 80647 Blower, Distribution 610339 SP24I Lid Assy 88252 Flue Gasket 80684 Control Plate 27986...
-
Page 29: Wiring Diagram
MOTOR WHITE COMBUSTION CONVECTION BLOWER BLOWER POWER OUTLET DETAIL LOOKING FROM THE REAR WHITE WHITE OF THE STOVE ENSURE THE WIRES ARE CONNECTED TO THE BOTTOM TWO PRONGS OF THE HOPPER SWITCH AS SHOWN. CORRECT WRONG © 2020 Breckwell Hearth... -
Page 30: Service Record
Engineer Name: _________________________________ Engineer Name: _________________________________ License No.: _____________________________________ License No.: _____________________________________ Company: ______________________________________ Company: ______________________________________ Telephone No.: __________________________________ Telephone No.: __________________________________ Stove Inspected: Chimney Swept: Stove Inspected: Chimney Swept: Items Replaced: __________________________________ Items Replaced: __________________________________ © 2020 Breckwell Hearth... - Page 31 NOTES © 2020 Breckwell Hearth...
Need help?
Do you have a question about the SP24i and is the answer not in the manual?
Questions and answers