Table of Contents
Advertisement
Quick Links
Advertisement
Table of Contents

Related Manuals for Insportline inCondiT30i


Summary of Contents for Insportline inCondiT30i
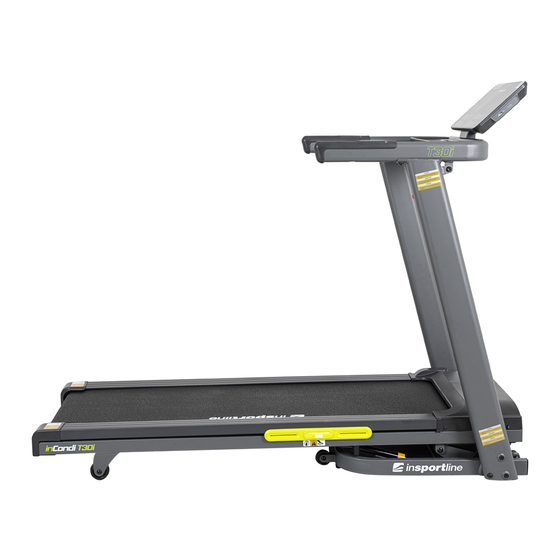
- Page 1 USER MANUAL – EN IN 21318 Treadmill inSPORTline inCondiT30i...
-
Page 2: Table Of Contents
CONTENTS SAFETY INSTRUCTIONS ........................3 ASSEMBLY ............................. 4 TRANSPORTATION ..........................11 CONSOLE ............................. 12 MAINTENANCE GUIDE ........................14 ADJUSTING THE RUNNING BELT....................14 LUBRICATING THE TREADMILL ..................... 15 TROUBLESHOOTING .......................... 16 DIAGRAM .............................. 18 PARTS LIST ............................20 ENVIRONMENT PROTECTION ......................21 TERMS AND CONDITIONS OF WARRANTY, WARRANTY CLAIMS .......... -
Page 3: Safety Instructions
SAFETY INSTRUCTIONS • Read the manual carefully and keep it for future reference. • Always clip the safety key to your clothes or belt before starting exercising. • Move naturally, forward. Do not look on your feet. Only for one person can use the product on the same time. -
Page 4: Assembly
• Do not expose to direct sunlight. • Do not place in areas with high humidity (pools, sauna etc.) • Continuous use cannot be longer than 2 hours. • If the treadmill is not in use, remove the safety key. •... - Page 5 STEP 1 Carefully pull out the belt (A) and console (B) out of the box.
- Page 6 STEP 2 Attach the posts (A04 and A05) to the treadmill (A) with 2x bolts (D05) on each side. Attach the handrails (A03) to the posts (A04 and A05) with 2x washers (D29) and 2x bolts (D09).
- Page 7 STEP 3 Connect the console cables to the cables from the console bracket as shown. Then attach the console (2) to the console bracket (A03) with 2x washers (D24) and 2x bolts (D09).
- Page 8 STEP 4 Cut the tape.
- Page 9 STEP 5 Lift the belt and attach the feet (f) to the belt with the screws (b), then attach the feet (f) to the bottom frame with the screws (b).
- Page 10 KROK 6 The treadmill is ready for use, attach the safety key for use and check function.
-
Page 11: Transportation
TRANSPORTATION Lift the treadmill by the rear part (K) and secure with the bracket (F). Then tip and move the treadmill using the transport wheels. If the belt is heavy, ask another person for help. -
Page 12: Console
CONSOLE Button function: 1. INSTANT INCLINE: Press 3, 6, 9 to quickly change incline. 2. INSTANT SPEED: Press 3, 6, 9 to quickly change speed. 3. INCLINE +: Press to increase incilne. 4. INCLINE -: Press to decrease incline. 5. START: Press to turn on the treadmill. 6. - Page 13 4. Time: Display time use. 5. Speed: Displays current speed. You can adjust the speed by the buttons. 6. Pulse: Displays the current heart rate. Grasp the sensors on the handles. The sensors start detecting the pulse after 5 seconds. Displayed values are for reference only and are not for medical or healing purposes.
-
Page 14: Maintenance Guide
LUBRICATION NOTIFICATION The treadmill automatically alerts the user. A warning is displayed after 300 km. The console will sound a beep every 10 seconds and the OIL will be displayed. Read the user manual before lubricating and then apply the lubricant to the center of the treadmill. After lubrication, press the STOP button for 3 seconds to turn off the alarm and notification. -
Page 15: Lubricating The Treadmill
If the running belt (20) drifts to the left, turn the adjusting bolt on the left side ¼ of a turn clockwise, then turn the right adjustment bolt ¼ turn counter-clockwise. If the belt does not move, repeat this step until it centers. Refer to image B. Over time, the running belt (20) will loosen. -
Page 16: Troubleshooting
TROUBLESHOOTING PROBLEM CAUSE SOLUTION Not plugged in. Plug the cord into the outlet. Treadmill will not start Safety key not inserted. Insert safety key. Running belt tension not proper Tighten the adjustment bolts on Running belt not centered on the left or right side of the the left and right side of the rear running board. - Page 17 Inspect the moving parts of the treadmill to ensure that they are A moving part of the treadmill is operating correctly. Check the stuck and therefore the motor is motor, listen for strange noises unable to rotate properly. and check for a burning smell. Replace the motor if necessary.
-
Page 18: Diagram
DIAGRAM... -
Page 20: Parts List
PARTS LIST Name Spec. Qty. Name Spec. Qty. Base frame Ring-shape wire plug Main frame EVA cushion Console bracket EVA cushion Left upright tube Console wire cover Right upright tube Incline bracket Console fixed bracket Front roller Bolt M10*55 L20 Back roller Bolt M8*55... -
Page 21: Environment Protection
Safety key sensor Running board bottom signal wire Keyboard DC motor connecting wire On-off switch Incline motor Overload protector Filter Power socket Inductance Magnetic core AC single wire Power wire Grounding wire AC signal wire Brown 200 Screw ST4.2*12 AC signal wire Brown 350 USB board AC signal wire... - Page 22 The seller is SEVEN SPORT s.r.o. with its registered office in Strakonická street 1151/2c, Prague 150 00, Company Registration Number: 26847264, registered in the Trade Register at Regional Court in Prague, Section C, Insert No. 116888. According to valid legal regulations it depends whether the Buyer is the End Customer or not. “The Buyer who is the End Customer”...
- Page 23 26847264 VAT ID: CZ26847264 Phone: +420 556 300 970 E-mail: eshop@insportline.cz reklamace@insportline.cz servis@insportline.cz Web: www.inSPORTline.cz inSPORTline s.r.o. Headquaters, warranty & service center: Električná 6471, Trenčín 911 01, SK CRN: 36311723 VAT ID: SK2020177082 Phone: +421(0)326 526 701 E-mail: objednavky@insportline.sk reklamacie@insportline.sk servis@insportline.sk...
Need help?
Do you have a question about the inCondiT30i and is the answer not in the manual?
Questions and answers