Table of Contents
Advertisement
Quick Links
Advertisement
Table of Contents

Subscribe to Our Youtube Channel
Related Manuals for Insportline AeroHike IN 19902


Summary of Contents for Insportline AeroHike IN 19902
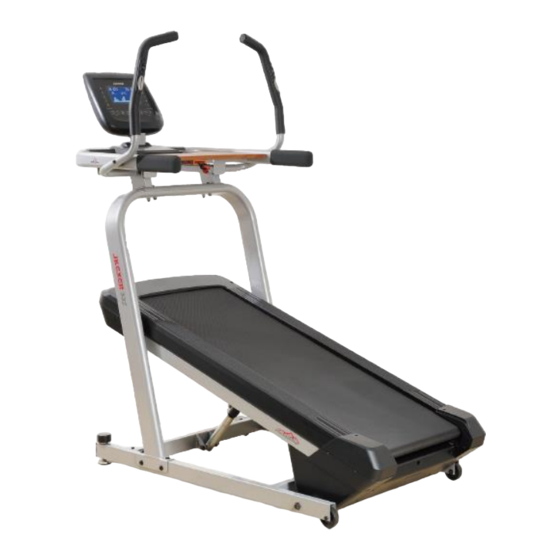
- Page 1 USER MANUAL – EN IN 19902 Treadmill inSPORTline AeroHike...
-
Page 2: Table Of Contents
CONTENTS SAFETY INSTRUCTIONS ........................3 ASSEMBLY ............................. 5 CONSOLE ............................. 11 FUNCTIONS ............................12 BUTTONS ............................12 USE ............................... 14 PRESET PROGRAMS .......................... 17 RUNING MODE ..........................17 CLIMBING MODE ..........................23 ERRORS ............................... 25 MOVING AND LEVELING ........................25 SAFE EXERCISING .......................... -
Page 3: Safety Instructions
SAFETY INSTRUCTIONS • Keep the manual for the future references. • Always clip the safety key to your clothes or belt before starting exercising. • Move naturally, forward. Do not look on your feet. Only for one person can use the product on the same time. - Page 4 • Max. user weight: 140 kg • Category: HC for home use • Meets standard: CE, ISO20957-1, ISO20957-6 • WARNING: The heart rate monitoring system may not be accurate. Overloading during training can cause serious injury or death. If you experience nausea, stop the exercise immediately! SAFETY WARNING: Do not use heart rate sensors in the handle at speeds above 14 km / h.
-
Page 5: Assembly
ASSEMBLY Main frame Screw (M8 x 55L) 4+4+4 Front frame Screw + spacer (M8 x 45L) Console Screw (M8 x 15L) Console holder Screw (M8 x 50L) Table Screw 2+2+4 Handlebar – R Screw Handlebar – L Plate Rear cover Allen key 1+1+1 Safety key... - Page 6 STEP 1 There are cables on the right side of the Front Frame (2) and on the right side of the Main Frame (1). Ask another person to hold the frame (2) and connect the cables from the Front Frame (2) to the Main Frame (1).
- Page 7 STEP 4 Grab the Console (3) with one hand and the Bracket Holder (4) with other one hand. Attach Console (3) and COnsole Holder (4) simultaneously to Table (5). STEP 5 Fasten with Screws (G). STEP 6 Secure the Rear Cover (8) on the Console Holder (4) with the Screws (F).
- Page 8 STEP 7 To secure the Console holder (4) to the Table (5), fasten the plate (I) with 4 screws (H). STEP 8 Using the Screws (H) - shorter, attach the Console holder (4) to the Table (5) as shown on the picture. Connect the cables from the Console (3) and Table (5).
- Page 9 STEP 10 Ask another person to hold the Table (5) on the Front Frame (2). Connect the cable from the Table (5) to the Front Frame Cable (2). Hide the excess cable into the frame (2). STEP 11 Using the Screws (C), attach the Table (5) to the Front Frame (2). Do not damage the cable and connector.
- Page 10 STEP 13 Fasten the Handlebar (6) to the Table (5) with the Screws (E). STEP 14 Secure the Handlebar - R (6) to the Table (5) with the Screw and Spacer (D). Repeat on the left. according to STEP 13. STEP 15 Plug the power cord (K) into the main frame plug (1).
-
Page 11: Console
CONSOLE Speed, incline – Running mode 0,8 – 12 km/h, Level 0-15 Speed, incline – Climbing mode 0,8 – 6 km/h, Level 15 - 40 Running mode 1. 12 preset programs with levels 1-3 2. 3 targets: TIME, DISTANCE, CALORIES 3. -
Page 12: Functions
FUNCTIONS A. Heartbeat 0 – 200 bpm (beats per minute) Pulse B. Body type 1-5 C. Resting heartbeat A. Calories 10 – 999 Kcal Calories B. Height 50 – 250 cm Steps A. Step count B. BMR A. Distance 0 – 99,9 km Distance B. - Page 13 Climbing mode For hill running training START To turn on or wake from sleep mode STOP Temporary stop, hold for 3 seconds to reset Running mode For running ENTER Confirm the entered data Speed A. Data Setup B. Selecting a preset program and load C.
-
Page 14: Use
To start your workout, select Running mode or Climbing mode. After selecting, you can turn on the program using the START button or select the U0-U3 profile using the incline adjustment buttons. QUICK START Press the START button. Adjust the incline (running 0-15, climbing 15-40) and speed (0.8 - 12 km / h). Lap 00 is displayed on the left and a point blinks on the right. - Page 15 • If the pulse is not detected for 20 seconds, the treadmill stops and displays NO PULSE. • Pulse Calculation: Intensity HRR % 59-75 % 74-84 % 84-88 % 88-95 % 95-100 % RHR - pulse during rest, MHR - maximum pulse, HRR difference between rest pulse and maximum pulse Calculation: (MHR-RHR) x HRR % + RHR MHR= For man 220 - age...
- Page 16 BMR (Basal Metabolic Rate) It shows passive calorie burning by metabolism. Calculation: Male = 66 + (13.7 x weight kg) + (5 x height cm) - (6.8 x age) Female = 655 + (9.6 x weight kg) + (1.7 x height cm) - (4.7 x age) BODY TYPE Malnutrition Thin...
-
Page 17: Preset Programs
PRESET PROGRAMS RUNING MODE... - Page 18 Speed Speed Incline Speed Incline Speed Incline Speed Incline level 1 km/h km/h km/h km/h Interval 1 Interval 2 Interval 3 Interval 4 Interval 5 Interval 6 Interval 7 Interval 8 Interval 9 Interval 10 Interval 11 Interval 12 Interval 13 Interval 14 Interval 15 Interval 16...
- Page 20 Incline Speed Level Speed Level Speed Level Speed Level level 1 km/h km/h km/h km/h Interval 1 Level 2 Level 2 Level 2 Level 2 Interval 2 Interval 3 Interval 4 Interval 5 Interval 6 Interval 7 Interval 8 Interval 9 Interval 10 Interval 11 Interval 12...
- Page 22 Speed Speed Incline Speed Incline Speed Incline Speed Incline level 1 km/h km/h km/h km/h Interval 1 Level 2 Level 2 Level 2 Level 2 Interval 2 Interval 3 Interval 4 Interval 5 Interval 6 Interval 7 Interval 8 Interval 9 Interval 10 Interval 11 Interval 12...
-
Page 23: Climbing Mode
CLIMBING MODE... - Page 24 Speed level Speed Incline Speed Incline Speed Incline Speed Incline Speed Incline km/h km/h km/h km/h km/h Interval 1 Level 8 Level 10 Level 12 Level 15 Level 15 Interval 2 Interval 3 Interval 4 Interval 5 Interval 6 Interval 7 Interval 8 Interval 9 Interval 10...
-
Page 25: Errors
ERRORS E1 (ERROR 1) There is no signal from the console for 7 seconds E6 (ERROR 6) There is no incline motor signal E3 (ERROR 3) Connecting console cables and control cabinets Smell If you smell odor, stop the operation and contact the supplier MOVING AND LEVELING There are 2 adjustable screws on the front of the Main Frame. -
Page 26: Warm - Up Exercise
EXERCISE Stand aside to learn how to operate the machine (adjusting the speed and inclination). Start exercising after you familiarize yourself with the functions. Walk 1 km in a constant tempo and record the time it takes, which may be about 15 - 25 minutes. Walk 1 km by 4.8 km/h (you need about 12 minutes). After successfully completing this exercise a few times you can adjust to a higher speed and inclination. -
Page 27: Maintenance Instructions
Calves and Achilles tendon stretches Support yourself with two hands on a wall or a tree with one leg stretched behind you. Keep the leg straight and the heel on the ground. Keep the position for 10 - 15 seconds. Repeat 3 times for each leg. -
Page 28: Maintenance Guidelines
• Every 180 km or every 3 months A warning is displayed after 180 km. When any button is pressed, the notification will disappear but will appear every time the device is turned on. Press the START and SPEED – buttons together to delete the message. -
Page 29: Belt Adjustment
BELT ADJUSTMENT The poly V-Belt will gradually loosen and change shape after a long time usage and you will need to adjust it for safe use. How to judge:when you are running as usual, and your feet stamp on the running belt and you feel the pause sometimes, it indicates the V-Belt or running belt is loose. -
Page 30: Environment Protection
ENVIRONMENT PROTECTION After the product lifespan expired or if the possible repairing is uneconomic, dispose it according to the local laws and environmentally friendly in the nearest scrapyard. By proper disposal you will protect the environment and natural sources. Moreover, you can help protect human health. -
Page 31: Expanded Diagram
EXPANDED DIAGRAM... -
Page 32: Parts List
PARTS LIST Bush (Ø15,8 x 2,7 x 72,5 l) Screw (OSBR-26) End cap (Ø12 x Ø 3,5 PVC) Washer (Ø110 x Ø121 x 2,0t) Round cushion (60D) Screw (OSBR-22) Screw (M3 x 10L) Screw (5/32 "x 12,7 l) Nylon nut (M8) Screw (M10 X 100L) Wheel (Ø139,5) Cable (1200 l) -
Page 33: Terms And Conditions Of Warranty, Warranty Claims
PVC trim Safety key box Running belt Safety key Belt (201-J6) Safety key clip Screw (M6 x 65L) Screw (M2,3 x 10L) Screw (M8 x 25L) Switch Screw (M8 X 65L) Console Central bar Power cable (400L # 2464) Tighten belt Kabel (400 mm / incline) Screw (M6 x 30L) Kabel (400 mm / speed) - Page 34 The seller is SEVEN SPORT s.r.o. with its registered office in Borivojova Street 35/878, Prague 13000, Company Registration Number: 26847264, registered in the Trade Register at Regional Court in Prague, Section C, Insert No. 116888. According to valid legal regulations it depends whether the Buyer is the End Customer or not. “The Buyer who is the End Customer”...
- Page 35 to exchange the defected Goods for a fully compatible Goods of the same or better technical characteristics. The Seller is entitled to choose the form of the Warranty Claim Procedures described in this paragraph. The Seller shall settle the Warranty Claim within 30 days after the delivery of the defective Goods, unless a longer period has been agreed upon.
Need help?
Do you have a question about the AeroHike IN 19902 and is the answer not in the manual?
Questions and answers