
Subscribe to Our Youtube Channel
Related Manuals for Labnet MultiGene Mini


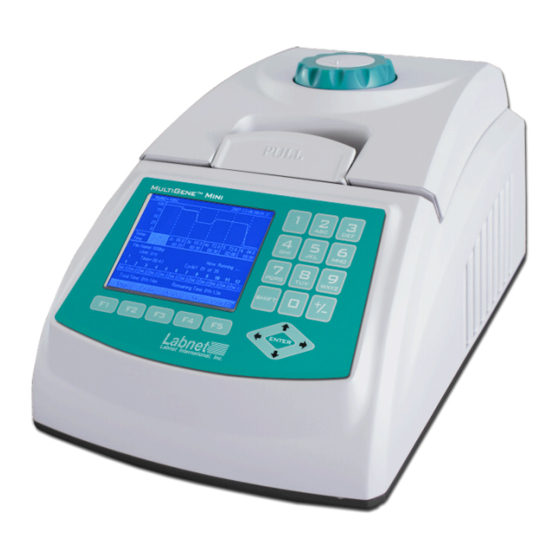
Summary of Contents for Labnet MultiGene Mini
- Page 1 MultiGene Mini Thermal Cycler TC020-24 /TC020-24-230V TC050-18 /TC050-18-230V Operation Manual Ver.1.2 Labnet International...
-
Page 2: Table Of Contents
CONTENTS CHAPTER 1 SPECIFICATIONS ...................... 1 Normal Operating Conditions ....................1 Transportation and Storage Conditions................... 1 Basic Specifications......................... 1 Performance ..........................2 Software Functions ........................2 CHAPTER 2 Features ........................3 Description ..........................3 Keyboard Diagram........................4 Key Functions .......................... 4 Inspection before Power-up..................... -
Page 3: Chapter 1 Specifications
CHAPTER 1 SPECIFICATIONS This chapter describes the MultiGene Mini Thermal Cycler’s operation, transportation and storage conditions, basic parameters, performance and functions. 1 Normal Operating Conditions Ambient operating temperature: 10°C ∼ 30°C Relative humidity: ≤70% Power supply: ~100-120V, 200W, 50/60Hz ~220-240V, 200W, 50/60Hz... -
Page 4: Performance
Remaining time estimate Date and time (year, month, day, hour, minute, second) display Audible alarm in the event of failure Note: The above software functions are listed for reference only. Labnet reserves the right to modify the software without notice. -
Page 5: Chapter 2 Features
⑦ Fuse Socket ⑤ Power switch Note: 1 The fuse specifications are as follows: 250V:2.5A / 125V:5A, Ø5×20mm. The fuse should be replaced with one that meets these specifications. 2 Contact your distributor or Labnet’s service department if you need proper fuses. -
Page 6: Keyboard Diagram
2 Keyboard Diagram 3 Key Functions “Numbers & Letters”, select the letter by pressing the key until your selection appears on the screen. “CE”,can be used to change “+, -” when editing temperature and time. “Right/Left”,moves the cursor one position to the left or right during file parameter setting. -
Page 7: Inspection Before Power-Up
2) The plug has been inserted into the power socket; 5 Power-on Procedures Turn on the power (i.e. turn the power switch to position ‘1’), the MultiGene Mini Thermal Cycler will beep 4 times, and the LCD will display ‘... -
Page 8: Chapter 3 Operation Guide
"click" sound, To open pull the release latch with your finger; and turn the knob counter-clockwise. 1 How to Run a Program Switch on the power, the MultiGene Mini Thermal Cycler will beep 4 times. The screen will display “ ”,and the instrument will carry on self test. -
Page 9: How To Edit A Program
If the default user does have a password, you will be prompted to enter it before you can run the default file. Password Prompt Hotlid=off 2009-04-01 10:05:00 Enter password Labnet MultiGene Mini Use the keypad to enter the Version: 2009-1.0 password. Press “Back” to go back Default User: Labnet the main menu. Press “Accept” to... - Page 10 user. Shift to the File Name Column, using the “right” arrow button, then select the user’s file using the up/down keys. File List Menu Press “Edit” edit file Hotlid=off 2008-07-28 10:05:00 indicated by the cursor. User File Name Save Time Press “New File”...
- Page 11 The symbol “*”at the top of User and File indicates the default User and Note: file. The Default User name is LABNET and the default file is 1. default file cannot be renamed, but it can be edited. File Editing Screen...
- Page 12 Seg. 1 section 1 Cycle1 ×** From ** to ** Seg. 2 section 2 Cycle2 ×** From ** to ** · · · File · · · section 5 Cycle5 ×** From ** to ** Seg. 16 Relation of cycle and segments in a file File Saving Screen In this screen use the keypad to enter Hotlid=off...
- Page 13 02:00 01:45 00:00 displayed. Select ‘F1’or ‘F3’”.You File Name:Num1 can then select either “Stop” or User: Labnet Now Running ••• “Start”. Temp=00.0 Time=00:00 Cycle 01 of 10 Press “Pause” and the display Total Time: 00h 56m Remaining Time:00h 56m will show “Pause state now.
-
Page 14: How To Set System Parameters
1.2 How to Set System Parameters System Parameter Setting Interface In the main screen press “System” to Hotlid=off 2009-02-28 10:06:00 enter the system parameter settings menu. Press “Enter” to move the Date(yy-mm-dd): 09-02-28 cursor to the next item. This operation Time(hh-mm-ss): 10:06:19 is followed by the symbol “... - Page 15 “Tube mode” controls the cooling & heating rate of the block, inconsideration of the sample temperature changing at a slower rate. In tube mode, there is an overshoot after reaching the set temperature, which allows the sample to reach the set temperature faster, and will help the stay at the set temperature for a longer period.
-
Page 16: Chapter 4 Trouble Shooting
No display and the two beeps or 125V 5A, Φ5×20mm ) missed when power on Switch failure Replace switch Others Contact Labnet or your distributor Ventilation blocked Clear the airflow blockage Abrupt change in heating Open the device, check the speed or bad temperature... -
Page 17: Block Error Messages
Error Message when running "Please contact the distributor.",and "Hotlid sensor is short- Hot-lid sensor reports a short circuit circuited." Note: During the warranty term, please contact Labnet or your distributor. If the instrument is opened by an unauthorized individual the warranty is void. -
Page 18: Appendix 1 Wiring Diagrams
APPENDIX 1 Wiring Diagram (1 of 2) AC input_ 220-240VAC PCB1 50/60Hz BYQ904102000110_HOTLID HOTLID 1 2 3 LID-J1-1_SEN LID-J1-2_SEN AC Line PCB2 LID-J1-3_HEATER+ Fi l t er BYQ904101000010_BLOCK LID-J1-4_HEATER+ LID-J1-5_HEATER+ LID-J1-6_HEATER- J1-8_AUX HEATER LID-J1-7_HEATER- J1-7_AUX HEATER LID-J1-8_HEATER- J1-6_SEN-BLOCK J1-5_SEN-BLOCK FUSE1 LID-J2-1_SEN J1-4_SEN-SINK 5*20mm_ 2.5A... - Page 19 Wiring Diagram (2 of 2) Hotl i d PCB1 BYQ904102000110 Rated Vol t age input: HOTLID AC100-120V 50/60Hz 1 2 3 Bl o ck LI D - J 1- 1 _SEN LI D - J 1- 2 _SEN PCB2 LI D - J 1- 3 _HEATER+ BYQ904101000010 Fi l t er LI D - J 1- 4 _HEATER+...
-
Page 20: Appendix 2 Parameter Values
APPENDIX 2 Parameter Values Item Parameter Scale Range Note Temp(ºC) Temp. Control point 4.0~99.0 --:-- The time of Temp. control is (set the value before Time of Temp. infinite, meanwhile, the hotlid “:”through “Function” Time turned off. Control(mm:ss) key.) 00:00~59:59 Ramping Rate 0.1 ~5.0 Ramp(C/S) - Page 21 block block reagent reagent Image 2 Image1...
- Page 22 This warranty gives you specific legal rights. You may have other rights which vary from state to state. No individual may accept for, or on behalf of Labnet International, Inc., any other obligation of liability, or extend the period of this warranty.
Need help?
Do you have a question about the MultiGene Mini and is the answer not in the manual?
Questions and answers