Table of Contents
Advertisement
Quick Links
Read this manual. Understand all safety and operating instructions. Failure to comply
with the warnings and instructions may result in serious injury, illness or even death.
MARK 7® RELOADING EVOLUTION USER MANUAL VERSION 2.0, COPYRIGHT 2020
ALL RIGHTS RESERVED
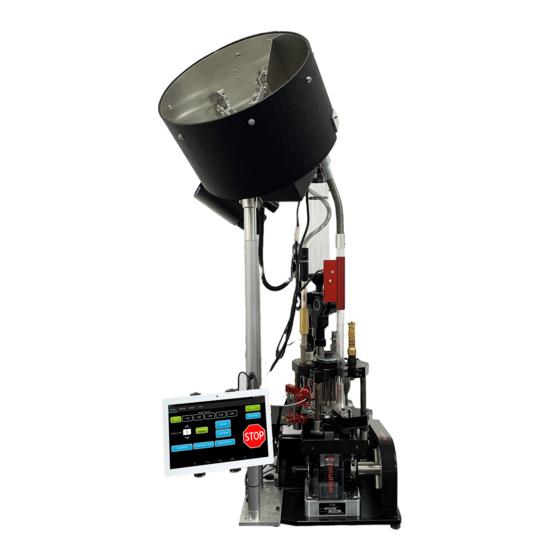
Mark 7® Evolution
User Manual V 2.0
TM
1
Advertisement
Table of Contents

Related Manuals for Mark 7 Evolution


Summary of Contents for Mark 7 Evolution
- Page 1 User Manual V 2.0 Read this manual. Understand all safety and operating instructions. Failure to comply with the warnings and instructions may result in serious injury, illness or even death. MARK 7® RELOADING EVOLUTION USER MANUAL VERSION 2.0, COPYRIGHT 2020 ALL RIGHTS RESERVED...
-
Page 2: Table Of Contents
6. Setting up Mr.Bulletfeeder and Bullet Drop Assy ..............21 7. Bullet Seating/Crimping setup ....................22 Mark 7 Evolution Recommended Maintenance ................... 23 Shellplate indexing adjustments ....................... 29 Storage Recommendations ........................32 Troubleshooting ............................32 Mark 7® Reloading EVOLUTION User Manual version 2.0, Copyright 2020 All rights reserved... -
Page 3: Important Safety Instructions
Actions as a result of using the Mark 7® product are solely the responsibility of the user – if you get injured through the reloading process or through the use of ammunition as a result of the reloading process it is your fault. - Page 4 Case Retention Spring Primer Tube Stack Assy Shell Plate Retention Spring 10-32 x 1/2" Flat Head Screw 1/2" Allen Key Mechanical Powder Measure AkOffload Bin Shaft Handle Adapter Mark 7® Reloading EVOLUTION User Manual version 2.0, Copyright 2020 All rights reserved...
-
Page 5: Unpacking Instructions
Main Unit and place on a clean work surface. WARNING – The Evolution is shipped with the Tool Head in the down position secured with a zip tie. The Tool Head is spring loaded with a heavy-duty spring. Before cutting the zip-tie place an 11/16”... -
Page 6: Installing Base Plate Feet
Installing Base Plate Feet Thread in Base Plate Feet into Evolution Main Unit Base Plate. Apply grease to the threads for easy installation. Evolution Main Unit Base Plate Base Plate Feet (4X) Installing Base Plate Feet Figure 2: Mark 7® Reloading EVOLUTION User Manual version 2.0, Copyright 2020... -
Page 7: Handle Installation And Workbench Mounting
Position the press so the handle, while tool head is in the bottom position, does not contact the leading edge of the workbench. Using the machine as a template mark the 4-hole locations. For reference the MARK 7® RELOADING EVOLUTION USER MANUAL VERSION 2.0, COPYRIGHT 2020 ALL RIGHTS RESERVED... - Page 8 5” square and need be large enough to clear a 3/8” -16 socket head screw. Mounting Hardware is provided with the press. Mark thru hole (4X) Check for clearance Figure 4: Mount to workbench with the machine orientated as shown. Mark 7® Reloading EVOLUTION User Manual version 2.0, Copyright 2020 All rights reserved...
-
Page 9: Case Feeder Installation
During the initial assembly leave all screws loose. Wait until the entire assembly is together before doing the final tightening. Install the Case Feeder Mounting Pole Brackets (2X) to the Evolution Main Unit. Assemble the Case Feed Pole Lower to the Case Feeder Mounting Pole Brackets with the Screws and Spacers as shown in Figure 5. - Page 10 Pistol), LG P (Large Pistol), SM R (Small Rifle), LG R (Large Rifle.) Confirm the correct plate is included with the machine caliber. Caliber Plate Case Feeder Case Pole Upper Figure 6: Installing the Case Feeder with Caliber Plate Mark 7® Reloading EVOLUTION User Manual version 2.0, Copyright 2020 All rights reserved...
-
Page 11: Installing Case Feeder Spring Flipper Assy
Instead of the Case Feeder Spring Flipper Assy you may need to install the Case Feeder Ramp. It is caliber dependent and you choose which option works best for you. Case Feeder Spring Flipper Assy Figure 7: Case Feeder with Spring Case Feeder Flipper Installed MARK 7® RELOADING EVOLUTION USER MANUAL VERSION 2.0, COPYRIGHT 2020 ALL RIGHTS RESERVED... -
Page 12: Case Feeder Adapter And Drop Tube Assy
Upper Housing. The Case Feed Adapter is designed to rotate out 90 degrees for quick removal of cases in the Drop Tube assy. Drop Tube (O-Ring End goes into Adapter) Socket Cap Screw Shoulder Screw Case Feed Adapter Figure 9: Case Feed Adapter installation. Mark 7® Reloading EVOLUTION User Manual version 2.0, Copyright 2020 All rights reserved... - Page 13 Note: You may need to thread the spring in/out of the fitting ends to achieve the proper spring tension/slack. Case Feeder Housing Case Feeder Output Spring Assy Case Drop Tube Figure 10: Case Feeder Assy Installed MARK 7® RELOADING EVOLUTION USER MANUAL VERSION 2.0, COPYRIGHT 2020 ALL RIGHTS RESERVED...
-
Page 14: Installing Primer Tube Stack Assy And Low Primer Alarm
Using the 10-32 Flat Head Screws (3X) mount the Primer Tube Stack Assembly to the Primer Housing. Primer Tube Stack Assy 10-32 Flat Head Screws (3X) Primer Housing Figure 11: Installing Primer tube Assy Mark 7® Reloading EVOLUTION User Manual version 2.0, Copyright 2020 All rights reserved... - Page 15 Screw to lock in place. Back up rod to be installed after loading primers. If installed without primers, press will not index. Note: When connecting the Evolution™ to the autodrive platform remove the battery before powering on the machine. Primer Back up Rod PrimerSense®...
-
Page 16: Powder Measure Installation
Assemble Powder measure per insert instructions included in powder measure box. Install into station 6 recommended station per Figure 15. Tool Head Recommended Die Positions With 9 available Tool Head die locations there are many setups the Evolution can be configured / customized for to achieve your loading/processing requirements. We recommend the Following setup for standard processing and loading in one pass. -
Page 17: Operating Instructions
Always use case lube when re-sizing once fired cases. Run a few cases through the sizing die and check cases using a sizing gauge to confirm they are being fully sized and decapped properly. MARK 7® RELOADING EVOLUTION USER MANUAL VERSION 2.0, COPYRIGHT 2020 ALL RIGHTS RESERVED... -
Page 18: Swage Setup - Station 3
2. Swage Setup– Station 3 The Evolution™ is shipped with the swage rod fully backed off in the down position. We recommend to cut an empty case in half (cross-section) and insert it into the shell plate in station 3. Always use a hold down die over the swaging station and never run the machine without the tool head on to avoid damaging the shellplate during a jam. - Page 19 Figure 15: Primer Adjustments WARNING – Never install more than 100 Primers at once. Always wear protective eyewear and hearing protection when loading primers into the machine and loading. Activities using the Mark 7® Evolution are inherently dangerous and may lead to injury and even death.
-
Page 20: Case Neck Expansion
Tool Head to the top of the stoke. • Check the die nut and adjustment charge nut for tightness. Mark 7® Reloading EVOLUTION User Manual version 2.0, Copyright 2020 All rights reserved... -
Page 21: Setting Up Mr.bulletfeeder And Bullet Drop Assy
The expansion die should open the case mouth just enough for the bullet to slip in – the bullet dropper will provide a slight amount of pressure which will keep the bullet in place. MARK 7® RELOADING EVOLUTION USER MANUAL VERSION 2.0, COPYRIGHT 2020 ALL RIGHTS RESERVED... -
Page 22: 7. Bullet Seating / Crimping Setup
Spring retaining clamp retains the round in station 10 – to remove a casing slightly advance the shell plate a few degrees remove the case then move it back into position. Mark 7® Reloading EVOLUTION User Manual version 2.0, Copyright 2020 All rights reserved... -
Page 23: Mark 7 Evolution
(Red Lithium Grease) Main Bearing right Crank (Red Lithium Grease) (Red Lithium Grease) Swage • Clean press after use. (Multi Purpose Lithium Grease) Figure 17: Grease Points MARK 7® RELOADING EVOLUTION USER MANUAL VERSION 2.0, COPYRIGHT 2020 ALL RIGHTS RESERVED... - Page 24 Internal Guide Rod Main Bearing left (Light weight machine oil) (Red Lithium Grease) Protective Shield (use syringe) Figure 19: Main Bearing left and Internal Guide Rod lubrication points Mark 7® Reloading EVOLUTION User Manual version 2.0, Copyright 2020 All rights reserved...
- Page 25 Case Feed Dagger (Light weight machine oil) Tool Head Pins (Light weight machine oil) Under shell plate lock nut (Red Lithium Grease) Figure 20: Tool Head lubrication points MARK 7® RELOADING EVOLUTION USER MANUAL VERSION 2.0, COPYRIGHT 2020 ALL RIGHTS RESERVED...
- Page 26 Major Service required (100,000+ Rounds:) • If play develops in crank assembly or index assembly: o Core re-alignment should be performed. o Full cleaning and grease packing/lubrication of press required. Mark 7® Reloading EVOLUTION User Manual version 2.0, Copyright 2020 All rights reserved...
-
Page 27: Shellplate Indexing Adjustments
Turning the set screw counterclockwise will back off the index pawl engagement and increase the height engagement. MARK 7® RELOADING EVOLUTION USER MANUAL VERSION 2.0, COPYRIGHT 2020 ALL RIGHTS RESERVED... - Page 28 The height of the index pawl is critical if it set too low or too high the shell plate will miss indexing altogether. Index Pawl Adjustment Location Figure 23: Index Pawl Adjustment Location (left side of Machine) Mark 7® Reloading EVOLUTION User Manual version 2.0, Copyright 2020 All rights reserved...
- Page 29 Index Pawl height Figure 24: Checking Height of Index Pawl engagement – Between .060 - .100” Index Pawl engagement Figure 25: Visually checking index pawl engagement MARK 7® RELOADING EVOLUTION USER MANUAL VERSION 2.0, COPYRIGHT 2020 ALL RIGHTS RESERVED...
-
Page 30: Storage Recommendations
Refer to the knowledge base section on our website under SUPPORT for troubleshooting articles relating to setup and operation. http://www.markvii-loading.com/ Mark 7 ® Digital Community at www.markvii-loading.com Please contact us for technical support https://www.markvii-loading.com/supports/customer-service-support.html Phone: 1-888-462-7577 Hours: 8:30am-5:00pm, ET, M–F Mark 7® Reloading EVOLUTION User Manual version 2.0, Copyright 2020 All rights reserved...
Need help?
Do you have a question about the Evolution and is the answer not in the manual?
Questions and answers