Advertisement
Quick Links
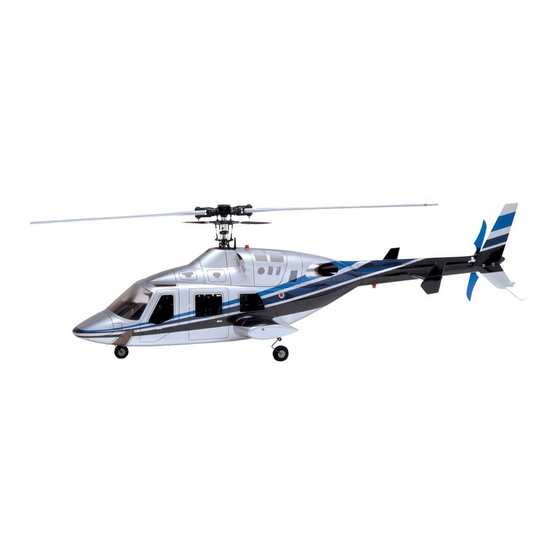
スケールボディ
この度は60スケールボディ Bell222 をお買い上げ頂き誠にありが
とうございます。取扱説明書に従い、組立を行って下さい。
注意
・ボディに搭載する前に機体のみでフライト調整して下さい。
その際、垂直尾翼を取り付けてフライトして下さい。垂直尾
翼がないとテールがハンチング(左右に振れる現象)します。
・このボディは競技用ではありません。高回転(1800rpm以上)
での無理なフライトは危険ですので行わないで下さい。
・機体に振動がある場合。ボディに搭載しても充分なフライト
性能が発揮できない上、破損や墜落の原因になる可能性があ
ります。搭載前に充分なメンテナンスを行って下さい。
別売品
搭載可能機種
sst-eagle FREYA
sst-eagle FREYA-EX
sst-eagle FREYA-EX-WC
SST-EAGLE 3-WC
このキットはボディと引込脚セットのみです。
マフラー許容サイズ
ø45mm以下
190mm以下
210mm以下
65mm以下
目次
ボディの組立
・・・・・・・・・・・・・・・・・・・・・・・・・・・・・・・・4, 5
1
引込脚のリンケージ
・・・・・・・・・・・・・・・・・・・・・・・・・・・・・6, 7
2
(1)ノーズギヤのリンケージ
(2)メインギヤのリンケージ
機体の分解
・・・・・・・・・・・・・・・・・・・・・・・・・・・・・・・・・・8
3
マフラーの穴加工
・・・・・・・・・・・・・・・・・・・・・・・・・・・・・・・9
4
・・・・・・・・・・・・・・・・・・・・・・・・・10, 11
フローティングゴムの取付
5
フレームの搭載
・・・・・・・・・・・・・・・・・・・・・・・・・・・・・・12, 13
6
パーツリスト
・・・・・・・・・・・・・・・・・・・・・・・・・・・・・・・・・14
7
付録
・・・・・・・・・・・・・・・・・・・・・・・・・・・・・・・・・・・15, 16
8
525mm
小型サーボ3ケ
(引込脚に使用)
約31mm
16mm
以下
純正適合マフラー
S60IIサイド排気マフラー 60用
0414-097 ○10290(9800)
S60IIサイド排気マフラー 90用
0414-289 ○20790(19800)
EXチューンドマフラー
0414-159 ○21000(20000)
sst-eagle FREYA用
For sst-eagle FREYA
Thank you for purchasing the 60 scale body Bell222. Read these
instructions carefully for the proper assembly.
Caution
・Before mounting the fuselage to the body, adjust the flight of the
fuselage only. In this regard, install the vertical fin to the fuselage.
A maneuver without the vertial fin will cause tail hunting.
・This aircraft is not designed for flight competitions. It is dangerous to
maneuver this aircraft at high speeds (1800 rpm or higher).
Never fly this aircraft at excessive speeds.
・When there is vibration in the fuselage: Not only will this model's full
flight characteristics be degraded, even if mounted on the body, it is
also possible to cause damage or crashes.
Perform thorough maintenance in advance of mounting.
Sold separately
Model's that can be mounted
sst-eagle FREYA
sst-eagle FREYA-EX
sst-eagle FREYA-EX-WC
SST-EAGLE 3-WC
This kit includes only the body and retractable gears.
Muffler Tolerance Size
Max. ø45 mm
Max. 190 mm
Max. 210 mm
Max. 65 mm
Contents
Assembling the body
・・・・・・・・・・・・・・・・・・・・・・・・・・・・・4, 5
1
Retractable gear linkage
・・・・・・・・・・・・・・・・・・・・・・・・・・・6, 7
2
(1) Nose gear linkage
(2) Main gear linkage
Disassembling the aircraft
・・・・・・・・・・・・・・・・・・・・・・・・・・・・8
3
Preparing a hole for the muffler
・・・・・・・・・・・・・・・・・・・・・・・・・9
4
・・・・・・・・・・・・・・・・・・・・・・・・・・10, 11
Floating rubber mounting
5
Mounting the frame
・・・・・・・・・・・・・・・・・・・・・・・・・・・・・12, 13
6
Parts List
・・・・・・・・・・・・・・・・・・・・・・・・・・・・・・・・・・14
7
Appendix
・・・・・・・・・・・・・・・・・・・・・・・・・・・・・・・・・15,16
8
1
440mm
1560mm
ボディ重量:約1300g
(引込脚ユニットを含む)
Body weight: approx. 1300g
(Includes Retractable Wheel Unit)
Small-servo: 3 pcs.
(Used for retractable gears)
approximately
Max. 16 mm
31mm
Genuine muffler
S60II Side exhaust muffler for 60
0414-097 ○10290(9800)
S60II Side exhaust muffler for 90
0414-289 ○20790(19800)
EX tuned muffler
0414-159 ○21000(20000)
Advertisement

Related Manuals for Hirobo BELL 222


Summary of Contents for Hirobo BELL 222
- Page 1 スケールボディ 440mm 525mm 1560mm ボディ重量:約1300g (引込脚ユニットを含む) Body weight: approx. 1300g (Includes Retractable Wheel Unit) sst-eagle FREYA用 For sst-eagle FREYA この度は60スケールボディ Bell222 をお買い上げ頂き誠にありが Thank you for purchasing the 60 scale body Bell222. Read these とうございます。取扱説明書に従い、組立を行って下さい。 instructions carefully for the proper assembly. Caution 注意 ...
-
Page 2: Required Tools
〈組立をはじめる前に〉 〈Before Assembling〉 組立に必要なもの Required Tools ¥税込価格(税抜価格) Price including Tax (Price excluding Tax) ¥ +ドライバー 瞬間接着剤 ラジオペンチ カッターナイフ ハサミ 十字レンチ 大・小 定規 ニッパー 840(800) ¥ Ruler 曲面 低粘度 630(600) ¥ ¥1,050(1,000) 315(300) ¥ ミニ 高粘度 ¥1,050(1,000) キャノピーボンド ロッドエンド 六角レンチ ピンバイス ハードタイプ... - Page 3 〈組立をはじめる前に〉 〈Before Assembling〉 引込脚用に必要なもの Items Necessary for Wheel Retraction Unit 各社小型サーボX3ケ 送信機の空きチャンネルに応じて、 Setting is easier by mounting two or three Compact Servo-motor x 3 Pcs. 1chでサーボを2個または、3個制御する装置を control units for the servo-motor on Futaba 装備することにより、セッティングが簡単に one channel depending on the number of S135 行なえます。...
- Page 4 ボディの組立 Assembling the body ※生地完成キットは組立を行って下さい。 (1) トップカバーの組立 Assemble the unpainted completed body kit. Assembling the top cover まず、ボディにトップカバーを仮止めし、ダウエルピン用の穴 ø3とブラケット用のカットをトップカバーとボディの両方同じ 位置にあけます。 Temporarily put the top cover on the body, and drill the dowel pin hole (ø3 mm) and make the cut for the bracket at the same places in both the top cover and body.
- Page 5 ※生地完成キットは組立を行って下さい。 (2) ボディの組立 Assemble the unpainted completed body kit. Assembling the fuselage テールコーン ø3穴 Tail cone ø3 holes 水平尾翼 Horizontal stabilizer エポキシ 10X10ベニヤ板 Epoxy 10X10 plywood 垂直尾翼 水平尾翼 Vertical fin Horizontal stabilizer エポキシ アルミホルダー Epoxy Aluminum holder ダミーライト(白) エポキシ Dummy light (white) Epoxy 排気管...
- Page 6 ノーズギヤロッド ワンポイント 引込脚のリンケージ NoseGear Rod Important Retractable Gear Linkage 36mm ロック (1)ノーズギヤのリンケージ Lock Nose gear linkage 0° 約21mm サーボに付属のネジを ロック 使用します。 M3X10CS ………………………4 Lock Use the screws that came with the servo. 90° M2 ナット ………………………2 M2 nut サーボ Servo 引込脚ユニットは、飛行中や着陸の際に脚を...
- Page 7 ワンポイント (2)メインギヤのリンケージ Important Main gear linkage メインギヤロッド(2set) MainGear Rod (2set) ロック 5° 36mm Lock ……………………2 M3X12CS-TS 約20mm ロック approx. 20mm Lock ………………………8 M3X10CS 動作させた時に、 95° アジャストロッドが M3X3SS …………………………2 引込脚ユニットに干渉 しない様に、45°傾けます。 引込脚ユニットは、飛行中や着陸の際に脚を When operating, incline 45° しっかり固定するようにロック機構がついて …………………………2 M4X4SS so that the adjusting rod います。このロック機構が十分機能するよう...
- Page 8 機体の分解 Disassembling the Aircraft 上側をやすり等で 削っておきます。 キャビン Cut the top portion クロスメンバー using a file. を外します。 Remove the cabin cross members. Bell222には使用しません。 Not used for the Bell222. 組立済のメインフレームとテールパイプ、スキッド、 ローターヘッドを分解します。 Disassemble the main frame, tail pipe, skids, and rotor head. 注意 この部分にジャイロをのせないで下さい。 ...
- Page 9 マフラーの穴加工 Preparing a Hole for the Muffler フレームとボディを仮組みし、マフラー の排気口の穴位置を決めたら再びフレー ムを外し、リューター又はヤスリで排気 用の穴をあけます。 Temporarily assemble the frame and body, and determine the hole position for the muffler exhaust port. Remove the frame again and use a router or file to open a hole for the exhaust.
- Page 10 フローティングゴムの取付 Floating rubber mounting (1)フレーム下部のフローティングゴムの取付 M3X20CS Mounting of the floating rubber to the frame bottom 位置合わせに使用します ネジを接着しない様に 注意して下さい。 ボディのフレームマウント用の穴に合わせて Used for positioning フローティングゴム ø 22をボディに接着します。この時 Do not glue the screws. 長いネジを貫通させておくと、位置合わせが簡単に出来ます。 接着剤は必ずセメダイン工業スーパーXを使用して下さい。 Position with the hole for the body frame mounting and glue the floating rubber ø22 to the body.
- Page 11 フローティングゴムの取付 Floating rubber mounting ボディの中にメインフレームを入れる前に、メインフレームの (2)フレーム側面のフローティングゴムの取付 右側だけにボディステーL42を取り付けます。 Mounting of the floating rubber to the frame side surface Before inserting the main frame into the body, mount the body stay L42 on the right side of the main frame only. M3X20CS 左側のボディステーL42はフレームをボディの中に入れ...
- Page 12 フレームの搭載 Mounting the Frame ベルトドライブの場合 フレームを仮止めしているM3X8CSと、ボディステーを固定しているM3X10CSを 取り外し、フレームが動く状態にしてから、テールパイプを取り付けます。 テールパイプを取り付けた後、フレームを固定します。 ・For belt drives Remove the M3X8CS that is temporarily fastening the frame, and the M3X10CS that is fastening the body stay, and mount the tail pipe after allowing the frame to move. Fasten the frame after mounting the tail pipe.
- Page 13 ポイント point sst-eagleFREYA標準仕様の場合、最スローの時、トップカバーにコレクトピッチレバーが 接触しないように、ピッチカーブもしくはサーボの舵角を調整してください。 スケールフライトでは十分なピッチがとれますが、もしマイナスピッチを多くとりたい 場合は0414-194 カーボンコレクトピッチレバー(R)を使用すると、フレイヤの標準設定の まま使用できます。 M3X12CS-TS(塗装済) ……1 For sst-eagle FREYA standard specifications,adjust the pitch curve or the rudder of the (Painted) servos that the correcting pitch lever dose not touch top cover when it moves at the slowest level.
-
Page 14: Parts List
パーツリスト 0414-344 Parts List 2505-001 0004-065 2505-001 2522-004 2531-003 2532-003 2522-004 0004-065 0004-085 2531-003 2532-003 2505-001 2531-001 2522-004 2531-001 0004-085 0004-065 0414-346 2532-003 2531-003 2506-010 2532-001 2532-003 0414-346 0414-345 2532-006 2532-002 2506-010 2505-006 0004-084 * The prices in parentheses are the prices excluding consumption tax. 税込価格... - Page 15 0414-424 0414-426 0414-425 0412-276 * The prices in parentheses are the prices excluding consumption tax. 税込価格 コード No. 品名 入数 備考 ( 税抜価格 ) 円 Part Q'ty Remarks Code No. Price (Yen) 引込脚用 T 型レバー 1,680 0412-276 T-type lever (for retract) (1,600) 60 ベル...
- Page 16 の場合 sst-eagle FREYA EX・EX WC When using with the sst-eagle FREYA EX or EX WC ■ EXフローティングアングルを使用の場合 フレーム下側は付属のフローティングゴムを使用してください Bell222に付属のフローティングゴム¿22は側面のみ使用します。 For the EX floating angle: Use the accessory floating rubber for the bottom side of the frame. The floating rubber ¿22 that was an accessory to the Bell222 is used only on the sides. ■ SX (L)アングルを使用の場合...
- Page 17 SST-EAGLE3-WC の場合 When using with the SST-EAGLE3-WC フレーム下側はEAGLE3に付属のEXフローティングゴムを使用して下さい Bell222に付属のフローティングゴム¿22は側面のみ使用します。 Use the accessory floating rubber of the EAGLE3 for the bottom side of the frame. The floating rubber ¿22 that was an accessory to the Bell222 is used only on the sides. 使用しません。...
- Page 18 M E M O M E M O M E M O M E M O M E M O...
- Page 19 M E M O M E M O M E M O M E M O M E M O...
- Page 20 注意 Note ①本書の内容の一部または全部を無断で転載することは禁止されています。 ②本書の内容については、将来予告なしに変更することがあります。 平成16年9月 初版発行 ③本書の内容について万全を期しておりますが、万一ご不審な点や誤り、記載もれなどお気付 平成17年2月 第2版発行 きのことがありましたら、ご一報くださいますようお願いいたします。 平成17年8月 第3版発行 ④運用した結果については③項にかかわらず責任を負いかねますので、ご了承ください。 平成18年7月 第4版発行 ①Reproduction of this manual, or any part thereof, is strictly prohibited. First printing September 2004 ②The contents of this manual are subject to change without prior notice. Second printing February 2005 ③Every effort has been made to ensure that this manual is complete and correct.
Need help?
Do you have a question about the BELL 222 and is the answer not in the manual?
Questions and answers