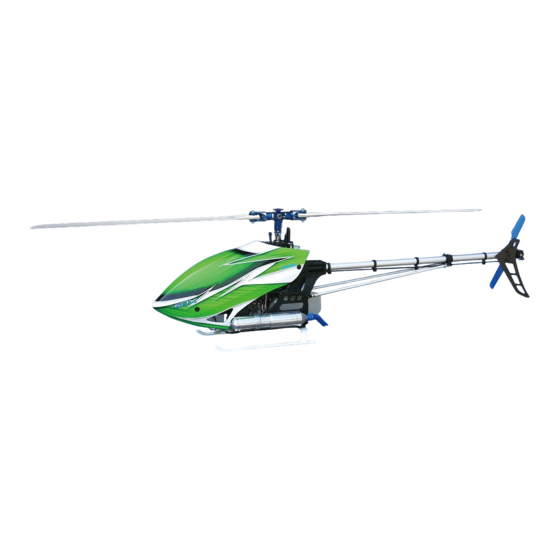
Table of Contents
Advertisement
Quick Links
0403-969
■ このたびはヒロボー製品をお買いあげいただき誠に有難うございます。
■ この説明書は19mmベアリングホルダー、 ヨーク、 ラジアスブロック組込に関する箇所のみとなっ て
います。
SDX D3 SWM SL OP取扱説明書の各工程を置き換えて組立を行っ て下さい。
■ パーツリス トに関しては、 SDX D3 SWM SL OP取扱説明書をご覧下さい。
■ Thank you for purchasing this Hirobo product.
■ This manual is only for assembling bearing holder, yoke and radius block.
Please use instruction from this manual instead of instructions from standard SDX D3 SWM SL
OP version.
■ For parts list,check partslist section from SDX D3 SWM SL OP version instruction manual.
SDX D3 SWM SL 取扱説明書
SDX D3 SWM SL Instruction manual
3
メ イ ンフ レームの組立 ................................................... P. 13
8
メ イ ンギヤの取付......................................................... P. 18
10
ウ ォ ッ シュアウ ト部の組立 ............................................. P. 20
11
ヨーク部の組立 ......................................................... P. 20
12
ヨーク/ブレー ドホルダー部の組立 .................................... P. 21
13
ローターヘッ ド部/ウ ォ ッ シュアウ ト部/スワ ッ シュ プレー ト部の取付...... P. 22
26
ローターヘッ ド部のリ ンケー ジ .......................................... P. 32
33
リ ンケー ジの確認と ピ ッ チ/スロ ッ トルの設定 ........................ P. 39
SDX D3 SWM SL-II 追加説明書
SDX D3 SWM SL-II Additional manual
1
SDX D3 SWM SL-II 追加説明書
SDX D3 SWM SL-II Additional manual
⇨
........................... P. 2
⇨
........................... P. 3
⇨
........................... P. 4
⇨
........................... P. 4
⇨
........................... P. 5
⇨
........................... P. 6
⇨
........................... P. 7
⇨
........................... P. 8
Advertisement
Table of Contents

Summary of Contents for Hirobo SDX D3 SWM SL
-
Page 1: Table Of Contents
■ Thank you for purchasing this Hirobo product. ■ This manual is only for assembling bearing holder, yoke and radius block. Please use instruction from this manual instead of instructions from standard SDX D3 SWM SL OP version. ■ For parts list,check partslist section from SDX D3 SWM SL OP version instruction manual. -
Page 2: メインフレームの組立
メインフレームの組立 Main frame assembly 燃料タンク Brg. ø10Xø19X5ZZ キ ャ ビンサポー ト ゴム Fuel tank Cabin support rubber 段付カラー3X6X5S Shoulder collar 3X6X5S ボディ マウ ン トL=30 瞬間接着剤で接着します。 Body mount L=30 Apply quick-dry adhesive to the shoulder Brg. ø5Xø13X4ZZ collars to secure them in positions. カ... -
Page 3: メインギヤの取付
メインギヤの取付 メインマストP-181 Main mast P-181 Main gear installation 注意 Caution 注 意 Caution マストロック Mast lock メインマスト Main mast M3.5X10CS ......2 M4X4SS M4X4SS M3X8CS ........ 4 M2.6X6皿ネジ ...... 4 181mmの穴を使用して M2.6X6 countersunk screw ください。 Use the holes positioned at 181mm. M4X4SS ......... -
Page 4: ウォッシュアウト部の組立
ウォッシュアウト部の組立 Washout assembly 注 意 Caution ウォッシュアウトコントロールアームの M3X22CS ......1 向きに注意してください。 Note washout control arm orientation. M3X15CS ......1 ø1.5 Eリング ø1.5 E-ring カラー3X4X8.5F ....2 SSLウオッシュコントロールアーム SSL wash control arm Collar 3X4X8.5F 溝付き平行ピンø2X11.8 Grooved parallel pin ø2X11.8 工場組立済 ラジアスアームP=25 Pre-assembled Radius arm P=25 M3X22CS M2X3SS ........ -
Page 5: ヨーク/ブレー ドホルダー部の組立
ヨーク /ブレードホルダー部の組立 警 告 Warning Yoke and blade holder assembly 飛行前にはM5X10ボタンボル トが緩んでいないかを点検 警 告 Warning してく ださい。 また、 M5X10ボタンボル トは定期的に交換してく ださい。 スピン ドルのネジき り部に必ずネジロッ ク剤 (高強度タイプ) を塗布し、 ボタンボル トM5X10 緩んだボル トは疲労亀裂の起こ りやすい状態となり、 破損 を40〜45kg•f/cmの締め付け トルクでし っかり と締め付けてく ださい。 の原因となり ます。 ネジロッ ク剤を塗布しなかったり、 ボル トがし っかり と締めつけられていなかった場合、 ボル ト Before flying the unit, please check that the button の脱落や疲労による破損によ... -
Page 6: ローターヘッド部/ウォッシュアウト部/スワッシュプレート部の取付
ローターヘッド部/ウォッシュアウト部/スワッシュプレート部の取付 Rotor head, washout, and swashplate installation M2.6X10CS ......2 ボタンボルトM4X8 Botton bolt M4X8 M4X8ボタンボルト ..... 2 M4X8 button bolt 注 意 Caution 本ページの各ネジはローターヘッドを固定す る重要なネジです。 しっかりと締め込まれていることを確認して ください。 M2.6X10CS M3X22CS All the screws mentioned on this page are very important to fix the rotor head in its 仮締め... -
Page 7: ローターヘッド部のリンケージ
ローターヘッド部のリンケージ Rotor head linkage ピッチロッド (2セット) Pitch rod (2 sets) 60mm M2ロッドエンド ....10 M2 rod end 約43mm Approx. 43 mm SWMエルロンレバー/スワッシュロッド (2セット) SWMエレベーターレバー/スワッシュロッド SWM aileron lever/swash rod (2 sets) SWM elevator lever/swash rod 45mm 45mm 約27mm 約27mm Approx. 27 mm Approx. -
Page 8: リンケージの確認とピッチ/スロットルの設定
M4X4 注 意 Caution set screws so that it doesn't move. 必ずヒロボー製ピッチゲージ(2513-040)を使用して すこし持ち上げて ください。 ピ ッ チロ ッ ド 測ります。 For best results, use Hirobo’s pitch gauge Pitch rod Lift blade a little 2513-040. and measure ② ハイピッチ 12°... - Page 9 ■ Pitch curve setting ■ピッチカーブの設定 (Refer to your transmitter’s instruction manual for radio specific pitch (設定の行い方は、 ご使用の送信機の説明書をご覧ください。 ) curve setting descriptions). 各コンディションごとのピッチ角が下の表のようになるよう送信機の Adjust your radio’s pitch curve percentages so the following suggested pitch ピッチカーブ機能にデータを入力して ください。 curve degrees are measured on your helicopter at the low, mid and high ※このデーターはコンピュータプロポを使用のものです。...
- Page 10 パーツリスト Parts list 0412-347 0414-544 2531-003 2531-001 0414-571 2539-017 2506-044 2500-090 0414-462 2539-029 2500-090 0403-314 0403-315 2506-044 0414-460 0412-296 2532-051 0414-458 2539-017 2507-001 0414-543 2533-030 2509-009 0414-467 2532-007 0414-561 2500-073 2531-006 2500-073 2521-094 0414-543 2507-001 2531-006 0414-467 2507-001 2532-044 2509-009 0412-330 2532-015 2500-044...
- Page 11 コードNo. 品名 入数 税抜価格(円) 備考 Code No. Part Q'ty Price (Yen) Remarks FRP 対称メインブレード L=600 1式 0403-314 12,500 FRP main blade L=600 (symmetry) 1 set セミ対称メインブレード L=600(カーボン) 1式 0403-315 16,800 Semi-symmetrical main blade L=600 (carbon) 1 set SSZ-IVダンパーゴム 0412-296 SSZ-IV damper rubber SZ-Vブレードホルダー...
- Page 12 2532-002 0412-172 2532-002 2538-012 0412-259 0412-171 0412-348 コードNo. 品名 入数 税抜価格(円) 備考 Code No. Part Q'ty Price (Yen) Remarks SDセカンドギヤハウジング 0412-171 3,300 SD second gear 80T ネジ・Brg.付属 ø19 Brg.ホルダー W=60 1式 0412-172 2,200 ø19 Bearing holder W=60 1 set Bearing and screws attached SDセカンドギヤ80T (DTDS) 0412-259 3,000...
- Page 16 注意 Note ①本書の内容の一部または全部を無断で転載することは禁止されています。 ②本書の内容については、将来予告なしに変更することがあります。 ③本書の内容について万全を期しておりますが、万一ご不審な点や誤り、記載もれなどお気付 きのことがありましたら、ご一報くださいますようお願いいたします。 ④運用した結果については③項にかかわらず責任を負いかねますので、ご了承ください。 ①Reproduction of this manual, or any part thereof, is strictly prohibited. ②The contents of this manual are subject to change without prior notice. ③Every effort has been made to ensure that this manual is complete and correct. Should there, however, be any oversights, mistakes or omissions that come to your attention, please inform...


Need help?
Do you have a question about the SDX D3 SWM SL and is the answer not in the manual?
Questions and answers