Table of Contents
Advertisement
Quick Links
Digital Flat Panel Detector
Venu1012V(A17)
User Manual
Version :A0
:060-201-03
Doc ID
Release Date::2020.12.30
Medical device registration certificate no:
Registered product standard no:
Before operating, please read this user manual and pay attention to all safety precautions.
Please ensure that this user's manual is properly maintained so that it can be accessed at any
time (reserve).
Please use it correctly on the basis of full understanding of the content.
Advertisement
Table of Contents

Subscribe to Our Youtube Channel
Related Manuals for iRay Technology VENU1012V


Summary of Contents for iRay Technology VENU1012V
- Page 1 Digital Flat Panel Detector Venu1012V(A17) User Manual Version :A0 :060-201-03 Doc ID Release Date::2020.12.30 Medical device registration certificate no: Registered product standard no: Before operating, please read this user manual and pay attention to all safety precautions. Please ensure that this user's manual is properly maintained so that it can be accessed at any time (reserve).
- Page 3 To Customers Congratulations on your purchase of the Fixed Digital Flat Panel (hereinafter referred to as VENU1012V) which is manufactured by iRay Technology Co.Ltd. (Hereinafter referred to as iRay). Please take time to read this user guide in order to utilize the product effectively.
- Page 4 Information regarding specification, compositions, and appearance of this product is subject to change without prior notice. Venu1012V has no applied parts. Be sure to check the connection of all the parts are set properly & check the detector is kept in insulated cover that operator or patient can’t touch the detector directly before powered up.
- Page 5 This is used to indicate a prohibited operation. This is used to indicate an action that must be performed. This is used to indicate important operations and restrictions. This is used to indicate operations for reference and complementary information. User Manual of Venu1012V...
- Page 6 Flat Panel Detector Venu1012V Labels and markings on the equipment The contents of the labels and markings on iRay Venu1012V product are indicated below: 图 标 含 义 Caution: please refer to the instructions in the user manual. This symbol is used to indicate that the equipment has passed CE testing and it is followed by the CE Notified Body number.
- Page 7 This symbol is used to indicate the operational temperature limits. This symbol is used to indicate the storage temperature limits. Package symbol, fragile. Package symbol, keep away from sunlight. Package symbol, keep dry. Package symbol, this symbol is used to indicate the humidity limits. User Manual of Venu1012V...
- Page 8 Flat Panel Detector Venu1012V Package symbol, keep the equipment up right. Package symbol, do not roll the transportation package. Package symbol, this symbol is used to indicate stacking limit number. User Manual of Venu1012V...
-
Page 9: Table Of Contents
PERATION ........................46 FTER USE REGULATORY INFORMATION ....................48 ..............48 EDICAL EQUIPMENT SAFETY STANDARDS EMC ......... 49 ’ UIDANCE AND ANUFACTURE ECLARATION FOR ......................52 RODUCT ABEL SERVICE INFORMATION ......................54 ......................54 RODUCT IFETIME User Manual of Venu1012V... - Page 10 Flat Panel Detector Venu1012V ..............54 EGULAR NSPECTION AND AINTENANCE ..........................54 EPAIR APPENDIX A INFORMATION OF MANUFACTURES ..............56 User Manual of Venu1012V...
- Page 11 1. Safety Information 1 SAFETY INFORMATION ....................10 AFETY RECAUTIONS ......................15 OTES FOR SING User Manual of Venu1012V...
-
Page 12: Safety Information
Flat Panel Detector Venu1012V Safety Information 1.1 Safety Precautions Follow these safeguards and properly use the equipment to prevent injury and damage to any equipment/data. WARNING Do not use or store the equipment near flammable Installation and chemicals such as alcohol, thinner, benzene, etc. - Page 13 Never disassemble or modify the equipment. No Handling modification of this equipment is allowed. Parts of the VENU1012V that are not serviced or maintained while in use with the patient. Doing so may result in fire or electric shock. Also, since the...
- Page 14 Flat Panel Detector Venu1012V Have the patient take a fixed posture and do not let the patient touch parts unnecessarily. If the patient touches connectors or switches, it may result in electric shock or malfunction of the equipment. ...
- Page 15 Also, be sure to connect all the grounds for the system to a common ground. Do not use any power source other than the one provided with this equipment. Otherwise, fire or electric shock may be caused due to leakage. User Manual of Venu1012V...
- Page 16 Flat Panel Detector Venu1012V Do not spill liquid or chemicals onto the equipment. In Handling case the patient is injured, it is not allowed to contact with blood or other body fluids. Doing so may result in fire or electric shock.
-
Page 17: Notes For Using
Wipe it with a cloth slightly damped with a neutral detergent. Do not use solvents such as alcohol, benzene and acid. Doing so may damage the surface of the product. It’s recommended to use a waterproof non-woven cover as the isolated layer User Manual of Venu1012V... - Page 18 Flat Panel Detector Venu1012V between product and the blooding patient. User Manual of Venu1012V...
-
Page 19: General Description
2. General Description 2 GENERAL DESCRIPTION ..........................18 COPE ..........................18 ODEL ......................19 HARACTERISTIC ........................ 19 NTENDED USE ....................19 RODUCT PECIFICATION ..................20 NVIRONMENT REQUIREMENTS ....................21 RODUCT OMPONENTS ..................22 OMPONENTS ESCRIPTION User Manual of Venu1012V... -
Page 20: Scope
Flat Panel Detector Venu1012V 2 General Description Venu1012V is a digital X-ray flat panel detector based on amorphous silicon thin-film transistor technologies. It is developed to provide the highest quality of radiographic image, which contains an active matrix of 2000×2400 with 125um pixel pitch. -
Page 21: Characteristic
According to the Venu1012V intended use and the result of risk management, identifying and describing the essential performance as the following: a) To get image of dark field, the Venu1012V shall not be influenced to the imaging acquisition; b) To keep the data transmission function, the Venu1012V shall not be influenced to the data and signal transmission. -
Page 22: Environment Requirements
Flat Panel Detector Venu1012V Used kV 45kV to 55kV Power Consumption Max. 20W Weight 2.5kg Degrees of protection provided by IPX0 enclosure 2.6 Environment requirements 2.6.1 Operation requirements Item Specification Min 5 °C Temperature Max 35°C Temperature variation Max ± 0.5 °C / min... -
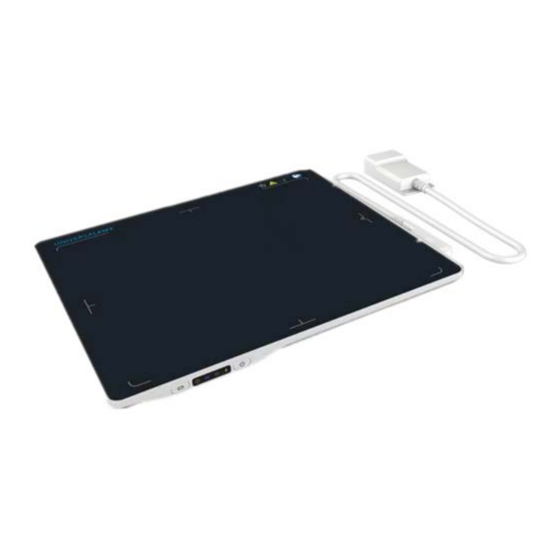
Page 23: Product Components
Venu1012V Detector Main Unit with Detector Cable The Detector Cable is replaceable. Medical Adapter 1 pcs DC 24V Gigabit Ethernet 1pcs Cable 1 pcs AC Power Cable 1pcs Gain correction data CD-Rom Defect correction map Manual User Manual of Venu1012V... -
Page 24: Components Description
Flat Panel Detector Venu1012V 2.8 Components Description 2.8.1 Detector Item Description Comment Length of Splitter Refer to 2.8.3 Width of Splitter Refer to 2.8.3 Height of Splitter Refer to 2.8.3 Length of the cable ~ 3m 2.8.2 Detector Cable The detector cable is replaceable and can be replaced if necessary. It is fixed to the detector by two screws. - Page 25 2.8.3 Splitter The Splitter should be fixed steady. Power Item Dimension (mm) Item Dimension (mm) 2.8.4 LED Indicator Once powered on, user can check the status through LED indicator. Item Description Power Indicator Link Indicator Reserved User Manual of Venu1012V...
- Page 26 Flat Panel Detector Venu1012V Status Indicator Power Indicator Lighting Status Description Power OFF Green ON Power ON Link Indicator Lighting Status Description Power OFF No connection Physical layer connection is Green ON established Status Indicator...
-
Page 27: Software Instructions
3. Software Instructions 3 SOFTWARE INSTRUCTIONS ....................26 YSTEM EQUIREMENT ........................ 26 NVIRONMENT ...................... 26 IRED ONNECTION ................... 29 ETWORK ONFIGURATION ........................30 NTERFACE ........................31 ALIBRATION User Manual of Venu1012V... - Page 28 Flat Panel Detector Venu1012V 3 Software Instructions Venu1012V provides SDK for user to integrate panel into their DR system. Additionally, it also provides an application for demonstration, i.e. iDetector. User can use iDetector to control panel without DR system. For detailed introduction, please refer to “\Help\Doc”...
- Page 29 3. Software Instructions Connect the Ethernet cable physical layer 1. Wait until connection is established 2. Open local network management interface Double click “TCP/IPv4” User Manual of Venu1012V...
- Page 30 Flat Panel Detector Venu1012V 1. Enter the IP address and Subnet mask as follow: IP address: 192.168.8.188 Subnet mask: 255.255.255.0 2. Click “OK”. 1. Open SDK 2. Click “Home” 3. Click “Venu1012V_1” 4. Click “Connect” User Manual of Venu1012V...
- Page 31 3. Software Instructions 3.4 Network Configuration 1. Wait until physical layer connection is established 2. Open local network management interface Double click “TCP/IPv4” User Manual of Venu1012V...
-
Page 32: User Interface
Flat Panel Detector Venu1012V 1. Enter the IP address and Subnet mask as follow: IP address: 192.168.8.188 Subnet mask: 255.255.255.0 2. Click “OK”. 5. Open SDK 6. Click “Home” 7. Click “Venu1012V_1” 8. Click “Connect” User Interface SDK supply iDetector as tool software: 32-bits iDetector.exe: Tools\iDetector\w32... -
Page 33: Calibration
1. Select HWPostOffset option on “Acquire” page. Otherwise, the generated gain template maybe not good. 2. The FDD (Focus to Detector Distance) should be higher than 1.2m. Ensure the whole active area is covered by the X-ray beam and no objects between the X-ray source and Detector. User Manual of Venu1012V... - Page 34 Flat Panel Detector Venu1012V 3. Click arrow icon to enter Gain Calibration Interface. 4. Click “PREP” button. 5. Exposure and acquire images. If gray value of the image does not meet the requirement, the mAs of X-ray generator need to be adjusted. A green tips box will be displayed if the gray value is acceptable.
- Page 35 3. In order to achieve better performance, new gain template should be used when the FDD is changed. 3.6.2 Download Gain Template 1. Click “Gain”, then Click “DownloadFile” button. User Manual of Venu1012V...
- Page 36 Flat Panel Detector Venu1012V 2. Click “...” to choose the path. 3. Select the “.gn”file and click “Open(O)” button. 4. Input the File Index. For example, input “1”. Click “OK” button until the file is downloaded successfully. User Manual of Venu1012V...
- Page 37 2. The FDD (Focus to Detector Distance) should be higher than 1.2m. Ensure the whole active area is covered by the X-ray beam and no objects between the X-ray source and Detector. 3. Click arrow icon to enter Defect Calibration Interface. User Manual of Venu1012V...
- Page 38 Flat Panel Detector Venu1012V 4. Click “PREP” button. 5. Exposure and acquire images. If gray value of image does not meet the requirement, the mAs of X-ray generator need to be adjusted. A green tips box will be displayed if the gray value is acceptable.
- Page 39 3. Software Instructions 3.6.4 Download Defect Template It is very similar to the steps about how to download gain template. 1. Click “Defect”, then Click “DownloadFile” button. 2. Select the “.dft” file and click “Open(O)” button. User Manual of Venu1012V...
- Page 40 Flat Panel Detector Venu1012V 3. Input the File Index. For example, input “1”. Click “OK” button until the file is downloaded successfully. 4. Click “ReadStatus” button, choose the right index and click “SelectFile” button. User Manual of Venu1012V...
- Page 41 The operator can update the template within two steps. 1. Select “HWPreOffset” in “Acquire” interface. Click “UpdateHWPreoffset” button and wait until the message box shows “Task succeed”. User Manual of Venu1012V...
-
Page 42: Operation
Flat Panel Detector Venu1012V 4 OPERATION ....................41 TEPS FOR ACQUIRING IMAGE ....................41 NNER PERATION ..................44 REESYNC PERATION ........................46 FTER USE User Manual of Venu1012V... -
Page 43: Steps For Acquiring Image
Generate HWPreOffset, Gain and Defect template after the detector reaches thermal equilibrium Acquire images in the selected mode To Acquire X-ray image is the main operation of Venu1012V. Most importantly, detector should build synchronization with X-ray generator. Venu1012V has Inner mode and FreeSync mode. - Page 44 Flat Panel Detector Venu1012V Acquire Delay Time(ms): t4-t3. The time span between the end of exposure and the start of acquisition. Actual Exposure Time Actual Exposure Window Setting Exp Window Time 4.2.2 Work Flow When connected, select “HWPostOffset”, “HWGain” and “HWDefect”. Then image can be acquired by clicking “Acquire”...
- Page 45 . After step12, panel would do another dark image acquisition. With both light and dark image, panel completes correction and calibration process. Finally, panel uploads processed image to Workstation and image is shown on screen. User Manual of Venu1012V...
-
Page 46: Freesync Mode Operation
Flat Panel Detector Venu1012V If Software Post offset and Software calibration is selected, image got from panel would be preview image. After step12, Workstation sends another “clear Acquire” to panel , panel would do dark image acquisition and uploads dark image to Workstation. With both light and dark image, Workstation completes correction and calibration process. - Page 47 (2X2 binning). 4. Panel starts uploading Post-dark image to Workstation. If hardware offset is chosen, panel would do correction and calibration first, then upload processed image to Workstation. 5. Workstation receives “Exposure Enable” from Panel. User Manual of Venu1012V...
-
Page 48: After Use
Flat Panel Detector Venu1012V 4.4 After use Disconnect the software Power off Keep it clean Store under specified conditions User Manual of Venu1012V... -
Page 49: Regulatory Information
5. Regulatory Information 5 REGULATORY INFORMATION ..............48 EDICAL EQUIPMENT SAFETY STANDARDS EMC ......... 49 ’ UIDANCE AND ANUFACTURE ECLARATION FOR ......................52 RODUCT ABEL User Manual of Venu1012V... -
Page 50: Medical Equipment Safety Standards
Flat Panel Detector Venu1012V 5 Regulatory Information 5.1 Medical equipment safety standards Medical equipment classification Type of protection against External electrical power source equipment electrical shock Class I Equipment Degree of protection against No Applied Parts. electrical shock Degree of protection against... -
Page 51: Guidance And Manufacture S Declaration For Emc
Electrostatic IEC 61000-4-2 ±8 kV contact Discharge ±2kV, ±4kV, ±8kV, ±15kV air Radiated RF EM IEC 61000-4-3 3V/m field 80MHz-2.7GHz 80% AM at 1kHz Proximity fields from IEC 61000-4-3 Refer to table 3 RF wireless communications User Manual of Venu1012V... - Page 52 Flat Panel Detector Venu1012V equipment Rated power IEC 61000-4-8 30A/m frequency magnetic 50Hz or 60Hz fields Table 3 – Proximity fields from RF wireless communications equipment Test frequency Band Immunity test levels (MHz) (MHz) Professional healthcare facility environment 380-390 Pulse modulation 18Hz, 27V/m 430-470 FM, ±5kHz deviation, 1kHz sine, 28V/m...
- Page 53 30 cm (12 inches) to any part of the Venu012V, including cables specified by the manufacturer. Otherwise, degradation of the performance of this equipment could result. User Manual of Venu1012V...
-
Page 54: Product Label
Flat Panel Detector Venu1012V 5.3 Product Label User Manual of Venu1012V... -
Page 55: Service Information
6. Service Information 6 SERVICE INFORMATION ......................54 RODUCT IFETIME ..............54 EGULAR NSPECTION AND AINTENANCE ..........................54 EPAIR User Manual of Venu1012V... -
Page 56: Product Lifetime
Flat Panel Detector Venu1012V 6 Service Information 6.1 Product Lifetime The estimated product lifetime is up to 7 years under appropriate regular inspection and maintenance. 6.2 Regular Inspection and Maintenance In order to ensure the safety of patients and operator, maintain the performance and reliability of the panel, be sure to perform regular inspection at least once a year. - Page 57 Appendix APPENDIX APPENDIX ............................56 User Manual of Venu1012V...
- Page 58 Flat Panel Detector Venu1012V Appendix A Information of Manufactures Company: iRay Korea Limited ADDRESS: 1833, 18F, 5, Gasan digital 1-ro, Geumcheon-gu, Seoul, Republic of Korea 08594 User Manual of Venu1012V...
Need help?
Do you have a question about the VENU1012V and is the answer not in the manual?
Questions and answers