Sign In
Upload
Download
Table of Contents
Contents
Add to my manuals
Delete from my manuals
Share
URL of this page:
HTML Link:
Bookmark this page
Add
Manual will be automatically added to "My Manuals"
Print this page
×
Bookmark added
×
Added to my manuals
Manuals
Brands
PRO Scientific Manuals
Laboratory Equipment
Bio-Gen PRO200
Operating manual
PRO Scientific Bio-Gen PRO200 Operating Manual
Homogenizer
Hide thumbs
1
2
3
4
5
6
7
8
9
10
11
12
13
14
15
16
17
18
19
20
21
22
23
24
25
26
27
28
29
30
31
32
33
34
35
36
37
38
39
40
41
42
43
44
45
46
47
48
49
50
51
52
53
54
55
56
57
58
59
60
61
62
63
64
65
66
67
68
69
70
71
72
73
74
75
page
of
75
Go
/
75
Contents
Table of Contents
Bookmarks
Table of Contents
Section 1
Table of Contents
Warranty
Repair Policy/Instructions
Bio-Gen PRO200 Homogenizer Motor Unit
Specifications
Description
Bio-Gen PRO200 Motor Unit Contents
Accessories
Bio-Gen PRO200 Operating Instructions
Care and Handling
Maintenance & Service
Environmental Conditions
Safety
Generators/Sealed Chambers Recommended for Use on Bio-Gen PRO200
PRO250 Homogenizer Motor Unit
Specifications
Description
PRO250 Motor Unit Contents
Accessories
PRO250/250C Operating Instructions
Assembly of the PRO250/PRO250C Motor Unit with the Optional Analog Speed Control Box
Assembly of the PRO250C Motor Unit with the Optional Digital Speed Control Box
Care and Handling
Maintenance & Service
Environmental Conditions
Safety
Generators/Sealed Chambers Recommended for Use on PRO250/250C
PRO Homogenizer Accessories
PRO Quick Connect Generator Introduction
Description
Attaching the PRO Quick Connect Generator to the Motor Unit
Operating Procedures
Dismantling the PRO Quick Connect Generator
Assembly of the PRO Quick Connect Generator
PRO Quick Connect Generator Maintenance
Tips to Maximize Your Generator's Performance
PRO MULTI-GEN 7 and MULTI-GEN 7XL Introduction
Description
Attachment of the Adapter to the Drive Motor: (See Figure 3 & 4)
Attachment of the Multi-Gen Generator to the Adapter: (See Figure 5)
Removal of the Multi-Gen Generator from the Adapter
Operating the Multi-Gen Generator
Dismantling of MULTI-GEN 7 ONLY
Dismantling of MULTI-GEN 7XL ONLY
Assembling MULTI-GEN Generator
MULTI-GEN Generator Maintenance
Homogenizer Accessory Cleaning
PRO Sealed Chamber Assembly
Description
Safety Sealed Assemblies with PRO Quick Connect Generator
Safety Sealed Assemblies with a Blade
PRO Safety Sealed Chamber Assembly Maintenance
PRO Carrying Case and Quick Connect Generator Probe Protective Cases
PRO Generator Index: Drawings and Spare Parts List
5Mm, 7Mm, and 10Mm Generators
20Mm Generators
30Mm Generators
Section 2
PRO MULTI-GEN Generator Index: Drawings and Spare Parts List
PRO Sealed Chamber Index: Drawings and Part List
ST Series
Repair Policy/Instructions
Warranty
Bio-Gen PRO200 Homogenizer Motor Unit
Specifications
Description
Bio-Gen PRO200 Motor Unit Contents
Accessories
Bio-Gen PRO200 Operating Instructions
Care and Handling
Maintenance & Service
Environmental Conditions
Safety
Generators/Sealed Chambers Recommended for Use on Bio-Gen PRO200
PRO250 Homogenizer Motor Unit
Specifications
Description
PRO250 Motor Unit Contents
Accessories
PRO250/250C Operating Instructions
Assembly of the PRO250/PRO250C Motor Unit with the Optional Analog Speed Control Box
Assembly of the PRO250C Motor Unit with the Optional Digital Speed Control Box
Care and Handling
Maintenance & Service
Environmental Conditions
Safety
Generators/Sealed Chambers Recommended for Use on PRO250/250C
PRO Homogenizer Accessories
PRO Quick Connect Generator Introduction
Description
Attaching the PRO Quick Connect Generator to the Motor Unit
Operating Procedures
Dismantling the PRO Quick Connect Generator
Assembly of the PRO Quick Connect Generator
PRO Quick Connect Generator Maintenance
Tips to Maximize Your Generator's Performance
PRO MULTI-GEN 7 and MULTI-GEN 7XL Introduction
Description
Attachment of the Adapter to the Drive Motor: (See Figure 3 & 4)
Attachment of the Multi-Gen Generator to the Adapter: (See Figure 5)
Removal of the Multi-Gen Generator from the Adapter
Operating the Multi-Gen Generator
Dismantling of MULTI-GEN 7 ONLY
Dismantling of MULTI-GEN 7XL ONLY
Assembling MULTI-GEN Generator
MULTI-GEN Generator Maintenance
Homogenizer Accessory Cleaning
PRO Sealed Chamber Assembly
Description
Safety Sealed Assemblies with PRO Quick Connect Generator
Safety Sealed Assemblies with a Blade
PRO Safety Sealed Chamber Assembly Maintenance
PRO Carrying Case and Quick Connect Generator Probe Protective Cases
PRO Generator Index: Drawings and Spare Parts List
5Mm, 7Mm, and 10Mm Generators
20Mm Generators
30Mm Generators
MULTI-GEN 7 and MULTI-GEN 7XL Generators
Stainless Steel
Stainless Steel with Blade
Glass Generator
Glass Blade
Advertisement
Quick Links
1
Table of Contents
2
Bio-Gen Pro200 Operating Instructions
3
Maintenance & Service
4
Care and Handling
5
Pro250 Homogenizer Motor Unit
6
Pro250/250C Operating Instructions
7
Maintenance & Service
Download this manual
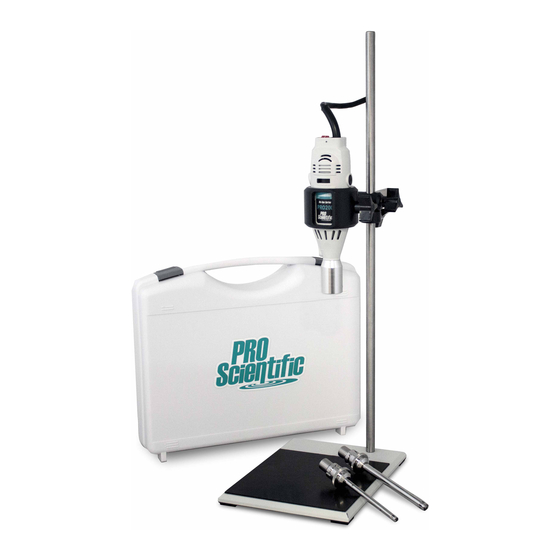
Bio-Gen PRO200 Homogenizer
PRO250 Homogenizer
Operating Manual
PRO Scientific Inc.
99 Willenbrock Road, Oxford, Connecticut 06478, USA
Phone: (203) 267-4600 Fax: (203) 267-4606
sales@proscientific.com, www.proscientific.com
OM.09.03.19
Table of
Contents
Previous
Page
Next
Page
1
2
3
4
5
Advertisement
Chapters
Section 1
2
Section 2
33
Table of Contents
Need help?
Do you have a question about the Bio-Gen PRO200 and is the answer not in the manual?
Ask a question
Questions and answers
Related Manuals for PRO Scientific Bio-Gen PRO200
Laboratory Equipment PRO Scientific P Series Operator's Manual
Homogenizer. 576w and 28,000 rpm. 1305w and 23,000 rpm (33 pages)
Laboratory Equipment PRO Scientific PRO250 Operating Manual
Homogenizer (75 pages)
This manual is also suitable for:
Pro250
Hv-04751-25
01-02200
Table of Contents
Print
Rename the bookmark
Delete bookmark?
Delete from my manuals?
Login
Sign In
OR
Sign in with Facebook
Sign in with Google
Upload manual
Upload from disk
Upload from URL


Need help?
Do you have a question about the Bio-Gen PRO200 and is the answer not in the manual?
Questions and answers