
Related Manuals for ADLINK Technology CSA-7210


Summary of Contents for ADLINK Technology CSA-7210
- Page 1 CSA-7210 2U Rackmount Network Appliance with Dual Intel® Xeon® Processor User’s Manual Manual Rev.: Rev. 1.0 Revision Date: July 3, 2020 Part No.: 50-1Z307-1000 Leading EDGE COMPUTING...
-
Page 2: Preface
CSA-7210 Preface Copyright © 2020 ADLINK Technology, Inc. This document contains proprietary information protected by copyright. All rights are reserved. No part of this manual may be reproduced by any mechanical, electronic, or other means in any form without prior written permission of the manufacturer. - Page 3 CSA-7210 Conventions Information to prevent minor physical injury, component damage, data loss, and/or program corruption when trying to complete a task. Informations destinées à prévenir les blessures corporelles mineures, les dommages aux composants, la perte de données et/ou la corruption de programme lors de l'exécution d'une tâche.
-
Page 4: Table Of Contents
1.3.2 Rear Panel............................7 1.3.3 Chassis Layout ..........................8 1.3.4 Dimensions ............................9 2 Specifications ........................ 10 CSA-7210 Specifications ....................... 10 3 Getting Started....................... 12 Installing Memory Modules ....................12 BIOS Update.......................... 13 3.2.1 Updating the BIOS via Network with BMC Tool................13 3.2.2 Updating BIOS via Host with BIOS Tool ..................14... -
Page 5: Overview
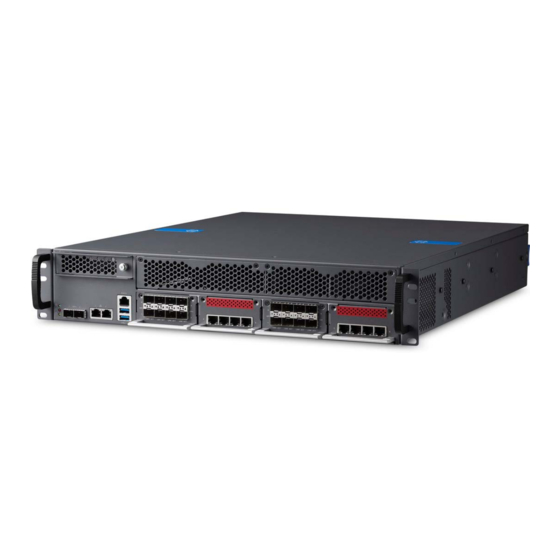
1 Overview 1.1 Introduction The ADLINK CSA-7210 is a 2U 19" rackmount Network Appliance with Intel® Xeon® Scalable processor and Intel® C620 series Chipset. The CSA-7210 features an IO intensive architecture with up to 64x SFP+ ports, high scalability with four Network Interface Module (NIM) slots, 3.5’’... -
Page 6: Block Diagram
CSA-7210 1.2 Block Diagram... -
Page 7: Mechanical Overview
CSA-7210 1.3 Mechanical Overview 1.3.1 Front Panel SPF+ Hot-Swap 3.5’’ LEDs Drive Bay 3.5’’ Internal Drive Bays x3 RJ-45 x2 USB x2 Console NIM Slots x4 Port 1.3.2 Rear Panel... -
Page 8: Chassis Layout
CSA-7210 1.3.3 Chassis Layout... -
Page 9: Dimensions
CSA-7210 1.3.4 Dimensions Dimensions: mm... -
Page 10: Specifications
CSA-7210 2 Specifications 2.1 CSA-7210 Specifications Main System Intel® Xeon® Silver 4110 Processor 2.10Hz (8C/16T, 85W) Intel® Xeon® Silver 4114 Processor 2.20 GHz (10C/20T, 85W) Intel® Xeon® Gold 5120T Processor 2.20 GHz (14C/28T, 105W) Intel® Xeon® Gold 6130 Processor 2.10 GHz (16C/32T, 125W) Intel®... - Page 11 CSA-7210 Storage Drive Bays 1x 3.5’’ hot-swappable SATA 6 Gb/s drive bay Internal 1x onboard CFast socket 3x 3.5’’ internal SATA 6 Gb/s drive bays with hardware RAID support (SKU dependent) Mechanical & Environmental Form Factor 2U 19’’ rackmount 438mm x 88mm x 560mm (W x H x D)
-
Page 12: Getting Started
3 Getting Started 3.1 Installing Memory Modules When installing memory modules in the CSA-7210, the blue DIMM slots of each channel can be freely populated (it is suggested to fill the slots from “outside to inside” for each CPU). However, the black DIMM slots must be populated after the blue DIMM slots are completely filled, otherwise the device will not boot up. -
Page 13: Bios Update
3. Copy the BMC FW package “BMC_CSA-7210_Release_V1.05” to the debug PC; Upgrade Procedure: 1. Check the IP of the BMC of CSA-7210. Power on the CSA-7210, boot the BMC to Linux (username: sysadmin; Passwd: superuser), and type “ifconfig” check its IP address. -
Page 14: Updating Bios Via Host With Bios Tool
CSA-7210 3.2.2 Updating BIOS via Host with BIOS Tool 1. Boot/Login to Shell 2. Update the BIOS over host with the following commands. Example: AfuEfix64 BIOS.ROM /p /b /n /k (to update BIOS without ME) AfuExfi64 BIOS.BIN /p /b /n /k /me (to update the entire BIOS) -
Page 15: Bmc Firmware Update
3. Copy the BMC FW package “BMC_CSA-7210_Release_V1.05” to the debug PC; Upgrade Procedure: 1. Check the IP of the BMC of CSA-7210. Power on the CSA-7210, boot the BMC to Linux (username: sysadmin; Passwd: superuser), and type “ifconfig” check its IP address. -
Page 16: Login To The Bmc Via Serial Console
Step 1 Set the UART to BMC mode using SW1 on the I/O board. Default BMC Debug Pins 2-7: ON Pins 1-8: ON Pins 4-5: ON Pins 3-6: ON Step 2 Connect the serial cable between CSA-7210 board and PC;... - Page 17 CSA-7210 Step 3 Open a serial port console tool (such as PuTTY), choose the higher numbered COM port (it may be different on different computers, please try both), then set the baud rate to 115200. Step 3 Input the user name “sysadmin” and password “superuser” to login to the system.
-
Page 18: Bmc Eth0 Default And Static Ip Settings
CSA-7210 3.5 BMC eth0 Default and Static IP Settings The default IP setting is DHCP. Users can login to the BMC to modify. Static IP Settings Ipmitool -I lan -H 127.0.0.1 -U admin -P admin raw 0x0c 0x01 0x01 0x0 0x1 # start config Ipmitool -I lan -H 127.0.0.1 -U admin -P admin raw 0x0c 0x01 0x01 0x4 0x1... -
Page 19: System Interfaces
CSA-7210 4 System Interfaces 4.1 Status LEDs 4.1.1 HDD LED (yellow) The HDD LED is controlled by SATALED# from the chipset. When SATA storage is active (read/write), the LED will blink. 4.1.2 Power LED (green) The Power LED will light up in boot up state. -
Page 20: Lan Leds
CSA-7210 4.2 LAN LEDs The LAN LEDs are integrated into the RJ-45 connector. Their behavior is as follows. LED1 - Left (Speed) 10 Mbps Green 100 Mbps Orange 1000 Mbps The LED2 (Link/Activity) indicates that a link has been established by lighting orange. When data is transmitted the LED blinks orange. -
Page 21: Sfp+ Ports
CSA-7210 4.4 SFP+ Ports Signal Name TX_FAULT TX_DSBL MOD_ABS RX_,OS VCCR VCCT... -
Page 22: Dual Usb 3.0 And Rj-45 Console Port
4.5 Dual USB 3.0 and RJ-45 Console Port Signal Name COM_TXD COM_RXD USB2_N USB2_P SSRX_N SSRX_P SSTX_N SSTX_P USB2_N USB2_P SSRX_N SSRX_P SSTX_N SSTX_P The CSA-7210 comes with an RJ-45 to DB-9 console port adapter cable. DB-9 Pin Signal — —... -
Page 23: Board Layout
CSA-7210 4.6 Board Layout CPU0 PCIe x8 slot CPU1 SATA Port NIM slot BMC Chip PWR CONN CPLD Chip B2B for Daughter Board DDR4 DIMM... -
Page 24: Lan Bypass Function
CSA-7210 5 LAN Bypass Function The CSA-7210 is equipped with a LAN Bypass function to allow uninterrupted network traffic in the case of power disruption, system failure, or if a single in-line appliance is shut down or hangs. The default behavior of the LAN Bypass function is determined by BIOS setting. -
Page 25: Nim Hardware Description
CSA-7210 5.2 NIM Hardware Description The CSA-7210 can bypass the LAN port on designated NIMs (CSA-Z4X01, CSA-Z8X10). (1) Bypass LED (Front Panel) Yellow: When one or more LAN segment has LAN Bypass is enabled Off: When all LAN segments LAN Bypass are disabled (2) CSA-Z4X01 LAN Bypass Port Pairing LAN Bypass Pair 1: Port 1 &... -
Page 26: Nim Slot Pcie Mapping Table
CSA-7210 5.4 NIM Slot PCIe Mapping Table NIM Slot PCIe Root Port Number CPU0 Slot 1 CPU0 Slot 2 CPU1 Slot 3 CPU1 Slot 4... -
Page 27: Important Safety Instructions
CSA-7210 Important Safety Instructions For user safety, please read and follow all instructions, WARNINGS, CAUTIONS, and NOTES marked in this manual and on the associated equipment before handling/operating the equipment. 1. Read these safety instructions carefully. 2. Keep this user’s manual for future reference. - Page 28 CSA-7210 9. This equipment is not suitable for use in locations where children are likely to be present. 10. Equipment must be serviced by authorized technicians when: • The power cord or plug is damaged; • Liquid has penetrated the equipment;...
-
Page 29: Consignes De Sécurité Importantes
CSA-7210 Consignes de Sécurité Importantes Pour assurer la sécurité de l’utilisateur, veuillez lire et suivre toutes les directives, ainsi que les AVERTISSEMENTS, MISES EN GARDE et REMARQUES de ce manuel et indiqués sur l’équipement associé avant de manipuler ou utiliser l’équipement. - Page 30 CSA-7210 9. Cet équipement ne convient pas à une utilisation dans des lieux pouvant accueillir des enfants. 10. L’équipement doit être entretenu par des techniciens agréés lorsque : • le cordon d’alimentation est endommagé ou lorsque la fiche électrique est endommagée;...
-
Page 31: Getting Service
5215 Hellyer Avenue, #110, San Jose, CA 95138, USA Tel: +1-408-360-0200 Toll Free: +1-800-966-5200 (USA only) Fax: +1-408-360-0222 Email: info@adlinktech.com ADLINK Technology (China) Co., Ltd. 上海市浦东新区张江高科技园区芳春路 300 号 (201203) Address: 300 Fang Chun Rd., Zhangjiang Hi-Tech Park, Pudong New Area Shanghai, 201203 China Tel: +86-21-5132-8988 Fax: +86-21-5132-3588 Email: market@adlinktech.com...
Need help?
Do you have a question about the CSA-7210 and is the answer not in the manual?
Questions and answers