Table of Contents
Advertisement
Available languages
Available languages
Quick Links
Advertisement
Chapters
Table of Contents

Related Manuals for Strong SRT 4935II


Summary of Contents for Strong SRT 4935II
- Page 1 USER’S MANUAL Manuel D’utilisation HIGH DEFINITION DIGITAL SATELLITE TELEVISION RECEIVER AND RECORDER DEMODULATEUR & ENREGISTREUR DE TELEVISION NUMERIQUE DE HAUTE DEFINITION VIA SATELLITE [2015.06.15]SRT4935Ⅱ Manual_english+French_NIG_rev1.0.indd 1 2015-06-16 오후 2:21:40...
-
Page 2: Table Of Contents
Contents 1. Introduction - - - - - - - - - - - - - - - - - - - - - - - - - - - - - - - - - - - - - - - - - - - - - - - - - - - - - - - 3 1.1 Overview 1.2 Main Features 2. -
Page 3: Introduction
1. Introduction English 1.1 Overview This satellite receiver is designed for the reception of free-to-air and encrypted channels. Depending on your location, enjoy the rich choice of up to 6,000 different channels broadcasting a large range of programs: culture, sports, cinema, news, events, etc. This receiver is assembled with highly qualified electronic parts. -
Page 4: Safety Precautions
2. Safety Precautions 2.1 Safety Be sure to read this user’s manual before Do not touch the power cord with wet hands starting the operation of the unit. as it may cause electric shock. Never open the cover. It is very dangerous Place the unit in a well ventilated and to touch the inside of the unit due to possible no-heat environment. -
Page 5: Points To Check Before Use
3. Points to Check before Use English 3.1 Accessories The accessories below are included with this receiver: Plot 746, IDU Industrial Area Phase 1 Abuja - Nigeria www.stronghd.tv User’s manual Remote control Batteries Warranty card (AAA type) RCA Cable HDMI Cable Power Adaptor ✽... -
Page 6: Controls/Functions
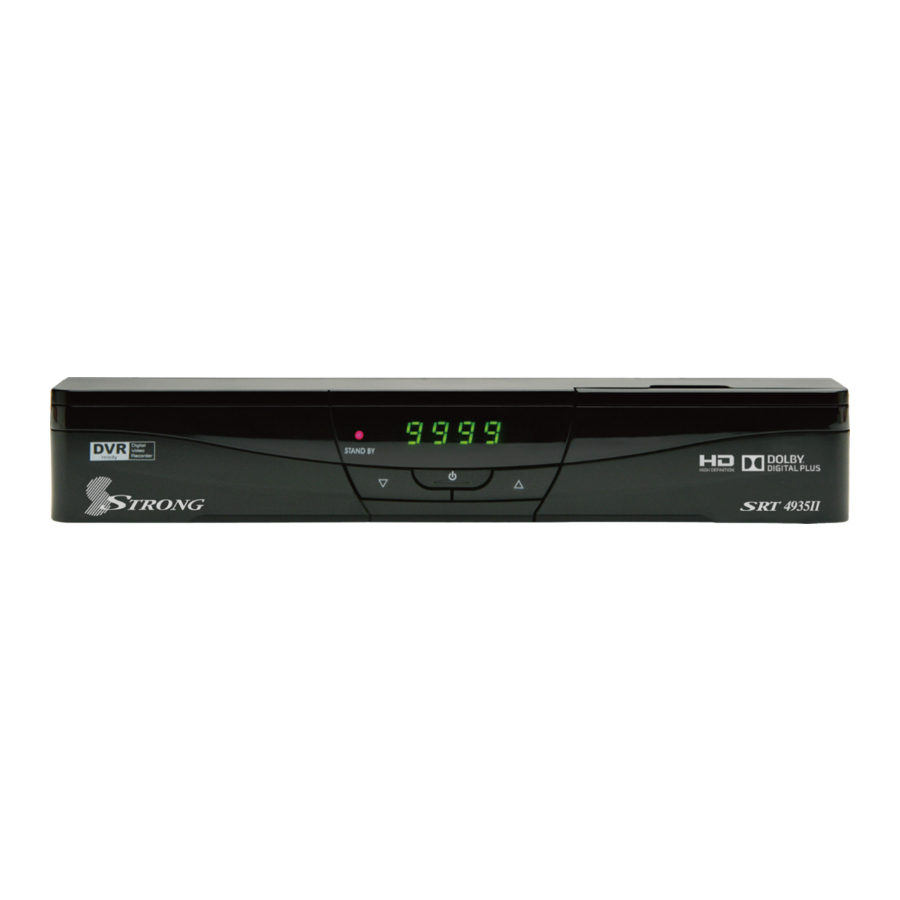
4. Controls/Functions 4.1 Front Panel ❶ ❸ ❷ ❹ ❺ ❻ ❶ Standby/Power on Indications Lamp: Flashes red light in ‘Standby’ mode and shows no light in ‘Power ON’ mode. ❷ Power: Switches the receiver between ‘Standby’ and ‘Power ON’ modes. ❸... -
Page 7: Remote Controller
4. Controls/Functions English 4.3 Remote Controller ❶ POWER: To turn the receiver On/Off. ❷ STAND BY: Just turn the receiver off. ❶ ❷ ❸ TEXT: To show the teletext contents. ❻ ❸ ❺ ❹ SUBTITLE: To turn closed captions on or off. ❹... - Page 8 4. Controls/Functions 4.3 Remote Controller ❶ Vol Up & Down: To change the volume level. ❷ Double arrow Up/Down: To move to the next or previous page when many pages are available. ❸ FILELIST: To display the filelist. ❹ GROUP: To change the channel groups. ❺...
-
Page 9: How To Connect
5. How to Connect English When Connecting the Receiver to a TV 1. Connect the TV antenna to TV ANT IN 2. Connect the Video and Audio of the TV to Video and Audio: connect the red and white connectors to Audio R and Audio L, and the yellow connector to Video 3. -
Page 10: Operation
6. Operation Getting Started After your receiver is powered on, proceed with installation as follows : ➊ Menu Language Setting 1. Turn on your TV and receiver. 2. The wizard menu for language selection will appear. <Figure 6.1.1> Select one language and press OK on proceed. Figure 6.1.1 ➋... - Page 11 6. Operation English 5. Select the item that you want to edit and set its parameters as desired. <Motorized Setting> ▪ Frequency: You can select appropriate TP frequency at which to check for signal. ▪ DiSEqC Motor: Select DiSEqC protocol among OFF/1.2/ USALS as appropriate for your Motor.
- Page 12 6. Operation ➌ Satellite Scan Through this function, the receiver searches for all the available channels ▣ Auto Scan <Figure 6.1.4> 1. You can select satellites by pressing the button and OK button on the remote. ▪ Search Type: ▫ All: To search all the Free To Air and scrambled channels, TV &...
- Page 13 6. Operation English ▣ OTA Menu 1. Select a satellite for OTA service 2. Enter the transpondes’s information (frequency, symbolrate)by 0~9 buttons. 3. Press RED button to start Scan. 4. If transponder’s information is correct, a pop-up window will display to update software. ➍...
- Page 14 6. Operation ▣ Audio Press to adjust the subtitle and/or audio status of the current channel: ▪ Audio Mode: Select between, Stereo -> Mono-Left -> Mono-Right ▪ Audio Track: Select between tracks available in this program ✽ Note: These subtitle and audio parameters are workable only when the desired channel supports these functions.
-
Page 15: System Setting
6. Operation English 6.2 System Setting You can set some settings from the submenus in “System settings” menu. ➊ Time Settings ▪ Region: local area ▪ GMT Usage: Set Region for the local time to be determined by adjusting the time difference with the GMT (Greenwich Meantime) according to your location. - Page 16 6. Operation ➍ Security Settings ✽ Note: PIN code and password are the same ▪ Receiver Lock : Set ON to require entering a PIN code at powering on. ▪ Install Lock : Set ON to require entering a PIN code to access the installation menu. ▪...
-
Page 17: Channels
6. Operation English 6.3 Channels You can edit favorite lists, Rename, Move, Lock, Skip, Delete, Add channel. You can select TV or Radio channels in an alternative way by pressing the TV/RADIO button and choose a channel list group by pressing the GROUP button. ➊... - Page 18 6. Operation ➍ Lock Channels Once a channel is locked, you will be asked to enter a password whenever you try to watch it. ✽ If you set ‘Lock Channel Confirm’ (refer to security setting on page 16) to OFF, you will not be asked to enter a password even if the channel is locked.
-
Page 19: Electronic Program Guide
6. Operation English 6.4 Electronic Program Guide ➊ EPG This submenu allows you to access the electronic program guide when available. 1. Press the GUIDE button to display the guide menu. <Figure 6.4.1> 2. Press OK to watch the selected channel and access its EPG data. -
Page 20: Entertainment
6. Operation ➋ Timer This sub menu allows you to set the on/off time of your receiver. To display the timer menu, press the RED button while in the guide menu. <Figure 6.4.2> Figure 6.4.2 ▪ Timer No: Select the timer that you want to modify. (1- 32 ) ▪... -
Page 21: System Information
6. Operation English 6.6 System Information Your receiver displays current information <Figure 6.6.1> regarding model name, software version and date of manufacture. This info is useful when downloading new software. Please note if you have performed a software update you must also perform a factory reset of the receiver. -
Page 22: External Device
6. Operation 6.8 External Device ➊ Disk Manager Use the cursor keys to activate the desired functions from this menu. ▪ Default Disk: If you have additional Storage devices connected to your receiver (i.e. USB HDD) you can select which storage device is to be the default drive for playback and recording. - Page 23 6. Operation English [File Management (Copy, NewFolder, Delete, Rename)] 1 RED KEY : To rename files 2 GREEN KEY : To copy files. 3 YELLOW KEY : To delete files. 4 BULE KEY : To make new folder. Figure 6.8.3 [MP3 Play] Select the MP3 file you want to play using the , OK in the file list.
-
Page 24: Dvr
6. Operation ▪ File Name: Press the OK button and enter File Name using keypad. ▪ Record: Set the record mode (ON/OFF) by using the left and right arrow button ▪ Power Off: Select Power Off should you wish the receiver to turn to standby after recording has finished <Figure 6.8.4>... - Page 25 6. Operation English ➋ Trick Mode You can operate the trick mode while you are playing the recorded files. These functions are available in playback mode or time-shift mode powerfully. ▣ PLAY This button will display a time- banner. If you want to show the play list while playing the file by using ▣...
- Page 26 6. Operation ▣ Bookmark To mark a specific place in a file for later retrieval. <Figure 6.9.2> ▪ RED: Press this button and red small triangle cursor will be placed at that position. If you want to delete the bookmarked position, press a this button once more when red small triangle cursor appear.
- Page 27 6. Operation English ➍ EPG (Electronic Program Guide) Recording This method can be used if the program you wish to record is on within the next 7 days. ▪ Press the button on your remote. ▪ Use the buttons to highlight the channel for the program you wish to record. Press OK. ▪...
-
Page 28: Troubleshooting
7. Troubleshooting There may be various reasons for the abnormal operation of the unit. Therefore, if the unit does not work properly, check it according to the procedures shown in the table below: Problem Possible causes Remedy The LED light on the The AC power cord is Connect the power cord properly front panel does not light... -
Page 29: Specifications
8. Specifications English System capabilities Fully DVB compliant satellite Connector IEC 169-24, female LNB/Tuner input Frequency range 950MHz ~ 2150MHz Signal level -65dBm ~ -25dBm LNB supply DC 13/18V, max 200mA LNB switch control 22KHz DiSEqC Ver 1.0/1.1/1.2/USALS Compatible Demodulator Front end DVB-S/S2 QPSK, 8PSK, 16APSK, 32APSK Symbol rate... - Page 30 8. Specifications Conditional Access Smart Card Reader 1 Slot Interface External Adaptor Power consumption max 18W Supply voltage AC 100V ~ 240V Supply frequency 50Hz ~ 60Hz Output Voltage (Current) DC 12V (1500mA) Rear Panel Video 1 X RCA cinch connectors Audio L/R 2 X RCA cinch...
- Page 31 Française Sommaire 1. Introduction ---------------------------------------------------------------------- 1.1 Aperçu 1.2 Caractéristiques Principales 2. Sûreté/Précautions ------------------------------------------------------------- 2.1 Sûreté 2.2 Précautions 3. Points à Vérifier avant l’Utilisation ----------------------------------------- 3.1 Accessoires 3.2 L’Antenne Parabolique 4. Contrôle/Fonctions ----------------------------------------------------------- 4.1 Panneau de Commande Avant 4.2 Panneau de Commande Arrière 4.3 Télécommande 5.
-
Page 32: Introduction
1. Introduction 1.1 Aperçu Ce récepteur satellite reçoit les chaînes d’accès libre (FTA) et chaînes cryptées. Dépendamment de votre location, vous pouvez jouir d’un choix vaste de 6,000 chaînes différentes couvrant une gamme de programmes variés : culture, sport, cinéma, nouvelles, événements… Ce récepteur contient des composantes électroniques de haute qualité. -
Page 33: Sûreté/Précautions
2. Sûreté/Précautions Française 2.1 Sûreté Bien lire ce manuel d’utilisation avant de Ne pas toucher le câble d’alimentation avec mettre l’unité en service. des mains mouillées pour éviter l’électrocution. Ne jamais ouvrir la couverture. Il est Placer l’unité dans un endroit frais et aéré. extrêmement dangereux de toucher l’intérieur de l’unité... -
Page 34: Points À Vérifier Avant L'utilisation
3. Points à Vérifier avant l’Utilisation 3.1 Accessories Les accessoires ci-dessous sont inclus avec ce récepteur: Plot 746, IDU Industrial Area Phase 1 Abuja - Nigeria www.stronghd.tv User’s manual Remote control Batteries Warranty card (AAA type) RCA Cable HDMI Cable Power Adaptor ✽... -
Page 35: Contrôle/Fonctions
4. Contrôle/Fonctions Française 4.1 Panneau Avant ❶ ❸ ❷ ❹ ❺ ❻ ❶ Lampe d’indication de mode En Veille ou ON: allume en rouge en mode En Veille et n’allume pas en mode ON ❷ Alimentation: Fait passer le récepteur entre les modes 'En Veille' et 'ON' ❸... -
Page 36: Télécommande
4. Contrôle/Fonctions 4.3 Télécommande ❶ Alimentation: Passer du mode ON au mode OFF. ❷ Standby: Eteindre le récepteur. ❶ ❷ ❸ Texte: Afficher le contenu télétexte s’il est transmis. ❻ ❸ ❹ Sous-Titres: Activer ou désactiver les sous-titres. ❺ ❹ ❺... - Page 37 4. Contrôle/Fonctions Française 4.3 Télécommande ❶ Volume Haut + Bas: Ajuster le volume hors du mode Menu. ❷ Double flèche Haut + Bas: Passer à la page. suivante ou précédente quand il y en a plusieurs. ❸ Liste des Dossier: Afficher la liste des dossiers. ❹...
-
Page 38: Comment Connecter
5. Comment Connecter Pour connecter le récepteur à une télévision 1. Connecter l’antenne télé au TV ANT IN 2. Connecter les fonctions Vidéo et Audio de la télévision aux fonctions correspondates: connecter les connecteurs rouge et blanc à Audio D (R) et Audio (L) et le connecteur jaune à Video 3. - Page 39 6. Opération Française 6.1 Préparation Allumer le récepteur puis installer comme suit: ➊ Configuration de la langue du menu 1. Allumer la télévision et le récepteur 2. Le menu Wizard pour le choix de la langue apparaîtra <Figure 6.1.1> Sélectionnez une langue et appuyez sur OK pour continuer.
- Page 40 6. Opération 5. Sélectionner l’article que vous voulez modifier et en conimage les parameters <Configuration Motorisée> ▪ Fréquence: Vous pouvez sélectionner la fréquence de TP opproprié pour vérifier le signal. ▪ Moteur DiSEqC: Sélectionner le protocole DiSEqC entre OFF/1.2/USALS (Système Universel de Repérage Satellite Automatique) qui est approprié...
- Page 41 6. Opération Française ➌ Scan du Satellite Grâce à cette fonction, le récepteur recherche pour tous les canaux disponibles. ▣ Scan Automatique <Figure 6.1.4> 1. Vous pouvez sélectionner satellites en appuyant sur le bouton et le bouton OK de la télécommande. ▪...
- Page 42 6. Opération ▣ Menu OTA 1. Sélectionner un satellite pour le les services OTA 2. Introduire les informations du transpondeur (fréquence, débit de symbole) avec les touches 0~9 3. Appuyer sur la touche ROUGE pour commencer le processus de Scan 4.
- Page 43 6. Opération Française ▣ RAPPEL Appuyer sur cette touche ramène l’unité à la chaîne visionnée précédemment. ▣ Audio Appuyer sur cette touché pour ajuster les sous-titres ou le statut audio de la chaîne en visionnement ▪ Mode Audio: Sélectionner du menu -> Stéréo -> Mono Gauche -> Mono Droite. ▪...
- Page 44 6. Opération 6.2 Reglage Système Vous pouvez définir des paramètres à partir des sous-menus dans le menu “Paramètres système”. ➊ Reglage Horloge ▪ Région: zone locale ▪ Utilisation GMT: Sélectionner cela pour que l’heure locale soit déterminée selon le décalage horaire avec la zone GMT ▪...
- Page 45 6. Opération Française ➍ Reglage Sécurité ✽ Note: Le code PIN et mot de passe sont les mêmes. ▪ Verrouillage du Récepteur: sélectionner ON pour que le PIN soit nécessaire dès le démarrage de l’installation. ▪ Verrouillage de l’Installation: sélectionner ON pour que le PIN soit nécessaire pour l’accès au menu d’installation.
-
Page 46: Chaînes
6. Opération 6.3 Chaînes Vous pouvez modifier les listes de favoris, renommer, déplacer, verrouiller,, supprimer, ajouter canal. Vous pouvez sélectionner les chaînes TV ou Radio d’une autre manière en appuyant sur la touche TV/RADIO et choisir un groupe de la liste des chaînes en appuyant sur le bouton GROUP. ➊... - Page 47 6. Opération Française ➍ Verrouillage Chaînes Une fois qu’un canal est verrouillé, vous serez invité à entrer un mot de passe chaque fois que vous essayez de regarder. ✽ Si vous réglez ‘Confirmer Verrouillage des chaînes’ (voir paramètre de sécurité à la page 16) sur OFF, vous ne serez pas invité...
-
Page 48: Guide Electronique Du Programme (Epg)
6. Opération 6.4 Guide Electronique du Programme (EPG) ➊ EPG Ce sous-menu vous permet d’accéder au guide EPG quand il est disponible. 1. Appuyer sur la touche GUIDE pour afficher le menu guide <Figure 6.4.1> 2.Appuyer sur OK pour visionner la chaine sélectionnée et accéder aux informations EPG Figure 6.4.1 Si vous appuyez sur OK du côté... -
Page 49: Divertissement
6. Opération Française 6.4 Guide Electronique du Programme (EPG) ➋ Compte-Minute Ce sous-menu vous permet de configurer les heures ON/OFF de votre récepteur. Pour afficher le menu compte-minutes appuyer sur la touche ROUGE sur le menu guide <Figure 6.4.2> Figure 6.4.2 ▪... -
Page 50: Informations Sur Le Système
6. Opération 6.6 Informations sur le Système Votre récepteur affiche les informations actualles <Figure 6.6.1> Concernant le nom du modèle, la version du logiciel et la date de fabrication. Ces informations sont utiles quand vous téléchargez un nouveau logiciel. Noter qu’une mise à jour du logiciel requiert une réinitialisation du récepteur. - Page 51 6. Opération Française 6.8 Périphérique Externes ➊ Gestionnaire Disques Utiliser les clés curseurs pour activer les fonctions désirées de ce menu. ▪ Disque par Défaut: Si vous avez des appareils de stockage connecté à votre récepteur (par exemple, un USB HDD ou un lecteur de cartes SD), vous pouvez sélectionner lequel sera l’appareil de stockage et d’enregistrement par défaut...
- Page 52 6. Opération [Gestion de fichiers (copier, bouger, nouveau fichier, supprimer, renommer)] 1. TOUCHE ROUGE: Pour renommer des fichiers. 2. TOUCHE VERTE: Pour copier des fichiers. 3. Touche Jaune: Pour supprimer des fichiers. 4. TOUCHE BLEU: Pour faire un nouveau dossier. Figure 6.8.3 [Lecture MP3 ] et OK dans la...
-
Page 53: Dvr
6. Opération Française ▪ Nom du fichier: Appuyez sur le bouton OK et entrez le nom du fichier en utilisant le clavier. ▪ Enregistrement: Sélectionner le mode d’enregistrement (ON/OFF) en utilisant les flèches gauche et droite ▪ Eteindre: Sélectionner cette option si vous voulez que le récepteur s’éteigne après la fin de l’enregistrement. - Page 54 6. Opération ➋ Mode Trick Vous pouvez activer ce mode en visionnant les fichiers enregistrés. Ces fonctions sont disponibles en mode playback ou mode décalage temporel. ▣ LECTURE Ceci montre la barre-durée et le progrès du programme enregistré Si vous voulez que s’affiche la liste de lecture en lisant le fichier en utilisant ▣...
- Page 55 6. Opération Française ▣ Point de Reprise Marquer un point spécifique pour y revenir plus tard. <Figure 6.9.2> ▪ ROUGE: appuyez sur la touche ROUGE. Un triangle rouge apparaîtra à ce point. Pour supprimer les points de reprise, appuyez sur la touche ROUGE de nouveau et le triangle rouge disparaîtra.
- Page 56 Le programme sélectionné apparaîtra en rouge. ▪ Appuyer sur la touche EXIT pour retourner à la vue normale Ce programme sera automatiquement enregistré par le DVR STRONG. ➎ Enregistrement au Compte-Minutes Cette fonction est disponible quand un appareil USB est connecté. Vous pouvez choisir une chaîne pour enregistrer le menu du Guide du Programme en utilisant...
-
Page 57: Résolution De Pannes
7. Résolution de Pannes Française Il peut y avoir différentes raisons au fonctionnement anormal de l’appareil. Par conséquent, si l’appareil ne fonctionne pas correctement, vérifier selon les procédures indiquées dans le tableau ci-dessous: Problème Cause Possible Solution La lampe à LED sur Le câble d’alimentation AC est B r a n c h e r l e c â... -
Page 58: Caractéristiques
8. Caractéristiques Capacités du Système Compatible au DVB satellite Connecteur IEC 169-24, female Entrée LNB/Tuner Gamme de Fréquence Niveau 950MHz ~ 2150MHz du Signal -65dBm ~ -25dBm Alimentation DC du LNB DC 13/18V, max 200mA Commande Changement 22KHz Compatible avec DiSEqC Ver 1.0/1.1/1.2/USALS Compatible Démodulateur Frontal... - Page 59 8. Caractéristiques Française Interface Accès Lecteur de Cartes à Puce 1 fente Conditionnel Adaptateur externe Consommation électrique max 18W Voltage d’alimentation AC 100V ~ 240V Fréquence d’alimentation 50Hz ~ 60Hz Output Voltage (Current) DC 12V (1500mA) Connecteurs Vidéo 1 X RCA cinch Panneau Arrière Audio L/R 2 X RCA cinch...
- Page 60 STRONG & CO. (FAR EAST), LTD. P. O. BOX 85, YOKOHAMA, KANAGAWA-KEN, JAPAN 231-91 FAX: +81 45 651 1842 www.stronghd.tv Technical Support Nigeria: techng@strong-technologies.com Ghana: techgh@strong-technologies.com RDC: techcd@strong-technologies.com Cote d Ivoire: techci@strong-technologies.com Other Countries: tech@strong-technologies.com [2015.06.15]SRT4935Ⅱ Manual_english+French_NIG_rev1.0.indd 30 2015-06-16 오후 2:22:04...
Need help?
Do you have a question about the SRT 4935II and is the answer not in the manual?
Questions and answers