
Related Manuals for Strong SRT 7004


Summary of Contents for Strong SRT 7004
- Page 1 Digital High Definition Satellite Receiver SRT 7004 User manual Bedienungsanleitung Manuel d’Utilisateur Manuale utente Manual del usuario Manual do Utilizador Felhasználói kézikönyv...
- Page 4 € 0,14/Min. deutsches Festnetz 801 702 017 € 0,42/Min. max. Mobilfunknetze support_pl@strong.tv +380(44)228 24 73 support_dk@strong.tv support_ua@strong.tv www.strong.tv Supplied by STRONG & Co, Japan Represented by STRONG Ges.m.b.H. Franz-Josefs-Kai 1 1010 Vienna Austria Email: support_at@strong.tv 06 May 2015 14:06...
- Page 5 PART 2 • English SRT 7004 is delivered with USB multimedia support. After downloading the PVR software from the website www.strong.tv the receiver can be upgraded to support the recording function via USB. This user manual describes the full functionality including the recording function and may not be applicable if the PVR software has not yet been installed.
-
Page 6: Table Of Contents
*This user manual describes the full functionality including the recording function and may not be applicable if the PVR software has not yet been installed. STRonG declares that this item complies with the basic requirements and other relevant regulations of directives CE 2004/108/EC and 73/23/EC, RohS 2002/95/EC Subject to alterations. -
Page 7: Instruction
PART 2 • English 1.0 InSTRUCTIon 1.1 Safety Instructions Do noT InSTALL YoUR RECEIVER: In a closed or poorly ventilated cabinet; directly on top of or under any other „ „ equipment; on a surface which might obstruct the ventilation slots. Do noT EXPoSE ThE RECEIVER oR ITS ACCESSoRIES: To direct sunlight or any other equipment that generates heat;... -
Page 8: Equipment Set-Up
„ the receiver. Always make backups of data on your USB storage device before using it with this receiver. STRONG will not take responsibility for any loss of information or circumstances caused by loss of information. STRONG cannot guarantee the playback of all files although extensions are listed, as it „... -
Page 9: Your Receiver
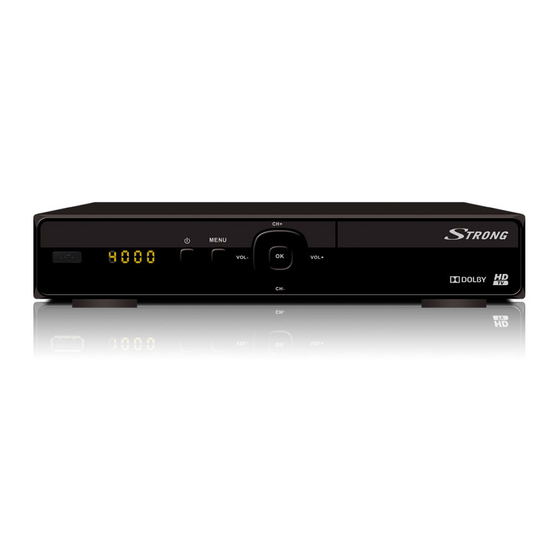
PART 2 • English *This user manual describes the full functionality including the recording function and may not be applicable if the PVR software has not yet been installed. 2.0 YoUR RECEIVER 2.1 Default PIn: 0000 2.2 front panel Fig. 1 1. - Page 10 PART 2 • English 4. GREEn Flexible functions in OSD menu and Teletext. 5. YELLoW Flexible functions in OSD menu and Teletext. 6. BLUE In viewing mode: Opens the Timer menu for easy setup timers; Flexible functions in OSD menu and Teletext. 7.
-
Page 11: Installing The Batteries
PART 2 • English 2.5 Installing the batteries Fig. 4 Remove the battery cover from the remote control and put 2x AAA size batteries inside the compartment. The diagram inside the battery compartment shows the correct way to install the batteries. 1. -
Page 12: Connecting Multiple Fixed Lnbs Using A Diseqc 1.0/1.1 Switch
PART 2 • English 3.3 Connecting multiple fixed LnBs using a DiSEqC 1.0/1.1 switch Fig. 8 a.: Connect the LNBs of your fixed antenna to the inputs of a DiSEqC 1.0/1.1 switch b.: Connect the output or “to receiver” connector of the DiSEqC 1.0/1.1 switch to the SAT IN connector on your receiver. -
Page 13: Installation
5.0 QUICk GUIDE foR USInG YoUR RECEIVER We at STRONG understand that you can’t wait to enjoy your new HD receiver. The following quick guide will make you familiar with the basic operation of this device. We do, however, advice you to read the full manual to get the best performance from your STRONG HD receiver. -
Page 14: Operation
PART 2 • English 6.0 oPERATIon In viewing mode, several features are available to make watching TV a true pleasure. This paragraph describes these features. Please also read chapter 7 to get familiar with the menu of your new receiver. 6.1 Changing channels There are different ways to change channels with your new receiver. -
Page 15: Selection Of Audio Language
PART 2 • English programme. Press three times to view technical details about the current channel. Press again or EXIT to close the information. You can change the on-screen duration of the info banner in the System menu. Please refer to section 7.2.5.2 for more details. -
Page 16: Favourite Channels
PART 2 • English 6.7 favourite channels Press the fAV button to access your favourite channels and to toggle between available favourite groups. Please refer to section 7.2.1 for details on how to create favourite lists. 6.8 Instant Recording* Your new receiver allows you to make an instant recording of the programme you are watching. Simply press 4 and confirm with ok to start the recording. - Page 17 PART 2 • English 22K Tone Auto: this setting will follow automatically. Polarity 13/18V, this setting will follow automatically. If using a motor, press tu to choose DiSEqC1.2/GOTOX. Then press ok to Motor show the menu for setting the position for your location. DiSEqC1.2 Move the motor to the right position for locking the signal like explained below.
- Page 18 PART 2 • English a new Transponder. In the popup window enter the frequency, symbol rate and polarity of the new transponder. While in the satellite name list: Press BLUE to delete a satellite from the Delete list. Press GREEn to delete the selected satellite, select YELLoW to delete all satellites.
-
Page 19: Channel
PART 2 • English Scan Select: Select All Sat to search all satellites you have selected in the Satellite Setting menu. Select Single Sat to search only the satellite selected under Satellite. After configuring, press GREEn to start scanning with the selected settings. Your receiver will now perform an automatic channel search with the scanning progress shown on screen. - Page 20 PART 2 • English 7.2.1 TV Channel Editor To edit your programme preferences (rename, move, sort, skip, lock, delete, or favourite), please go to the TV Channel Editor. Press pq to highlight a channel, BLUE to select a satellite (if more than one available).
- Page 21 PART 2 • English Disable a skipped TV or radio programme Press the BLUE button on the programme marked with the skip symbol. Move a TV or radio programme 1. Select the programme you want to move, and then press the EDIT button. Then press the GREEn button.
- Page 22 PART 2 • English Sort the channels in frequency order as found on Satellite.(Low - High) FTA/Scrambled Sort the channels from Free to Air to Scrambled HD/SD Sort the channels from HD to SD order. Satellite Sort the channels by satellite. note The 1st time the option is selected, the first possibility is executed, if you select the same option again, the 2nd possibility is executed.
- Page 23 PART 2 • English Time Zone: Select the Offset from GMT standard time. Enter the date using tu and the numeric buttons when GMT Usage is set to Set Date: Off. Enter the time using tu and the numeric buttons when GMT Usage is set to Set Time: Off.
-
Page 24: Parental Control
PART 2 • English RAW – audio from receiver will be sent in original digital format to be used in combination with Home Theatre Sets or Digital Amplifier with Multi Audio capability. Auto Switch off Auto Standby is a new, power saving feature that helps you reduce power consumption. It will switch off the receiver when no command is given for the defined period of time. - Page 25 Download the required update file for your receiver model from the support page on our website www.strong.tv or contact your local dealer. Unzip the file on your computer, if necessary, and then copy it to root folder of your USB storage device.
-
Page 26: Multimedia
PART 2 • English Select System then factory setting in the main menu and press ok to select. Enter your PIN code or the DEfAULT PIn: 0000 and press ok to confirm. This option will delete all your channels and settings. The receiver will reboot and start with the initial Installation menu. - Page 27 **STRONG cannot guarantee the playback of files although extensions are listed here, as the correct playback depends on codec used, data bit rate and resolution as well. Please consult the STRONG Hotline in your country to get more details. 7.3.1.1 Movie In the Movie menu you have to navigate to a movie file.
- Page 28 PART 2 • English During playback, press SUBTITLE to select a language and confirm with ok. During playback of Movie files you can press SUBTITLE twice to change the subtitle settings described below: Subtitle Size: Choose subtitle size between Small, Normal and Big. Subtitle BG: Choose subtitle background between White, Transparent, Grey and Yellow- Green.
- Page 29 PART 2 • English continue and proceed formatting. Select an action with tu and press ok. Please note that after formatting all currently stored data will be lost from the device. Select YELLoW Select: For selecting multiple recordings for further process, highlight the recording with pq and then press the YELLoW Select button to select the recording.
-
Page 30: Troubleshooting
If the receiver does not work properly after checking it, please contact your local Service line or a STRONG dealer. Alternatively you can send a support mail via our website: www.strong.tv. NEVER open or disassemble your receiver. This may cause a dangerous situation and will void the warranty. - Page 31 Satellite dish is too small Change to a larger dish Trees or buildings in path. Change position of dish Signal is too strong, dish is Connect a signal attenuator oversized. to the LNB input. Ask a local satellite specialist for advice.
-
Page 32: Specifications
Connect an extra power supply not start. too high. adapter to your USB HDD device. Password forgotten Contact local Service Hotline or send email to our support via www.strong.tv 9.0 SPECIfICATIonS Demodulator Demodulation: QPSK, 8PSK Input symbol rate: DVB-S QPSK: 1 ~ 45 Ms/s... - Page 33 Supported in various formats (MPG, MPEG, TS, VOB, MP4, AVI…)* Audio playback: MP3, WMA* Picture view: JPG, BMP* *STRONG cannot guarantee the playback of files although extensions are listed here, as it depends on codec used, data bit rate and resolution. network Connector: Ethernet RJ45 Wired IP setup: Auto (DHCP) and Manual setup.
- Page 34 PART 2 • English...
Need help?
Do you have a question about the SRT 7004 and is the answer not in the manual?
Questions and answers