Mytee Lite 8070 User Manual
Hide thumbs
Also See for Mytee Lite 8070:
- User manual (20 pages) ,
- Instructions manual (12 pages) ,
- Instructions manual (12 pages)

Related Manuals for Mytee Mytee Lite 8070


Summary of Contents for Mytee Mytee Lite 8070
- Page 1 User Manual Mytee Lite ™ Model: 8070 REV: 6/3/21 13655 Stowe Dr. Poway, CA 92064 P: (858) 679-1191 F: (858) 726-6005 www.mytee.com...
- Page 2 Mytee and its employees are equally dedicated to developing with the industry and its advances. Like any other piece of machinery or technology, the Mytee Lite™ also re- quires the proper maintenance and care to keep the product working over extended use.
-
Page 3: Table Of Contents
Table Of Contents Important Safety Information At a Glance 1.1 - Technical Specifications 1.2 - Included with the Mytee Lite™ 1.3 - Mytee Lite™ Front View 1.4 - Mytee Lite™ Rear View 1.5 - Switch Plate Machine Operation 2.1 - Powering the Mytee Lite™... -
Page 4: Important Safety Information
When and if calling Mytee for support, please grounding plug. The plug must be plugged into an appro- have your Model and Serial Number available for faster priate outlet that is properly installed in accordance with assistance. - Page 5 Important Safety Information 18. The voltage and frequency indicated on the name ing: Read all instructions before using this machine. This product is intended for commercial use only. plate must correspond to the wall receptacle supply volt- age. To reduce the risk of fire, electrical shock, or injury: 19.
-
Page 6: At A Glance
With handle: 33” x 12” x 36.5” Dimensions Without handle: 18” x 12” x 28.5” Power Cord Single 25’ 12/3 1.2 - Included with the Mytee Lite™ 8501 15’ x 1.25” Vacuum & Solution 8400P 4” Air Lite™ Upholstery Tool Heatguard™ Hose Wrap Hose... -
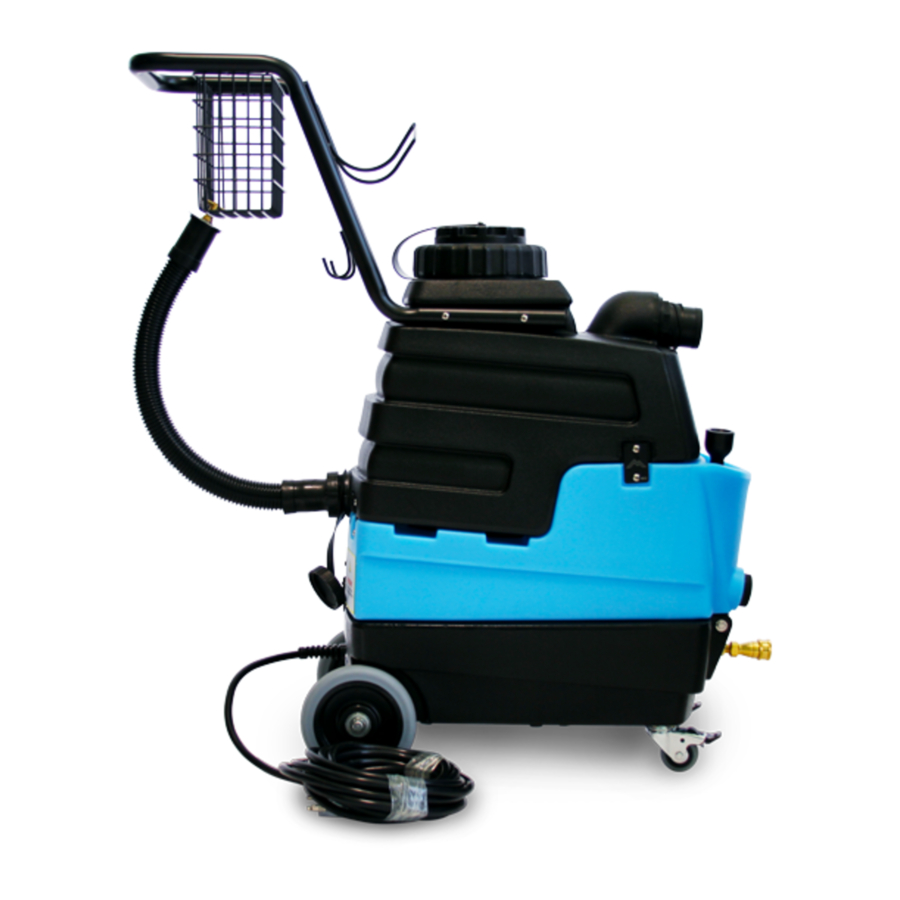
Page 7: Mytee Lite™ Front View
1 - At a Glance 1.3 - Mytee Lite™ Front View 1. Easy-Push Handle 6. Solution Tank 2. Recovery Tank 7. Faucet Fill Hose 3. 10” Wheels 8. Bucket Fill Opening 4. Quick Disconnect 9. Cuff-Lynx™ Hose Connection 5. Solution Tank Drain... -
Page 8: Mytee Lite™ Rear View
1 - At a Glance 1.4 - Mytee Lite™ Rear View 1. 3” Locking Front Casters 2. 25’ 12/3 Power Cord 3. Switch Plate 4. Opening Latch 5. Recovery Tank Drain Hose 6. Storage Basket... -
Page 9: Switch Plate
1 - At a Glance 1.5 - Switch Plate 1. Vacuum Switch 2. Pump Switch 3. Heater Switch Activates the vacuum motor. Activates the solution pump. Activates the heater. -
Page 10: Machine Operation
♦ Tighten all the screws in an X pattern with a screwdriver. The solution tank can be filled up via the faucet fill hose 2.1 - Powering the Mytee Lite™ ♦ or from a bucket via the opening. 2.4 - Operating the Mytee Lite™... -
Page 11: Emptying The Solution & Recovery Tanks
2 - Machine Operation 2.5 - Emptying the Solution & Recovery Tanks 3. Once pump is primed and there is pressure in the solu- tion line, turn on heater switch and wait a few minutes for water to heat up. 4. -
Page 12: Machine Maintenance
Inspect machine for water leaks and loose hardware. 3.1 - Filter Maintenance The Mytee Lite™ has a small filter on the top of the vac- uum stack in the recovery tank. This filter should be ♦ checked and cleaned after each use. -
Page 13: Available Accessories
4 - Available Accessories 8400M Mytee Dry™ Upholstery Tool 8400 4” Stainless Steel Upholstery Tool 8700 Crevice Tool 8390EZ 10” Single Jet Carpet Cleaning Wand... -
Page 14: Troubleshooting
Circuit breaker tripped in building. Reset breaker in building. turning on. Faulty switch or power cord. Contact a Mytee Service Center. Unclog the jet by removing and soaking in a vin- Jet is clogged. egar and water solution. Scrub with a soft brush. - Page 15 NOTES...
- Page 16 Mytee, LLC 13655 Stowe Dr. Poway, CA 92064 www.mytee.com © 2021 Mytee, LLC Printed in the USA...
Need help?
Do you have a question about the Mytee Lite 8070 and is the answer not in the manual?
Questions and answers