
Subscribe to Our Youtube Channel
Related Manuals for COMAC OMNIA 26


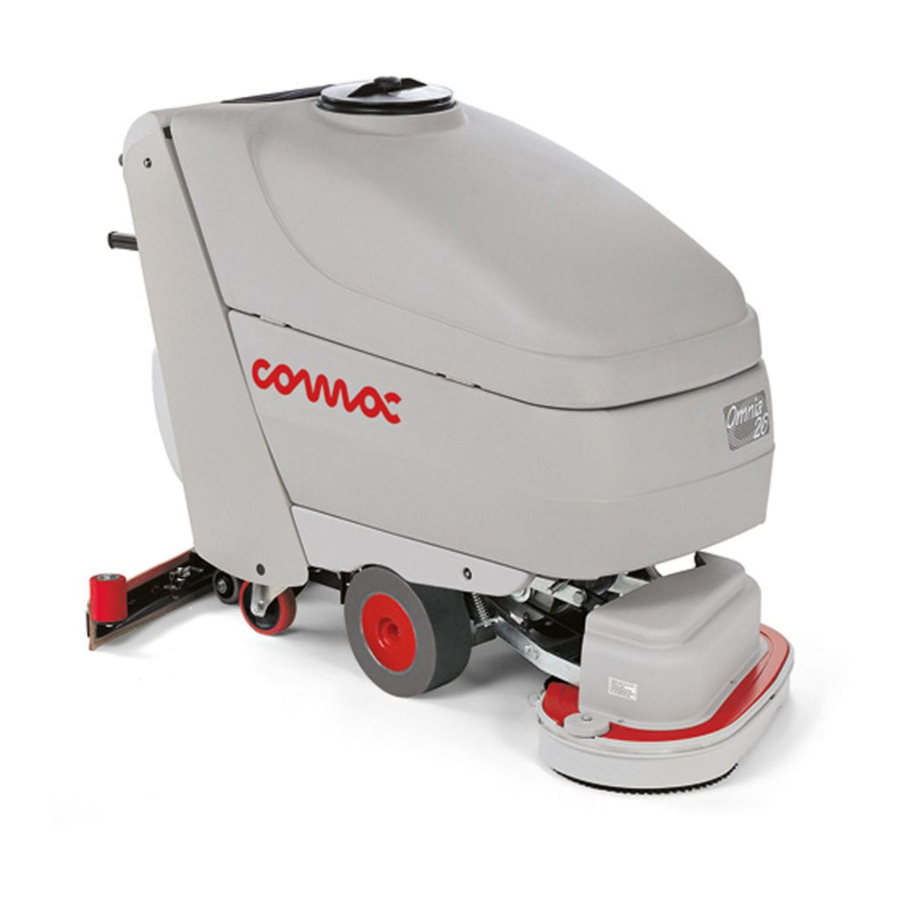
Summary of Contents for COMAC OMNIA 26
- Page 1 USE AND MAINTENANCE MANUAL OMNIA 26-32-42 ED. 06-2011 ORIGINAL INSTRUCTIONS Doc. 10012143 Ver.
- Page 2 The descriptions contained in this document are not binding. The company therefore reserves the right to make any modifications at any time to elements, details, or accessory supply, as considered necessary for reasons of improvement or manufacturing/commercial requirements. The reproduction, even partial, of the text and drawings contained in this document is prohibited by law.
-
Page 3: Table Of Contents
SOMMARIO ON CONSIGNMENT OF THE MACHINE ..............................4 SERIAL NUMBER PLATE..................................4 INTRODUCTORY COMMENT ................................4 INTENDED USE....................................4 TECHNICAL DESCRIPTION .................................. 5 SYMBOLS USED ON THE MACHINE..............................6 GENERAL SAFETY REGULATIONS............................... 8 MACHINE PREPARATION..................................9 1. HANDLING OF THE PACKED MACHINE ............................9 2. -
Page 4: On Consignment Of The Machine
Serial number plate On consignment of the machine When the machine is delivered to the customer, an immediate check must be performed to ensure all the material mentioned in the shipping documents has been received, and also to check the machine has not been damaged during transportation. -
Page 5: Technical Description
TECHNICAL DESCRIPTION Omnia 26 Omnia 32 Omnia 42 Rated power Working width 1040 Width of rear squeegee 1015 1115 1315 Work capacity, up to 2640 3320 4160 ∅ mm Brushes (diameter and quantity) 345 / 2 430 / 2 533 / 2 Brush rotations giri/min. -
Page 6: Symbols Used On The Machine
SYMBOLS USED ON THE MACHINE Indicates the general switch Indicates the exhaust pipe of the recovery tank Symbol denoting cock Indicates the cock lever Indicates the solenoid valve switch Symbol denoting up-down brushes base Indicates the lever of the brushes base lifting Symbol denoting up - down of the squeegee Indicates the squeegee lever Symbol denoting the brushes pressure... - Page 7 SYMBOLS USED ON THE MACHINE Symbol denoting the coupling Indicates the anchor points and the load direction Symbol recycling Indicates the actuation control of the solution recycling system (optional)
-
Page 8: General Safety Regulations
When disposing of consumption materials, observe the laws and regulations in force. • When your COMAC S.P.A. machine has reached the end of its long working life, dispose of the materials it contains in an appropriate manner, and bearing in mind that the machine itself was constructed using 100% recyclable materials. -
Page 9: Machine Preparation
5. Keep the pallet and the fixing brackets for eventual transport necessities 3. CABLE CONNECTION TRACTION MOTOR A technician of the Comac service dept. must carry out this operation. 4. INSTALLATION OF THE BATTERIES INTO THE MACHINE The batteries are fitted in the appropriate compartment under the solution tank and must be handled by using appropriate lifting equipment suitable both for the weight and for the coupler system. -
Page 10: Connection Of The Battery Connector
MACHINE PREPARATION For the battery installation it is necessary to: 1. Make sure that the solution tank is completely empty 2. Lift the solution tank completely 3. Move the coupler prop onto the outermost hole (1) maintaining the tank in a vertical position 4. -
Page 11: Level Indicator For The Charge Of The Batteries
MACHINE PREPARATION 8. LEVEL INDICATOR FOR THE CHARGE OF THE BATTERIES The batteries’ indicator is digital with 4 fixed positions and a blinking one. The numbers, which appear on the display, show the approximate charge level. 4 = maximum charge, 3 = charge 3/4, 2 = charge 2/4, 1 = charge 1/4, 0 = (blinking) discharged batteries ATTENTION! Some seconds after that “0”... -
Page 12: Assembly Rotating Brushes
MACHINE PREPARATION 12. ASSEMBLY ROTATING BRUSHES 1. Push downwards the control lever to lift the brushes base Note In case of machines with automatic control (machines with actuator) rotate the switch with key into position ON (1) and push the lever button (2) upwards so much until the signal lamp of the up-down brushes base is coming off. -
Page 13: Tanks
MACHINE PREPARATION 13. TANKS 1. Check that the solution tank is empty, then lift it until the blocking prop is coupled. Check the correct position of the suction hose in its seat (1), that the solution hose is firmly fixed to the proper connector (2) and that the upper plug is closed (3). -
Page 14: Work
WORK 1. PREPARING TO WORK 1. Carry out the operations for the preparation of the machine 2. Connect the connector to the batteries (1) 3. Check that the parking brake is released (2) 4. Turn the key of the general switch (3) clockwise of a quarter turn. Immediately, the general green signal lamp comes on (4) and the digital display indicates the charge level of the batteries ON/OFF 5. -
Page 15: Squeegee Automatic-Manual
WORK ATTENTION! Whenever problems during operating occur, lower promptly the lever of the emergency brake placed on the rear right side of the machine. This command will block immediately the traction of the machine. To restart the machine again, press the releasing trigger and lift the lever of the emergency brake;... -
Page 16: Traction
WORK 5. TRACTION These machines are equipped with electronically commanded traction, and continuous speed variation. To move the machine, rotate the key into position ON, wait for three seconds and then push forwards (forward movement) or backwards (rear movement) the lever placed on the handle bar. For safety reasons, in reverse motion, the speed movement is reduced. -
Page 17: At The End Of The Work
AT THE END OF THE WORK 1. AT THE END OF THE WORK Having finished the job and before any type of maintenance is done, it is necessary to: 1. Close the water cock (1) 2. Lift the brushes base through the suitable lever if the machine is equipped with manual control (2) or through the lever button, should the machine be equipped with the automatic control (3) Note In case of machines with automatic control act upon the lever button (3) until the signal lamp of... -
Page 18: Daily Maintenance
DAILY MAINTENANCE PERFORM ALL MAINTENANCE OPERATIONS IN SEQUENCE 1. CLEANING OF THE RECOVERY TANK 1. Empty the recovery tank completely 2. Empty the solution tank completely and lift it up to its vertical position blocking it through the suitable prop 3. -
Page 19: Cleaning Of The Solution Tank Filter
DAILY MAINTENANCE 3. CLEANING OF THE SOLUTION TANK FILTER 1. Open the cock of the water 2. Empty the solution tank completely 3. Unscrew the filter placed under the front right side of the machine 4. Take off the plug of the water inlet of the solution tank and the filter underneath 5. -
Page 20: Cleaning Of The Squeegee
DAILY MAINTENANCE 4. CLEANING OF THE SQUEEGEE In order to have the best drying results, check that the squeegee is always clean. To clean the squeegee: 1. Lift the squeegee through the suitable lever 2. Clean accurately the inside of the squeegee with a water jet 3. -
Page 21: Weekly Maintenance
WEEKLY MAINTENANCE 1. REPLACEMENT REAR SQUEEGEE RUBBER If the rear squeegee rubber is worn and does not dry well, it is possible to change the drying edge proceeding as follows: 1. Push and rotate the fixing plates (1) 2. Slip off the rubber blade and the rubber itself 3. -
Page 22: Troubleshooting
TROUBLESHOOTING 1. INSUFFICIENT WATER ONTO THE BRUSHES 1. Make sure that the cock is open (1). In this case the signal lamp must be on (2) 2. Make sure that there is water in the solution tank 3. In the machines with automatic version check that the solenoid valve switch is on 4. -
Page 23: Excessive Foam Production
CONTROLLO DI FUNZIONAMENTO 4. Check the perfect float condition of the recovery tank filter (see under “CLEANING OF THE RECOVERY TANK FILTER”) 5. EXCESSIVE FOAM PRODUCTION Check that a low foam detergent has been used. If required, add a small quantity of antifoam liquid into the recovery tank. -
Page 24: Disposal
DISPOSAL To dispose of the machine, take it to a demolition centre or an authorised collection centre. Before scrapping the machine it is necessary to remove and separate the following materials and send them to the appropriate collection centres in accordance with the environmental hygiene regulations currently in force: •... -
Page 25: Choosing And Using The Brushes
TABLE FOR CHOOSING THE BRUSHES Machine No. of Code Type of bristles ∅ Bristles ∅ Brush Length Notes 405590 BLUE 405591 WHITE OMNIA 26 405592 BLACK ABRASIVA 405593 PPL + ACCIAIO 405594 0.6 + 0.3 405562 BLUE 405563 WHITE OMNIA 32... -
Page 26: Ec Declaration Of Compliance
EC DECLARATION OF COMPLIANCE The undersigned company: COMAC S.p.A. Via Maestri del Lavoro n.13 37059 Santa Maria di Zevio (VR) declares under its sole responsibility that the FLOOR SCRUBBING MACHINE mod. OMNIA26 – OMNIA32 – OMNIA42 comply with the requirements of the following Directives: •... - Page 28 COMAC spa Via Maestri del Lavoro, 13 – 37059 Santa Maria di Zevio – Verona – ITALY Tel. +39 045 8774222 – Fax +39 045 8750303 – E-mail: com@comac.it info@comac.it www.comac.it...
Need help?
Do you have a question about the OMNIA 26 and is the answer not in the manual?
Questions and answers