Table of Contents
Advertisement
Advertisement
Table of Contents

Subscribe to Our Youtube Channel
Related Manuals for COMAC Vispa 35B


Summary of Contents for COMAC Vispa 35B
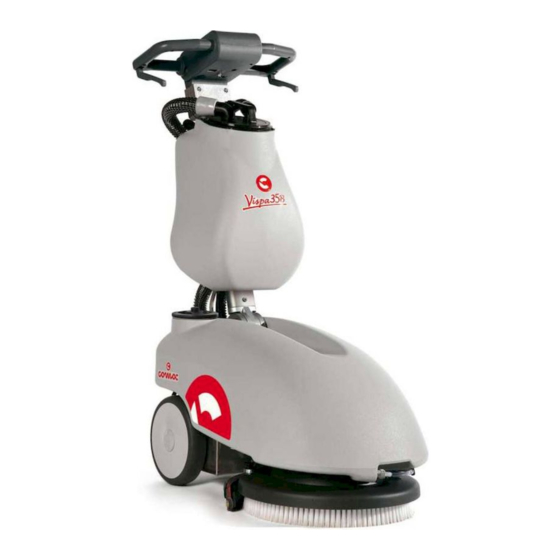
- Page 1 MANUAL USE AND MAINTENANCE VISPA 35 B ED. 02-2007 Doc. 10005706...
- Page 2 The contained descriptions in the present publication are not binding. The company therefore reserves itself the right to bring in whatever moment possible organs changes, details or supplies of accessories, that it holds convenient for an improvement, or for any demand of constructive or commercial character.
-
Page 3: Table Of Contents
TABLE OF CONTENTS RECEIVING THE MACHINE............................4 IDENTIFICATION PLATE...............................4 FOREWORD................................4 TECHNICAL DESCRIPTION ............................5 SYMBOLS USED ON THE MACHINE..........................6 GENERAL SAFETY REGULATIONS........................... 7 PREPARING THE MACHINE............................8 1. HANDLING THE PACKAGED MACHINE ..............................8 2. HOW TO UNPACK THE MACHINE ................................8 3. BATTERY INSTALLATION/CONNECTION ..............................8 4. -
Page 4: Receiving The Machine
Receiving the machine Identification plate Immediately check, when receiving the machine, that all the materials Disconnect the rapid graft before removing the indicated on delivery documents have been received and also that the reservoir solution to access the vision of the machine has not been damaged in transit. -
Page 5: Technical Description
TECHNICAL DESCRIPTION Vispa 35B Rated power Working width Rear squeegee width Work capacity 1050 Water consumption Brushes (diameter or length) ∅ mm Brush revolutions Pressure on the brushes Brush motor V / W 12 / 250 Drive type semi-aut. Maximum slope... -
Page 6: Symbols Used On The Machine
SYMBOLS USED ON THE MACHINE Cock symbol Used to indicate the solenoid valve switch Brush symbol Used to indicate the brush motor switch Brush symbol (SWEEPING VERSION) Used to indicate the brush motor switch Suction motor symbol Used to indicate the suction motor switch Battery symbol Battery charge gauge Maximum detergent solution temperature gauge... -
Page 7: General Safety Regulations
Dispose of consumables in accordance with existing laws and codes. When, after years of precious work, your COMAC ma chine is ready to be retired its entire component materials must be properly disposed of: they contain oils and electronic components. Remember that the machine itself was built using totally recyclable materials. -
Page 8: Preparing The Machine
PREPARING THE MACHINE 1. HANDLING THE PACKAGED MACHINE The machine is contained in specific packing. Each pallet contains four machines placed on two levels. More than two packings cannot be stacked. Total weight is 70 kg. Overall dimensions are: A : 500mm B : 500mm C : 1150mm 2. -
Page 9: Connector Connecton
PREPARING THE MACHINE 4. CONNECTOR CONNECTON 6. Connect the battery connector to the machine connector 7. Re-assemble everything ATTENTION: This procedure must be done by qualified personnel. Mistaken or imperfect connection of cables to the connector can cause severe damage to persons and property. 5. -
Page 10: Fastening The Handlebar
PREPARING THE MACHINE 7. FASTENING THE HANDLEBAR For packing purposes the handlebar is supplied folded and must be put into its working position. Proceed as follows to do this: Lift the handlebar, pulling up the lever indicated by the arrow Position the ma chine in its working position Mount the recovery tank on the handlebar tube using the two hooks Insert the tubes into the fittings that exit from the ring of the recovery tank... -
Page 11: Solution Tank
PREPARING THE MACHINE 10. SOLUTION TANK Check that the plug is properly inserted in its seat (A). Check that the valve is properly engaged (B). -
Page 12: Operation
OPERATION 1. PREPARING TO WORK The followings procedures must be done before installing the tanks: 1. Open the two rear hinges on the battery compartment 2. Connect the connector to the batteries 3. Close the battery compartment Now install the tanks 4. -
Page 13: Forward Movement
OPERATION 3. FORWARD MOVEMENT Forward movement by these machines is done using the brush. When the brush is slightly inclined it pulls the machine forward. ATTENTION: Always make sure that squeegee is lifted when moving backwards, even for short distances. -
Page 14: After Work Is Terminated
AFTER WORK IS TERMINATED Proceed as follows at the end of the work cycle and before you perform any type of maintenance: 1. Turn off the solenoid valve switch (3) 2. Lift the squeegee 3. Turn off the aspiration switch (2) 4. -
Page 15: Daily Maintenance
DAILY MAINTENANCE 1. CLEANING THE RECOVERY TANK Grasp the tube at the rear of the ma chine Remove the drain plug and empty the tank ATTENTION: Always wear gloves when doing this operation to protect yourself from contact with hazardous solutions Remove the tubes connected to the fittings on the recovery tank plug Remove the bayonet plug to open the tank Clean the filter under running water... -
Page 16: Replacing The Squeegee Rubbers
DAILY MAINTENANCE 3. REPLACING THE SQUEEGEE RUBBERS Check the condition of the squeegee rubbers. Replace as necessary. To replace the rubbers: 1. Lift the squeegee 2. Remove the two knobs 3. Detach the squeegee from the support 4. Remove the tube from the squeegee opening to permit the squeegee be removed 5. -
Page 17: Scheduled Maintenance
SCHEDULED MAINTENANCE 1. CLEANING THE SQUEEGEE TUBE Check the squeegee tube for clogging if the suction is insufficient or at periodic intervals. To clean the tube proceed as follows: 1. remove the tube from the sleeve on the squeegee 2. Remove the other end from the recovery tank 3. -
Page 18: Checking Operation
The reset push-button must be pressed in order to give power back to the motor. If the switch cut off power several times in a row then you must call the COMAC Service Center. In models with amperometric card, there are not the two safety amperometrics switches anymore. -
Page 19: Brush Selection And Use
BRUSH SELECTION AND USE POLYPROPYLENE BRUSHES (PPL) These are used on all types of floors and offer goods resistance to wear and to hot water (not more than 6o°C). PPL is not hygroscopic and consequently preserves its characteristics even when wet. DRIVE DISKS Drive disks are recommended for cleaning polished surfaces. -
Page 20: Ec Declaration Of Conformity
Via Cà Nova Zampieri 5 37057 San Giovanni Lupatoto - Verona (VR) - ITALY declares under its own responsibility that the machine SCRUBBING MACHINE mod. VISPA 35B is in conformity with the following Directives: • 98/37/CEE: Machinery Directive. • 73/23/CEE: Low Voltage Equipment Directive and its amendment 93/68/CEE.
Need help?
Do you have a question about the Vispa 35B and is the answer not in the manual?
Questions and answers