Table of Contents
Advertisement
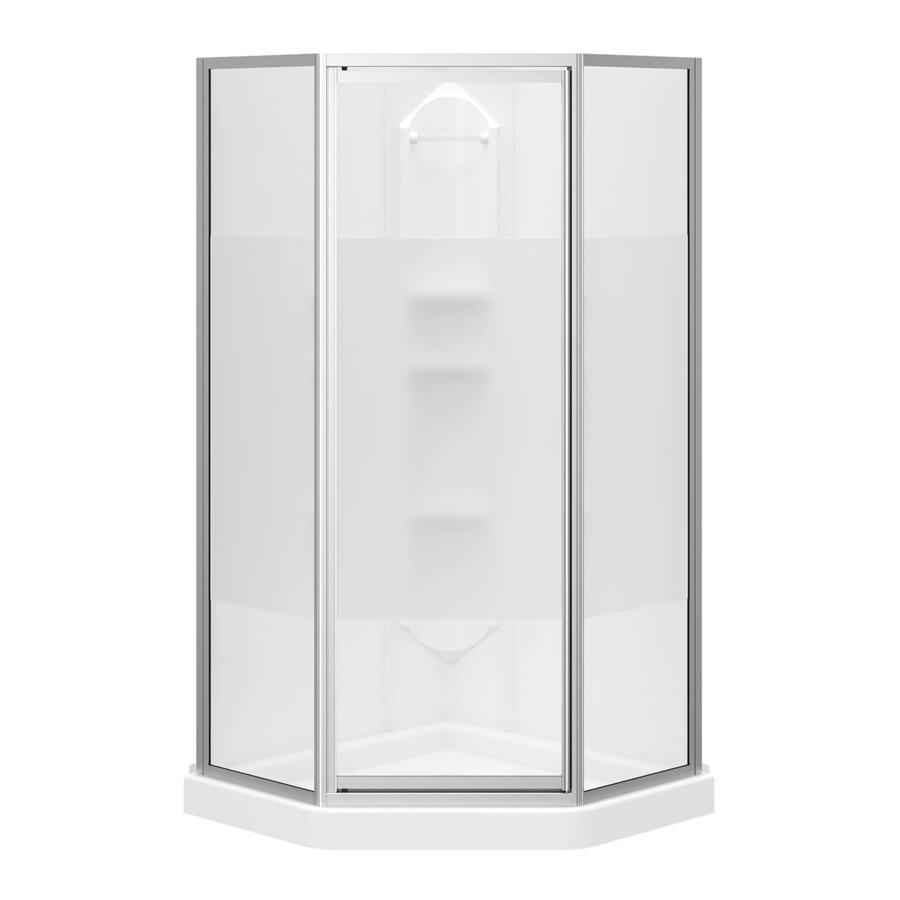
NEO-ANGLE SHOWER • DOUCHE NÉO-ANGLE • DUCHA ANGULAR NEO
101693 • 101694 • 106009 • 106010 • 300006 • 300022
Read all instructions carefully before proceeding.
Lire toutes les instructions attentivement avant de commencer
l'installation.
Leer detenidamente todas las instrucciones antes de comenzar
la instalación.
IMPORTANT
• Record the serial number
IMPORTANT
• Noter le numéro de série
IMPORTANTE
• Registre el número de serie
INSTALLATION INSTRUCTIONS
GUIDE D'INSTALLATION
GUÍA PARA INSTALACIÓN
SAVE THIS GUIDE FOR FUTURE REFERENCE.
CONSERVER POUR UN USAGE ULTÉRIEUR.
CONSERVE ESTE MANUAL COMO REFERENCIA.
Serial number • Numéro de série • Número de Serie
Advertisement
Table of Contents

Related Manuals for MAAX 101693


Summary of Contents for MAAX 101693
- Page 1 GUIDE D’INSTALLATION GUÍA PARA INSTALACIÓN NEO-ANGLE SHOWER • DOUCHE NÉO-ANGLE • DUCHA ANGULAR NEO 101693 • 101694 • 106009 • 106010 • 300006 • 300022 Read all instructions carefully before proceeding. SAVE THIS GUIDE FOR FUTURE REFERENCE. CONSERVER POUR UN USAGE ULTÉRIEUR.
-
Page 3: Table Of Contents
Gracias por confiar en MAAX para la a MAAX unit. l’achat de votre unité. compra de su unidad. We can assure you that MAAX uses only Nous pouvons vous garantir que MAAX a Le garantizamos que MAAX utiliza los the finest materials and employs strict utilisé... -
Page 4: Before You Begin
La garantie ne couvre pas les dommages que haya instalado la unidad, la garantía no the unit has been installed. MAAX is not ou les défauts de finition une fois l’unité cubrirá los daños o defectos de acabado. -
Page 5: General Considerations
General considerations • Règles générales • Reglas Generales Framing Construction de la structure Construcción de la Estructura DO NOT DO ANY FRAMING WORK NE PAS CONSTRUIRE LA STRUCTURE CONSTRUYA LA ESTRUCTURA UNTIL YOU HAVE RECEIVED THE UNIT. AVANT D’AVOIR REÇU L’UNITÉ. Afin ANTES DE RECIBIR LA UNIDAD. -
Page 6: Parts And Components
Parts and components • Liste des pièces et composantes • Piezas y Componentes 084=Chrome, Cromo 305=Brushed nickel, Nickel brossé, Níquel cepillado 173=Dark bronze, Bronze foncé, Bronce oscuro 340=Matte black, Noir mat, Negro mate 106009-106010 101693-101694 300006-300022 (74) (77) Part Nom de la pièce Pieza Qt Cant. -
Page 7: Tools And Supplies Required
Tools and supplies required • Outils et matériel requis • Herramientas y Materiales Necesarios Tools required Outils requis Herramientas Necesarias • Electric or hand drill • Perceuse électrique ou manuelle • Taladradora eléctrica o manual • Drill bits: 7/32” and 7/64” •... -
Page 8: Preparation Of Shower Area
Preparation of shower area • Préparation de l’aire de douche • Preparación del área de ducha construction, wherever Dans les nouvelles constructions, et dans En el caso de una nueva construcción y possible for renovation, install an extra stud les cas de rénovation, installez si possible cuando sea posible en una renovación, in each wall centered on 36 1/2”... - Page 9 To compensate for any irregularities in your Dans l’éventualité où votre plancher ne Suplementar la base con cuñas de ajuste, floor, the base must be shimmed properly serait pas de niveau, la base doit être desde abajo, para compensar por cualquier from underneath to provide a level threshold supportée de manière à...
-
Page 10: Wall Preparation
Wall preparation • Préparation du mur • Preparación de la pared Note: The wall panels should be Note: Le panneau mural doit être Nota: Las paredes de la ducha deben installed at a temperature near 16°C installé à une température d’environ instalarse a una temperatura media de (60°F) and must not be installed in 16°C (60°F), et ne doit pas être installé... -
Page 11: Measurements For Plumbing
Measurements for plumbing • Prise de mesures pour la plomberie • Medidas para tuberías Measuring from the shower base and En mesurant avec précision à partir Midiendo a partir de la base de la ducha the plumb line on the wall, determine the de la base de la douche ainsi que de y de las líneas verticales de la pared, locations of plumbing fixtures to the wall... - Page 12 Apply adhesive to back (matte side) and Appliquer un cordon d’adhésif au dos Aplique un cordón de adhesivo al reverso position panel on the back wall. See (côté mat) du panneau et le positionner en del panel (lado mate) en las marcas de ADHESIVE INSTRUCTIONS for installation suivant les marques de références.
-
Page 13: Install Corner Caddy
Install corner caddy • Installation du panneau de coin • Instalación del panel de rincón Apply a 1/4” strip of adhesive behind the Appliquez des longueurs d’adhésif de 1/4 Aplique tiras de adhesivo de 1/4 “ de ancho corner caddy, as illustrated in Fig. 10. Place po de large sur le panneau de coin, tel detrás del panel esquinero, como ilustrado the corner caddy in the shower corner and... -
Page 14: Install Wall Jambs
Install wall jambs • Installation des montants muraux • Instalación de los montantes murales Lightly sand the top surface of the base Sablez légèrement la surface supérieure Lije suavemente, con papel esmeril grado de la base, où le calfeutrant sera appliqué where the caulking will be applied (see Fig. - Page 15 Shower panel assembly and installation • Montage et installation du panneau de la douche • Montaje e instalación del panel de ducha Choose the direction of door swing Déterminez le côté d’ouverture de la Determine de qué lado abrirá la puerta porte.
-
Page 16: Door And Frame Installation
Door and frame installation • Installation de la porte et son cadre • Instalación de la puerta y del marco de la puerta It is recommended to assemble the door Il est recommandé de faire l'assemblage de Se recomienda montar la puerta sobre una mesa y poner encima un paño con objeto de on a table coveredwith a blanket to avoid la porte sur unetable et sur une couverture... -
Page 17: Securing The Door Frame
Securing the door frame • Fixation du cadre de porte • Fijación del marco de la puerta From the inside of the shower, insert the De l'intérieur de la douche, Insérez les vis Desde el interior de la ducha, introduzca #8 x 5/8"... -
Page 18: Adjusting The Door
Adjusting the door • Ajustement de la porte • Ajuste de la puerta Adjust the bottom of the shower door Ajustez le bas de la porte de douche Ajuste la parte de abajo de la puerta de parallel to the edge of the base by sliding parallèlement au bord de la base en ducha para que quede paralela al borde de the unit inside the wall jambs (1). -
Page 19: Caulking And Sealing The Shower
Caulking and sealing the shower • Calfeutrage et scellage la douche • Selle y aisle la ducha Remove masking tape. Areas to be Enlevez le ruban à masquer. Les zones à Quite la cinta adhesiva. Las áreas de sealed must be dry and free of dirt sceller doivent être sèches, et exemptes sellado deben estar secas y exentas and grease. -
Page 20: Troubleshooting Guide
Troubleshooting guide • Guide de dépannage • Guía de asistencia Shower leaks: La douche présente des fuites d’eau: La ducha tiene escapes de agua: • Caulking must cover all seams without • Le calfeutrant doit recouvrir tous les joints • La silicona/sellador deben recubrir todas any gaps. -
Page 21: Limited Warranty
LIMITED WARRANTY — UNITED STATES MAAX Bath Inc. offers express limited warranty on each of its products. This warranty extends only to the original owner/end-user for personal household use. For commercial uses, additional limitations apply. For accessing product Limited warranty please visit: www.maax.com/us-warranty... - Page 24 Technical Services / Service technique / Servicio técnico T. 1 877 GET-MAAX (1 877 438-6229) F. 1 888 361-2045 10049600 © 2020 MAAX Bath Inc. PRINTED IN CANADA / IMPRIMÉ AU CANADA / IMPRESO EN CANADA 2020-11-23...
Need help?
Do you have a question about the 101693 and is the answer not in the manual?
Questions and answers