Advertisement
Available languages
Available languages
Quick Links
These guidelines are recommended by
Maax Bath Inc. (hereafter "MAAX") for
the proper installation of their product.
A careful review of these procedures
(and
any
referenced
before starting is important in avoiding
unnecessary problems resulting in an
improper assembly or installation.
NOTE: All drawings in this publication are
typical, and may appear different than the
actual items being installed. In addition,
optional items may be shown on the units
which may not have been ordered on the
unit being installed.
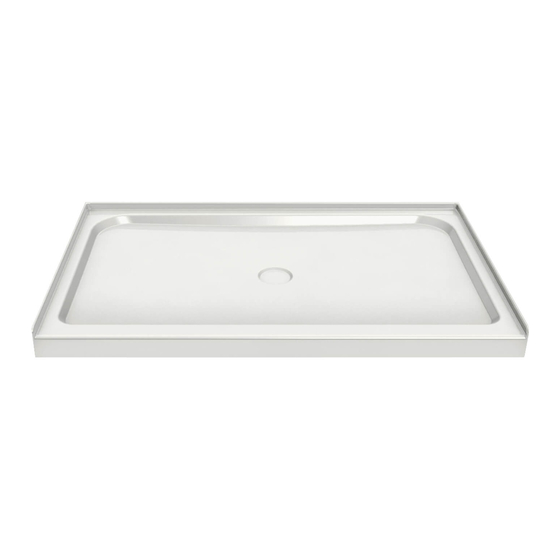
Outlook Shower Pans
106687 OUTLOOK BASE 4836
106630 OUTLOOK BASE 6030 C
106856 OUTLOOK BASE 6030 L/R
106631 OUTLOOK BASE 6036
106857 OUTLOOK BASE 6238
Special Notes to Installer
Ü It is the sole responsibility of the installer
to determine, prior to the installation, the
requirements necessary for compliance
publications)
with all codes involving the unit or the
installation!
ÜAll paperwork packaged with the unit and
any associated options or accessories
should be saved and presented to the
homeowner upon completion of the
installation!
ÜAll published unit dimensions are for
reference only. Any critical dimensions
required for installation should be taken
directly from the unit being installed!
ÜAny independent changes made to the
unit (or to any options and accessories
supplied with the unit) beyond those
required for normal installation can void
all warranties! (Refer to warranties for
further information.)
Inspection Guidelines
A careful check of the unit should be
conducted upon receipt. Notify your
supplier immediately if any questions or
problems are encountered during this
process.
DO NOT INSTALL ANY UNIT
WITHOUT FIRST ADDRESSING
QUESTIONS WHICH ARISE DURING
THE INSPECTION!
Basic Module Check
ü Check that the unit drain matches the
bathroom drain location.
ü Check for unit surface damage.
ü Check unit color for coordination to
other bathroom fixtures.
Options/Accessories Check
An individual check list is included with
the assembly and installation guidelines of
factory authorized options. Refer to listed
publications for further information before
continuing.
Advertisement

Related Manuals for MAAX OUTLOOK BASE 4836


Summary of Contents for MAAX OUTLOOK BASE 4836
- Page 1 Special Notes to Installer These guidelines are recommended by Inspection Guidelines Maax Bath Inc. (hereafter “MAAX”) for Ü It is the sole responsibility of the installer A careful check of the unit should be the proper installation of their product.
- Page 2 Figure 1 - Unit Data and Dimensional Guidelines (Tolerance: +0/ -3 /8 inch) ALCOVE , ALCÔVE, NICHO LR/LH ALCOVE , ALCÔVE, NICHO 6" 6" Base size / taille de base 48 x 36 48” (1219mm) 37” (940mm) 18” (457mm) 24” (610mm) 60 x 30 60”...
- Page 3 Due to individual site variations, exact Figure 2 guidelines for every situation cannot be supplied. The recommended framing and dimensional requirements shown are for a typical application and may vary, depending on site requirements. The dimensions shown in Figure 1 and the table are from the surfaces where the unit will be attached.
- Page 4 SHOWER BASE INSTALLATION Figure 4 Note: The shower base threshold and 3 back legs have been factory cut level on all Barrier Free Shower bases. At the time of installation, ensure the flooring is level. If the floor is not level, the outcome of the installed unit could possibly result in difficulty with the installation.
- Page 5 8. Set the shower base into place and Figure 6 guide the drainpipe into the drain by using the handle of a hammer or similar object. 9. Level the shower base and set plumb. If the floor is not level, it will require the use of shims (not provided) to level the shower base.
- Page 6 Bases de douche Outlook 106687 OUTLOOK BASE 4836 106630 OUTLOOK BASE 6030 C 106856 OUTLOOK BASE 6030 L/R 106631 OUTLOOK BASE 6036 106857 OUTLOOK BASE 6238 Notes spéciales à l’installateur Maax Bath Inc. (ci-après «MAAX») Directives d’inspection recommande consignes pour Ü...
- Page 7 Figure 1 - Données sur l’unité et directives dimensionnelles (Tolérance: + 0 / -3 / 8 pouce) ALCOVE , ALCÔVE, NICHO LR/LH ALCOVE , ALCÔVE, NICHO 6" 6" Base size / taille de base 48 x 36 48” (1219mm) 37” (940mm) 18”...
- Page 8 En raison des variations de chaque site, Figure 2 des directives précises pour chaque situation ne peuvent pas être fournies. L’encadrement recommandé exigences dimensionnelles indiquées s’appliquent à une application typique et peuvent varier en fonction des exigences du site. Les dimensions indiquées sur la figure 10 po autour du drain 1 et le tableau proviennent des surfaces encastré...
- Page 9 INSTALLATION BASE Figure 4 DOUCHE Détail de la zone centrale de drainage Remarque: Le seuil de la base de Dégagement pour drain de 6“ de diamètre douche et les 3 pieds arrière ont été à travers la dalle coupés en usine sur toutes les bases Trou de 10 “de diamètre x 1/2”...
- Page 10 8. Réglez la base de douche en place et guidez le tuyau du drain dans le drain à l’aide de la poignée d’un marteau ou d’un objet similaire. Figure 6 9. Mettez la base de la douche à niveau et mettez-la d’aplomb. Si le sol n’est pas de niveau, il faudra utiliser des cales (non fournies) pour niveler la base de douche.
- Page 11 106630 OUTLOOK BASE 6030 C 106856 OUTLOOK BASE 6030 L/R 106631 OUTLOOK BASE 6036 106857 OUTLOOK BASE 6238 Notas especiales para el instalador Maax Bath Inc. (en adelante, “MAAX”) Pautas de inspección recomienda estas pautas para la instalación Ü ¡Es responsabilidad exclusiva Una verificación cuidadosa de la unidad...
- Page 12 Figura 1a - Datos de la unidad y pautas dimensionales (Tolerancia: + 0 / -3 / 8 pulgadas) ALCOVE , ALCÔVE, NICHO LR/LH ALCOVE , ALCÔVE, NICHO 6" 6" Base size / tamaño de la base 48 x 36 48” (1219mm) 37”...
-
Page 13: Instalación Empotrada
Debido a las variaciones individuales Figura 2 del sitio, no se pueden proporcionar pautas exactas para cada situación. Los requisitos de estructura y dimensiones recomendados que se muestran son para una aplicación típica y pueden variar, según los requisitos del sitio. Las dimensiones que se muestran en la Figura 1 y la tabla son de las superficies Área de 10“... - Page 14 INSTALACIÓN DE BASE DE DUCHA Figura 4 Nota: El umbral de la base de la ducha y Detalle del área del núcleo de drenaje las 3 patas traseras han sido cortadas de Núcleo de drenaje de 6“ de diámetro a fábrica en todas las bases de ducha sin través de la losa barrera.
- Page 15 8. Coloque la base de la ducha en su lugar y guíe la tubería de desagüe hacia el desagüe utilizando el mango de un martillo u objeto similar. Figura 6 9. Nivelar la base de la ducha y ponerla a plomo. Si el piso no está nivelado, requerirá...
-
Page 16: Limited Warranty - United States
LIMITED WARRANTY — UNITED STATES MAAX Bath Inc. offers express limited warranty on each of its products. This warranty extends only to the original owner/end-user for personal household use. For commercial uses, additional limitations apply. For accessing product Limited warranty please visit: www.maax.com/us-warranty...
Need help?
Do you have a question about the OUTLOOK BASE 4836 and is the answer not in the manual?
Questions and answers