Advertisement
Quick Links
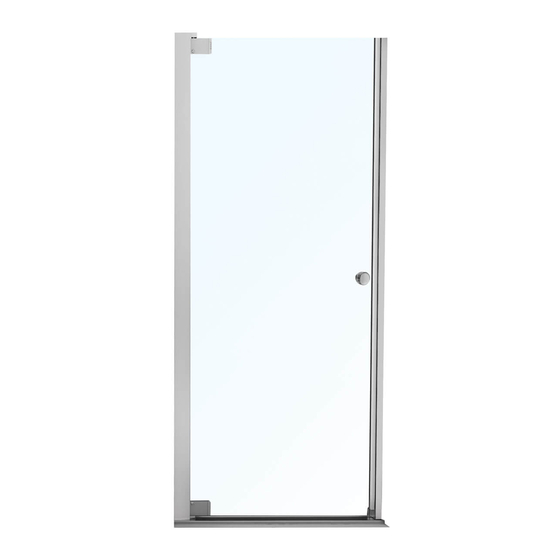
TUB ENCLOSURE / SHOWER ENCLOSURE
ENCEINTE DE BAIGNOIRE / ENCEINTE DE DOUCHE
MAMPARA PARA BAÑERA / MAMPARA PARA DUCHA
Read all instructions carefully before proceeding.
Lire toutes les instructions attentivement avant de commencer
l'installation.
Leer detenidamente todas las instrucciones antes de comenzar
la instalación.
IMPORTANT
IMPORTANT
IMPORTANTE
INSTALLATION INSTRUCTIONS
GUIDE D'INSTALLATION
GUÍA DE INSTALACIÓN
MODEL • MODÈLE • MODELO
105316 ● 105317 ● 105318 ● 105416
105417 ● 105418 ● 105419 ● 105420
805416 ● 805417
• Record the serial number
• Noter le numéro de série
• Registre el número de serie
SAVE THIS GUIDE FOR FUTURE REFERENCE.
CONSERVER POUR UN USAGE ULTÉRIEUR.
CONSERVE ESTE MANUAL COMO REFERENCIA.
Serial number • Numéro de série • Número de Serie
Advertisement

Related Manuals for MAAX 105316


Summary of Contents for MAAX 105316
- Page 1 ENCEINTE DE BAIGNOIRE / ENCEINTE DE DOUCHE MAMPARA PARA BAÑERA / MAMPARA PARA DUCHA MODEL • MODÈLE • MODELO 105316 ● 105317 ● 105318 ● 105416 105417 ● 105418 ● 105419 ● 105420 805416 ● 805417 Read all instructions carefully before proceeding.
- Page 2 fi nish after La garantie ne couvre pas les dommages que haya instalado la unidad, la garantía no the unit has been installed. MAAX is not ou les défauts de fi nition une fois l’unité cubrirá los daños o defectos de acabado.
- Page 3 General considerations • Règles générales • Reglas Generales Framing Construction de la structure Construcción de la Estructura DO NOT DO ANY FRAMING WORK NE PAS CONSTRUIRE LA STRUCTURE CONSTRUYA LA ESTRUCTURA UNTIL YOU HAVE RECEIVED THE UNIT. AVANT D’AVOIR REÇU L’UNITÉ. Afi n ANTES DE RECIBIR LA UNIDAD.
- Page 4 Parts and components • Liste des pièces et composantes • Piezas y Componentes Top glass Clamp Assembly (A1, A3, A5, A6) Top glass Clamp Assembly (A2, A3, A5, A6)
- Page 5 Parts and components • Liste des pièces et composantes • Piezas y Componentes Part Nom de la pièce Pieza Code Cant. Door Porte Puerta 10021953-900-XXX Bottom track Rail inférieur Carril inferior 10081233-XXX-606 Pivot wall channel Montant de pivot Canal de pared de pivote 10081148-XXX-603 Magnetic jamb Montant magnétique...
- Page 6 Tools and supplies required • Outils et matériel requis • Herramientas y Materiales Necesarios Level Level Pencil Pencil Electric drill Electric drill ⅛" and ¼" ceramic drill bit ⅛" and ¼" ceramic drill bit Niveau Niveau Crayon Crayon Perceuse électrique Perceuse électrique Mèche à...
-
Page 7: Illustrations Des Pièces
Before you begin • Avant de commencer • Antes de commenzar Unpacking: Care should be taken Déballage: Prendre des précautions Desembalaje: Debe tomar precauciones al desembalar su lors du déballage de votre Enceinte de when unpacking your Shower Mampara para Ducha. Coloque los douche. - Page 8 STEP ÉTAPE ETAPA WARNING: SAFETY GLASSES AVERTISSEMENT: PORTER À ADVERTENCIA: SE DEBERÁN UTILIZAR SHOULD BE WORN AT ALL TIMES. TOUT MOMENT DES LUNETTES ANTEOJOS DE SEGURIDAD EN TODO DE PROTECTION. MOMENTO. Please note; the hinge side of the Door Veuillez bien noter, le côté charnière de la Tenga en cuenta que el lado de la bisagra should be OPPOSITE the Shower Head Porte doit être du côté...
- Page 9 STEP ÉTAPE ETAPA Apply a generous amount of silicone Appliquer généreusement produit Aplique una cantidad generosa de sellador sealant to the inside edge of the Pivot Wall d’étanchéité à la silicone à l’embout de silicona a la orilla interior del Canal de Channel.
- Page 10 STEP ÉTAPE ETAPA Note: For some fi berglass Shower Remarque : Pour certaines Enceintes de Nota: En algunas mamparas de ducha Enclosures, the bottom of the Pivot Wall douche en fi bre de verre, le bas de la de fi bra de vidrio, quizá se necesite Channel may need to be “rounded”...
- Page 11 Drill mounting holes at marked locations: Percez trous montage Haga los orifi cios de montaje en las emplacements marqués : ubicaciones marcadas: When mounting to ceramic tile, use a Pour monter sur un carreau en céramique, Al instalar sobre la baldosa de cerámica, 1/4”...
- Page 12 STEP ÉTAPE ETAPA Measure the fi nished wall-to-wall distance, Mesurez la distance de fi nition entre les Mida la distancia fi nal de pared a pared, DIMENSION D, in the center of the Shower murs, DIMENSION D, au centre du Rebord DIMENSIÓN D, en el centro del borde de Enclosure Ledge.
- Page 13 STEP ÉTAPE ETAPA Apply a Bead of Silicon Sealant along Appliquez une perle de Produit d'étanchéité Aplique una línea de sellador de silicona a length of Bottom Track in the groove on the à la silicone sur la longueur du Rail inférieur lo largo del carril inferior, en la ranura del underside of the Bottom Track as shown in dans la rainure sur le dessous du Rail...
- Page 14 ADD A BEAD OF SILICONE SEALANT AJOUTER UN CORDON DE PRODUIT AGREGUE UN CORDON DE SELLADOR ALONG THE ENTIRE EDGE WHERE THE D’ÉTANCHÉITÉ À LA SILICONE LE LONG DE SILICONA POR TODO EL BORDE BOTTOM TRACK MEETS THE WALL. DE L’EMBOUT DU RAIL INFÉRIEUR QUI DONDE CARRIL INFERIOR...
- Page 15 STEP ÉTAPE ETAPA Please note, Magnetic Jamb & Veuillez bien noter, l'Huisserie magnétique Tenga en cuenta, que el canal de pared Adjustable Wall Channel may be partially et la Gorge de mur réglable peuvent être ajustable y el montaje magnético pueden assembled.
- Page 16 Used WITH Wall filler / Utilisé AVEC remplissage mur / Usar CON relleno pared Insert the Magnetic Jamb into the Adjustable Insérez l'Huisserie magnétique dans la Inserte el montaje magnético en el canal de Wall Channel, as shown in STEP 8C. Gorge de mur réglable, comme indiqué...
- Page 17 STEP ÉTAPE ETAPA Place Door on the fl oor with the metal edge Placez la Porte sur le sol avec le bord Coloque la puerta en el piso con el borde on the bottom. métallique dessous. de metal en la parte inferior. Install Seal Strip along glass edge, ensuring Installez la Bande d'étanchéité...
- Page 18 STEP ÉTAPE ETAPA Begin at the bottom Pivot Bracket location. Commencez à l'emplacement de Support Comience por la ubicación del cojinete de pivot inférieur. pivote inferior. Insert a Nylon Bushing into bottom Pivot Insérez une Bague en nylon dans le Introduzca un cojinete de nailon en el Bracket, as shown in STEP 10A.
- Page 19 To Secure the TOP of DOOR, slide Nylon Pour attacher le DESSUS de la PORTE, Para asegurar la PARTE SUPERIOR DE Bushing onto the TOP OF DOOR Pivot Pin, glissez la Bague en nylon sur l'Axe de pivot, LA PUERTA, deslice el cojinete de nailon as shown in STEP 10B.
- Page 20 STEP ÉTAPE ETAPA If not already pre-installed, Install Magnetic Si elle n'avait pas été installée au préalable, Si no está ya preinstalada, instale la banda Strip into Magnetic Jamb per Installation installer la Bande aimantée dans l'Huisserie magnética en el montaje magnético según Instructions included in the Magnetic Strip magnétique selon...
- Page 21 3/16”...
- Page 22 STEP ÉTAPE ETAPA Install Knob / Handle per Installation Installez le Bouton/Poignée selon les Instale la perilla/manija siguiendo las Instructions included in Knob /Handle Instructions d'installation incluses dans instrucciones de instalación que se incluyen package. l'emballage du Bouton/Poignée. en el embalaje. STEP ÉTAPE ETAPA...
- Page 23 STEP ÉTAPE ETAPA Attach the Glass Clamp Sweep by pressing Attachez l'Époussette de bride de verre en Coloque el burlete de abrazadera de vidrio it onto the groove as shown in STEP 15A. l'enfonçant dans la rainure comme indiqué en la ranura, como se muestra en el ETAPA à...
- Page 24 STEP ÉTAPE ETAPA Apply Silicone Sealant along seams where Appliquez Produit d'étanchéité à Aplique sellador de silicona a lo largo de Wall Jambs meet walls and Bottom Track la silicone le long des jointures où les las uniones entre los marcos de pared y las meets shower sill, as shown in STEP 17A.
-
Page 25: Limited Warranty
MAAX reserves the right to modify this MAAX se réserve le droit de modifi er cette MAAX se reserva el derecho de modifi car warranty at any time, it being understood that garantie en tout temps;... - Page 28 Technical Services / Service technique / Servicio técnico T. 1 877 GET-MAAX (1 877 438-6229) F. 1 888 361-2045 10028639 © 2008 MAAX Bath Inc. PRINTED IN CANADA / IMPRIMÉ AU CANADA / IMPRESO EN CANADA 2016-09-08...
Need help?
Do you have a question about the 105316 and is the answer not in the manual?
Questions and answers