
Subscribe to Our Youtube Channel
Related Manuals for aFe Power SCORPION 79-21003L


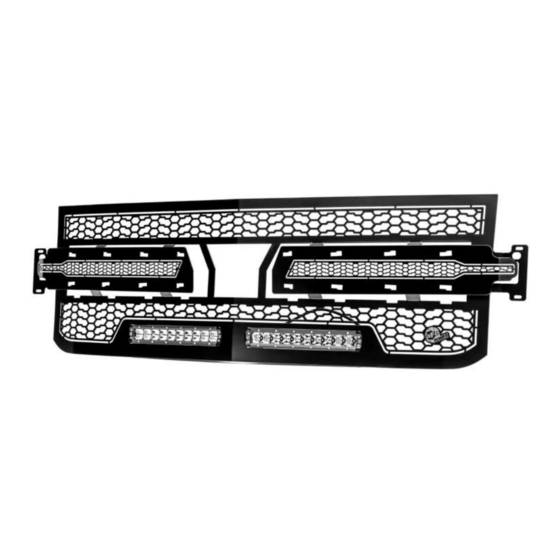
Summary of Contents for aFe Power SCORPION 79-21003L
- Page 1 advanced FLOW engineering Instruction Manual P/N: 79-21003L Scorpion Grille Make: Chevrolet Model: 1500 Silverado Year: 2019-2020...
- Page 2 • Please read the entire instruction before proceeding. • Ensure all components listed are present. • Ensure you have all necessary tools before proceeding. • Disconnect the negative battery terminal before proceeding. • If you are missing any of the components, call customer support 951 493 7100 Label Qty.
- Page 4 Note: Before you begin, use “Painter’s Tape” to apply a protective guard around the work areas (fender, bumper, valance, headlights and turn signals). This will help protect the paint and finish of your vehicle. 1. Disconnect the negative battery terminal. 2.
- Page 5 4. Remove the four (4) screws that retain the factory grille to the core support. Save the removed hardware for reinstallation.
- Page 6 Note: Please use extreme caution while performing the following step. Note: Use “Painter’s Tape” to apply a protective guard around the work areas. This will help protect the paint and finish of your vehicle. 5. Using a plastic prying tool, carefully pop the clips out of the core support (near the headlight and turn signal area).
- Page 7 Note: Please use extreme caution while performing the following step. Note: Please read the instruction below prior to removing the factory grille. 6. With the clips removed from the core support (near the headlight and turn signal area), carefully pull the top of the grill away from the core support. At the bottom of the factory grille are three (3) clips.
- Page 8 Note: To prevent scratching painted parts use protective covering between the grille and a flat surface. 7. Remove the four (4) screws that attach the inner factory grille to the outer factory grille. Save the hardware for reinstallation.
- Page 9 8. Disconnect the clips that secure the factory outer grille to the factory inner grille. Remove the factory inner grille and discard. Save the outer grille for reinstallation.
- Page 10 Note: To prevent scratching painted parts use protective covering between the grille and a flat surface. 9. Install the one (1) supplied bottom plate to the aFe Scorpion grille using six (6) supplied #10- 32 flange nuts.
- Page 11 10. Install the one (1) supplied left top plate using three (3) #10-32 flange nuts.
- Page 12 11. Install the one (1) supplied right top plate using three (3) #10-32 flange nuts.
- Page 13 This is what the assembled aFe Scorpion grille should look like when completely assembled. Note: Check the three (3) large fastener clips are installed correctly.
- Page 14 Note: To prevent scratching painted parts use protective covering between the grille and a flat surface. 12. With the outer factory grille laying on the flat surface, place the aFe Scorpion grille onto the outer factory grille. Make sure to line up the center of the outer factory grille to the aFe Scorpion grille.
- Page 15 under the slot hole 13. Install the two (2) supplied square aluminum spacers. Locate the slotted hole in the top left and right corners of the aFe Scorpion grille. The square aluminum spacers will be installed between the aFe Scorpion grille and the outer factory grille.
- Page 16 14. Install the four (4) screws removed in Step 7. Check the center line and tighten to factory specifacations.
- Page 17 15. Install eight (8) supplied small fastener retaining clips onto the factory clip points protruding through the aFe Scorpion grille.
- Page 18 16. Before installing the aFe Scorpion grille assembly, install the supplied power harness. The red wire goes on the positive battery terminal (+) and the black wire goes on the negative battery terminal (-). You will need to mount the switch inside the cab or to an available prewired switch.
- Page 19 17. Place the aFe Scorpion grille assembly on the truck and attach the light wires to the 10” single row LED lights. Carefully push the attachment clips back into the core support (near the headlight and turn signals) attachment points.
- Page 20 18. Install the four (4) screws that retain the grille to the core support that were removed in Step 4. Tighten to factory specifactions.
- Page 21 19. Reinstall the plastic radiator cover. Install the ten (10) push pin retainers that were removed in Step 3.
- Page 22 20. Reinstall the two (2) screws that attach the plastic handle to the hood release mechanism that were removed in Step 2. Tighten to factory specifications.
- Page 23 21. Remove all the painter’s tape if any was applied. 22. Installation is now complete.
- Page 24 This Page Was Left Intentionally Blank...
- Page 25 This Page Was Left Intentionally Blank...
- Page 26 PLEASE CONSULT YOUR LOCAL AUTOMOTIVE ELECTRICAL PROFESSIONAL FOR INSTALLATION SERVICES AND ADVICE. aFe Power IS ONLY EQUIPPED TO PROVIDE BASIC TECHNICAL ASSISTANCE DUE TO THE DIVERSITY OF VEHICLES, VEHICLE OPTIONS & MODIFICATIONS AND LIGHTING. CONFIGURATION OPTIONS AVAILABLE. aFe Power products cannot be held liable due to improper component installation and / or faulty wiring.
- Page 27 GRILLE CARE INFORMATION aFe Power Scorpion Grilles are the finest in the industry but do require normal care. Wash regularly as you would when caring for your vehicles. Never use dish soap. GLOSS BLACK FINISH aFe Power Scorpion Grilles with gloss black powder coated finish may be washed regularly as you would when caring for your vehicles finish using soap and water.
- Page 28 advanced FLOW engineering, inc. 252 Granite Street Corona, CA 92879 TEL: 951.493.7100 • TECH: 951.493.7100 x23 E-Mail: Tech@aFepower.com 06-81293 1/21/2020 DK...
Need help?
Do you have a question about the SCORPION 79-21003L and is the answer not in the manual?
Questions and answers