
Related Manuals for aFe Power Scorpion 79-21005L


Summary of Contents for aFe Power Scorpion 79-21005L
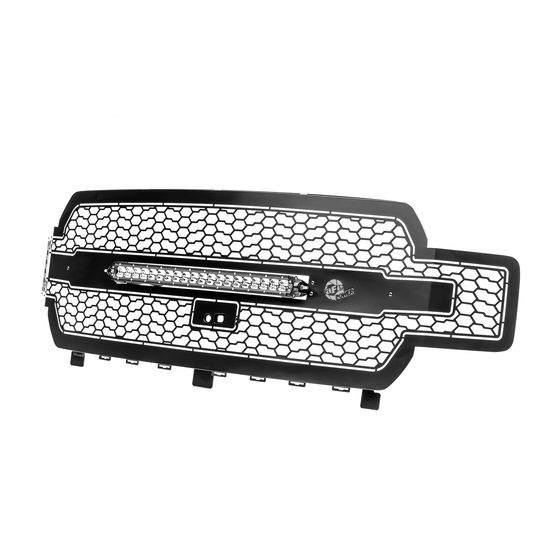
- Page 1 advanced FLOW engineering Instruction Manual P/N: 79-21005L Scorpion Grille with FFC Make: Ford Model: F-150 Year: 2018-2020...
- Page 2 • Please read the entire instruction before proceeding. • Ensure all components listed are present. • Ensure you have all necessary tools before proceeding. • Disconnect the negative battery terminal before proceeding. • If you are missing any of the components, call customer support 951 493 7100 Label Qty.
- Page 4 Note: Before you begin, use “Painters Tape” to apply a protective guard around the work areas (fender and bumper valance). This will help protect the paint and finish of your vehicle. 1. Disconnect the negative battery terminal. 2. Locate (12) plastic clips on top of plastic shroud. Carefully pry the pins out to remove and then set aside.
- Page 5 4. Remove the four (4) bolts that attach the factory grille assembly to the core support. Save for reinstallation. 5. Located near the hood latch, disconnect the two (2) electrical connectors and the Forward- Facing Camera (FFC) washer hose connection.
- Page 6 6. If equipped, disconnect the wheel arch moldings. Pull on the wheel arch moldings carefully until it comes off the two bottom tabs. Be careful not to break them. 7. Starting on the passenger side, pull on the plastic bumper cap fascia till it disconnects from the fender.
- Page 7 8. Remove the one (1) bolt located on each side of the grille. Save for reinstallation.
- Page 8 Note: To prevent scratching painted parts use protective covering between the grille and a flat surface. 9. Disconnect the clips (located near the headlights) behind the grille by pulling gently. 10. Remove the grille and active shutter assembly from the truck.
- Page 9 11. Remove the eight (8) push pins and remove the plastic lower shroud.
- Page 10 12. Disconnect the electrical connector from the FFC and the FFC washer water hose.
- Page 11 13. Disconnect the five (5) clips connecting the active shutter grille to the factory grille. 14. Remove the active grille shutters from the factory grill and set it to the side. Save for reinstallation.
- Page 12 Note: Please read the next instruction carefully prior to performing the step. 15. Pull the FFC washer nozzle out of the factory grille. It is spring loaded and will be a little difficult to pull out. You will need to find a way to keep the washer nozzle out so that you can take the trim piece off.
- Page 13 16. Remove the FFC and the FFC washer assembly from the factory grille. 17. Set the factory grille aside.
- Page 14 Note: To prevent scratching the aFe Scorpion Grille while preforming assembly, use a protective covering between the grille and a flat surface. 18. Remove the supplied aFe Scorpion grille from the box and place it on a flat surface for assembly.
- Page 15 20. Install the FFC assembly to the FFC mounting bracket with the two (2) supplied #10-32 x 5/8” button head screws, two (2) supplied #10 flat washers, and two (2) supplied #10-32 nylon lock nuts. Note: The washer nozzle trim piece will sit flat on the bracket when it is oriented correctly. 21.
- Page 16 22. Reinstall the FFC mounting bracket onto the aFe Scorpion grille using the hardware removed in Step 19. Before tightening, make sure to center the camera and the washer.
- Page 17 23. Remove and discard the two (2) nuts from the supplied 20” single row LED light.
- Page 18 Note: Please read the instruction below prior to installation. 24. Locate the drilled hole furthest to the driver’s side. Install one (1) supplied #10-32 x 1/2” button head screw (black) thru the front of the aFe Scorpion grille. Turn the aFe Scorpion grille over and install the aFe logo back plate onto the #10-32 x 1/2”...
- Page 19 Note: Please read the instruction below prior to installation. 26. Install one (1) supplied cable clamp 5/16” (black) around the wiring for the 20” single row LED light. 27. Locate the drilled hole furthest to the passenger side. Install one (1) #10-32 x 1/2” button head screw (black) through the aFe Scorpion grille.
- Page 20 28. Place the aFe Scorpion grille to the side and place the active shutter grille assembly onto the work surface. 29. Install the five (5) M6 clip nuts to the top of the active shutter grille.
- Page 21 30. Place the aFe Scorpion grille back on the workspace. 31. Attach the wiring connector and the water line to the FFC assembly.
- Page 22 32. Attach the active shutter grille to the aFe Scorpion grille. At the bottom of the aFe Scorpion grille assembly, install three (3) supplied 3/16” x 1” SS fender washers (black) and three (3) #10-32 nylon lock nuts. Do not tighten.
- Page 23 33. At the top of the aFe Scorpion grille assembly, install five (5) supplied M6 x 1.0mm x 25mm hex bolts and five (5) #10 flat washers. 34. Tighten the hardware in Step 32 and the hardware in Step 33.
- Page 24 35. Reinstall the eight (8) push pins that attach the plastic lower shroud.
- Page 25 36. Before installing the aFe Scorpion grille, install the supplied power harness. The Red wire goes on the positive battery terminal (+) and the black wire goes on the negative battery terminal (-). You will need to mount the switch inside the cab or to an available prewired switch.
- Page 26 Note: There are factory ford stickers on the headlights that will been seen through the grille if not removed. If you want to remove them, now is the time. 37. Install the aFe Scorpion grille assembly onto the vehicle. 38. Reinstall the factory hardware removed in Step 8. Tighten to factory specifications.
- Page 27 39. Center the grille assembly and install the four (4) factory screws removed in Step 4. Tighten to factory specifications.
- Page 28 Install Remove 40. Remove the two clips that attach the plastic bumper cap fascia to the wheel arch molding (if applicable). 41. Install the two clips remove in Step 40 into the wheel arch moldings (if applicable).
- Page 29 42. Reinstall the plastic bumper cap fascia. Push the plastic bumper cap facia back in until the clips to secure it in place. Push the sides in as well until they are clipped in securely. 43. Install the wheel arch moldings to the plastic bumper cap fascia. Make sure to push in the sides to secure it in place.
- Page 30 44. Reconnect the wiring connectors and the FFC washer hose connection.
- Page 31 45. Install the plastic shroud and the (12) plastic clips removed in Step 2. 46. Reconnect the negative battery terminal.
- Page 32 47. Remove all the painter’s tape if any was applied. 48. Installation is now complete.
- Page 33 This Page Intentionally Left Blank...
- Page 34 PLEASE CONSULT YOUR LOCAL AUTOMOTIVE ELECTRICAL PROFESSIONAL FOR INSTALLATION SERVICES AND ADVICE. aFe Power IS ONLY EQUIPPED TO PROVIDE BASIC TECHNICAL ASSISTANCE DUE TO THE DIVERSITY OF VEHICLES, VEHICLE OPTIONS & MODIFICATIONS AND LIGHTING. CONFIGURATION OPTIONS AVAILABLE. aFe Power products cannot be held liable due to improper component installation and / or faulty wiring.
- Page 35 GRILLE CARE INFORMATION aFe Power Scorpion Grilles are the finest in the industry but do require normal care. Wash regularly as you would when caring for your vehicles. Never use dish soap. GLOSS BLACK FINISH aFe Power Scorpion Grilles with gloss black powder coated finish may be washed regularly as you would when caring for your vehicles finish using soap and water.
- Page 36 advanced FLOW engineering, inc. 252 Granite Street Corona, CA 92879 TEL: 951.493.7100 • TECH: 951.493.7100 x23 E-Mail: Tech@aFepower.com 06-81295 11/21/2019 DK...
Need help?
Do you have a question about the Scorpion 79-21005L and is the answer not in the manual?
Questions and answers