
Subscribe to Our Youtube Channel
Related Manuals for Okolab H201-PRIOR-SP200-400-600


Summary of Contents for Okolab H201-PRIOR-SP200-400-600
- Page 1 User Manual H201-PRIOR-SP200-400-600 REV 01 H201-PRIOR-SP200-400-600 H201-PRIOR-SP200-400-600 is compatible with Queensgate SP200/400/600 Piezo on Prior H117/HLD117 stage. IST 2083_REV01 www.oko-lab.com...
-
Page 2: Table Of Contents
User Manual H201-PRIOR-SP200-400-600 REV 01 Index Components and dimensions....................3 Available Sample Holders ....................... 3 Installation ........................5 3.1 Insertion of the Sample Holder into Chamber Base ............... 5 3.2 Installation of the Chamber on the Stage ................... 5 3.3 Working with 35 or 60 mm Petri Dish – Spacing Rings and Magnetic Locks ........... 6 3.4 Working with 1x3’’... -
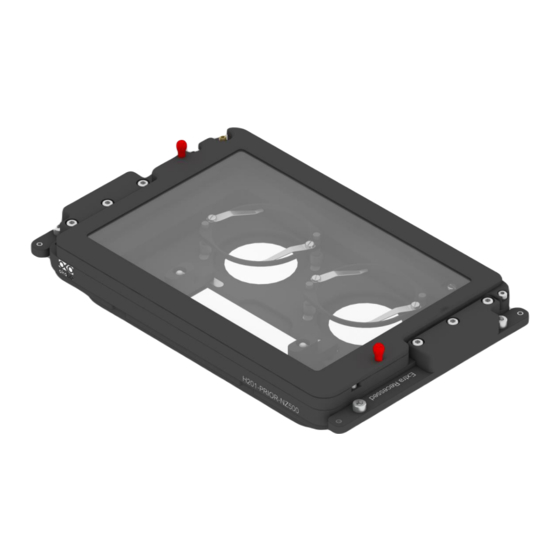
Page 3: Components And Dimensions
Chamber Riser Sample Holder (Order Separately) Spacers Chamber Base Figure 1. H201-PRIOR-SP200-400-600 - Components and Dimensions. 2. Available Sample Holders The following sample holders are available. NOTE: Please contact info@oko-lab.com if you cannot find the sample holder you are looking for. We are constantly adding new inserts to the list. - Page 4 User Manual H201-PRIOR-SP200-400-600 REV 01 #1 Lab-Tek 1”x2” chambered cover glass holder with built-in water reser- 1xLABTEK-PRIOR-NZ500 voirs. #1 Lab-Tek II 1”x2” chambered cover glass holder with built-in water reser- 1xLABTEK-II-PRIOR-NZ500 voirs. 1x60-PRIOR-NZ500 #1 50/60mm Petri-dish holder with built-in water reservoirs.
-
Page 5: Installation
Installation of the Chamber on the Stage To fix the H201-PRIOR-SP200-400-600 chamber on the stage, follow the steps shown in Figure 4. Slot the chamber base into the stage, taking care to match the screws position (see 1 in Figure 4). -
Page 6: Working With 35 Or 60 Mm Petri Dish - Spacing Rings And Magnetic Locks
User Manual H201-PRIOR-SP200-400-600 REV 01 Figure 4. Installation of the Chamber on the Stage Working with 35 or 60 mm Petri Dish – Spacing Rings and Magnetic Locks Magnetic locks prevent movement of 35 and 60 mm dishes inside the sample holder. - Page 7 User Manual H201-PRIOR-SP200-400-600 REV 01 Magnetic Locks for 35 and 60 mm petri dishes. Included in the corresponding sample holder Figure 5.Magnetic locks for 35 and 60 mm dish NOTE: Magnetic locks are included with sample holder. Spacing rings accounting for variability in dish diameter from one manufacturer to another are also included. Figure 6 shows how to position the ring.
- Page 8 User Manual H201-PRIOR-SP200-400-600 REV 01 Grainer-Petri35x10 Ibidi μ-Dish 35 mm-low BD Falcon-35x10 Willco-35x10 Corning-35x10 mm MatTek-P35G-X14-X Figure 7.Generic ring selection scheme for 35 mm dish. Ibidi μ-Dish 50 mm-low MatTek-P50G-X30-X BD Falcon-60x10 Grainer - Petri 60x15 Corning-60x15 mm Willco 60x15 Figure 8.
-
Page 9: Working With 1X3'' And 1X2'' Chamber Slides
User Manual H201-PRIOR-SP200-400-600 REV 01 Working with 1x3’’ and 1x2’’ chamber slides Magnetic locks prevent movement of 1’’x 3’’ and 1’’x 2’’ chamber slides inside of the sample holder. NOTE: Magnetic locks are included with sample holder. Figure 9. Magnetic lock for 1'' x 3'' chamber slide. -
Page 10: Working With 1"X3" Chamber Slides And #2 35Mm Petri-Dish
User Manual H201-PRIOR-SP200-400-600 REV 01 Working with 1”x3” chamber slides and #2 35mm Petri-dish Follow the steps in Figure 11 to work with 1”x3” chamber slides and #2 35mm Petri-dish. Figure 11. Working with 1”x3” chamber slides and #2 35mm Petri-dish. -
Page 11: Working With Mw Plates
User Manual H201-PRIOR-SP200-400-600 REV 01 Working with MW Plates MW plates holder (see 2 in Figure 12) holds MW plates in place into chamber base as illustrated in Figure 12. NOTE: MW plates holder must be ordered separately (NOT INCLUDED). Product code: H201-MW-HOLDER-NZ500. -
Page 12: Lid Assembly
User Manual H201-PRIOR-SP200-400-600 REV 01 Lid Assembly Place the Lid on the chamber base (No screws or tools are necessary). See Figure 14. Figure 14. Lid Assembly www.oko-lab.com... -
Page 13: Connection Of The Gas Supply
A single silicon tubing carries output gas from the Okolab Gas Controller to the H201-PRIOR-SP200-400-600. Silicon tubing connects to a gas input - brass opening - located on a corner of the H201-PRIOR-SP200-400-600. See Figure 15. Connect by gently pushing silicon tubing onto brass opening.
Need help?
Do you have a question about the H201-PRIOR-SP200-400-600 and is the answer not in the manual?
Questions and answers