Table of Contents
Advertisement
Quick Links
Advertisement
Table of Contents

Subscribe to Our Youtube Channel
Related Manuals for Verano VERANDA V905 - ISEO


Summary of Contents for Verano VERANDA V905 - ISEO
- Page 1 INSTALLATION MANUAL VERANDA V905 - ISEO...
-
Page 2: Table Of Contents
INSTALLATION MANUAL VERANDA V905 - ISEO Index page Exploded view Summary of the parts Required tools Important before installation 1. Mounting the wall profile 2. Fixing the gutter 3. Foundation blocks and uprights 4. Mounting the uprights 5. Mounting the gutter 6. -
Page 3: Exploded View
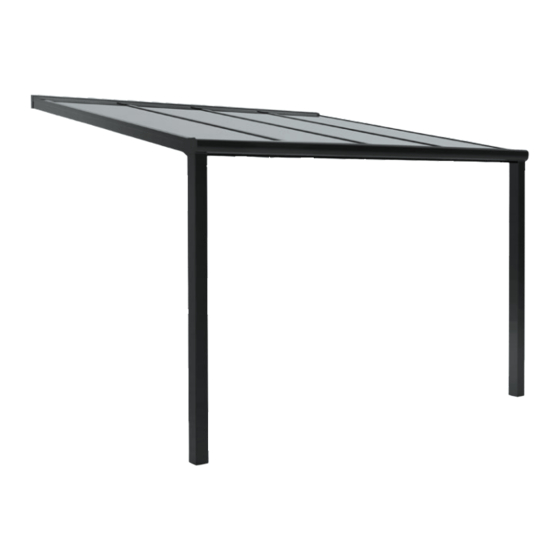
INSTALLATION MANUAL VERANDA V905 - ISEO Exploded view Subject to misprints, errors and technical modifications. Drukfouten, fouten en technische wijzigingen voorbehouden. 10399-191125EN 17 79- 160404(2) -
Page 4: Summary Of The Parts
INSTALLATION MANUAL VERANDA V905 - ISEO Summary of the parts 16. Foundation block 1. Wall plate profile 17. Cover plate 2. Wall rubber 18. Beams (all beams are identical) 3. Tilt profile 19. Glass rubber strip (short – as in 4) 4. -
Page 5: Required Tools
General warning Installing the Verano® product yourself is at your own risk. Only use this instruction as a tool and for the installation of this specific Verano® product. If you cannot install the product yourself, you can always opt for professional installation. -
Page 6: Mounting The Wall Profile
INSTALLATION MANUAL VERANDA V905 - ISEO Mounting the wall profile • Drill holes in the wall plate profile (1). Distance between the holes approx. 50 cm. • Draw the position of the holes onto the wall then drill each hole using an 8 mm bit. -
Page 7: Fixing The Gutter
INSTALLATION MANUAL VERANDA V905 - ISEO Fixing the gutter • Drilling the hole in the gutter (7) for the waste duct (11). • First pre-drill and then reshape to Ø 80 mm using a jigsaw. • Insert the waste duct (11) and screw it down with a turnbuckle (12). -
Page 8: Foundation Blocks And Uprights
INSTALLATION MANUAL VERANDA V905 - ISEO Foundation blocks and uprights Positioning the foundation blocks (16) (optional) This should be done with great care as there is no leeway with the beams! The distance from the foundation block to the wall should be size D minus 165 mm. (Specifi ed in the list of contents provided). This applies to all the blocks. The foundation blocks are often laid into the (paved) patio. -
Page 9: Mounting The Uprights
INSTALLATION MANUAL VERANDA V905 - ISEO Mounting the uprights Mounting the uprights (14) onto the foundation blocks and fixing them to the gutter (7) Position the uprights (14) plus base plates (15) onto the 4 bolts in the foundation blocks (16). Each upright can be levelled out using the double screw nuts on the foundation blocks (16). The height can be adjusted in the same way. -
Page 10: Mounting The Gutter
INSTALLATION MANUAL VERANDA V905 - ISEO Mounting the gutter drilling line • The drainpipe (13) should be sawn to size and attached. • The gutter (7) can then be fixed. • First drill 2 holes of Ø 3.5 mm per upright to the left and right of the waste duct (11). -
Page 11: Placing The Beams
INSTALLATION MANUAL VERANDA V905 - ISEO Placing the beams Placing the beams (18) • First insert the glass rubber (19). • Then the beams should be screwed down from underneath with the screws (C) and covered with the caps (D). Checking measurements • After placing both the side beams (18), check the diagonal length ‘Y’. Both lengths should be identical. -
Page 12: Placing The Poly Roofing Panels
INSTALLATION MANUAL VERANDA V905 - ISEO Placing the Poly roofing panels Formula for calculating the distance between the beams The total width (mm) – 9 mm = ..- (nr. of beams x 55 mm) = ..: nr. of roofing panels = space between the beams (mm). - Page 13 INSTALLATION MANUAL VERANDA V905 - ISEO How the Poly roofing panels should be laid • Start with the left (or right) section. First lay the poly roofing panel (21A) and then fix the end profile (20). Screws (C) and caps (D) are supplied. • It is better to drill the Ø 3.5 mm holes first (on the thin drilling line) into the end profiles (20-23) and the cover slats (22).
-
Page 14: Processing The Polycarbonate Plates
INSTALLATION MANUAL VERANDA V905 - ISEO Processing the polycarbonate plates Storage If you storage the polycarbonate plates, to plates need to lie on a flat surface, for example pallets. The plates may not be stacked directly on the ground. Avoid direct sunlight and rainwater and cover n polycarbonaatplaat the plates with a white polythene foil. - Page 15 INSTALLATION MANUAL VERANDA V905 - ISEO p een effen ondergrond igen. Daarna onmiddellijk t rechtstreeks dek af met witte olycarbonaatplaten n onder een afdak. rd tegen afschuiving door AntiDust tape (gesloten) (closed) speling dient dan aan de zaag met fijn getand...
- Page 16 AntiDust tape (gesloten) UV-laag weghalen ele speling dient dan aan de UV-laag zit boven n speling van circa 3 mm INSTALLATION MANUAL VERANDA V905 - ISEO – 10 daarom valt condensvocht Condensprofiel khelling tussen 5 – 10 de onderzijde e van de plaat.
-
Page 17: Ce-Statement
INSTALLATION MANUAL VERANDA V905 - ISEO Registration number TüV The Netherlands QA B.V.: 1231 Verano BV Bedrijfsweg 8 5683 CP Best, Nederland Certificate number: 1231-CPR-1090-1-2400-A-293 EN 1090-1:2009 + A1:2011 Aluminium parts, to be applied in veranda’s according to order: see sticker on the back of this installation manual...
Need help?
Do you have a question about the VERANDA V905 - ISEO and is the answer not in the manual?
Questions and answers