Advertisement
Quick Links
HOLEMAKER PRO 50
Holemaker Portable Magnetic Drilling Machine
OPERATOR'S MANUAL
WARNING!
,
BEFORE USE
ENSURE EVERYONE USING THIS MACHINE READS AND UNDERSTANDS
.
ALL SAFETY AND OPERATING INSTRUCTIONS IN THIS MANUAL
EYE PROTECTION
HEARING PROTECTION
NEVER PLACE
LINE VOLTAGE
BEWARE OF
REQUIRED
REQUIRED
FINGERS NEAR
PRESENT
ROTATING
CUTTING AREA OR
MACHINE PARTS
MACHINE ARBOR
S
r e
a i
# l
D
a
e t
f o
P
r u
h c
a
e s
Advertisement

Summary of Contents for Itm HOLEMAKER HMPRO36AD
- Page 1 HOLEMAKER PRO 50 Holemaker Portable Magnetic Drilling Machine OPERATOR’S MANUAL WARNING! BEFORE USE ENSURE EVERYONE USING THIS MACHINE READS AND UNDERSTANDS ALL SAFETY AND OPERATING INSTRUCTIONS IN THIS MANUAL EYE PROTECTION HEARING PROTECTION NEVER PLACE LINE VOLTAGE BEWARE OF REQUIRED REQUIRED FINGERS NEAR PRESENT...
-
Page 3: General Information
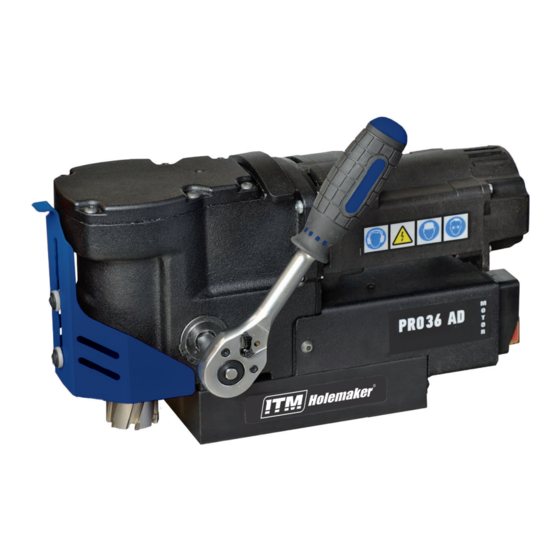
PRO 36 AD 1. GENERAL INFORMATION 1.1. Application The PRO 36 AD is a drilling machine with electromagnetic base, designed to drill holes with diameters of up to 36 mm (1-7/16″). The machine can drill to a depth of up to 20 mm (13/16″) by using HSS annular cutters or to a depth of up to 30 mm (1- 3/16″) by using TCT annular cutters. -
Page 4: Equipment Included
PRO 36 AD PRO 36 AD 1.3. Equipment included PRO 36 AD 1.3. Equipment included 1.3. Equipment included 1.3. Equipment included Drilling machine unit Plastic box unit Drilling machine unit Handle Drilling machine unit unit Plastic box Drilling machine unit unit Handle adapter Plastic box... -
Page 6: Safety Precautions
PRO 36 AD 2. SAFETY PRECAUTIONS 1. Before use, read this Operator’s Manual and complete a training in occupational safety and health. 2. Use only in applications specified in this Operator’s Manual. 3. Make sure that the machine has all parts and they are genuine and not damaged. 4. - Page 7 PRO 36 AD 20. Do not use on surfaces that are rough, not flat, not rigid, or have rust, paint, chips, or dirt. 21. Use the safety strap to attach the machine to a stable structure. Put the strap through the hole in the machine body. Do not put the strap into the buckle from the front.
-
Page 8: Startup And Operation
PRO 36 AD 3. STARTUP AND OPERATION 3.1. Installing the handle Install the handle by using the adapter. You can also install the handle at the other side of the machine. This document is protected by copyrights. Copying, using, or distributing without permission of PROMOTECH is prohibited. - Page 10 PRO 36 AD 3.3. Preparing Before use, clean steel parts, including the spindle, from anti-corrosion material used to preserve the machine for storage and transport. Install the handle as described before. Select the annular cutter or drill bit that matches the required hole diameter. Use a dry cloth to clean the spindle and the cutter (drill bit).
- Page 14 PRO 36 AD To install the assembly, unplug the power cord. Lift the chip guard and turn the handle to the left (1) to lower the standard TCT quill assembly as much as possible. Next, remove the handle and use pliers to remove the retaining rings (2). Push out the shaft (3) by 16 mm (10/16″).
- Page 16 HM PRO 36 AD ITEM PART NUMBER DESCRIPTION Q-TY SKR-000012 PLASTIC BOX PAS-000007 SAFETY STRAP 250 PLT-0378-15-00-00-0 PILOT PIN KLC-000007 4 MM HEX WRENCH PRD-000002 TORQUE STICK KLC-000048 RATCHET WRENCH 3-8...
- Page 17 HM PRO 36 AD ITEM PART NUMBER DESCRIPTION Q-TY WKR-000098 HEX SOCKET BUTTON HEAD SCREW M5x16 PKR-0521-02-00-00-1 GEARBOX COVER KLK-000044 DOWEL PIN 5n6x10 KOL-0521-08-00-00-0 GEAR z63 ASSY PRS-000223 EXTERNAL RETAINING RING 25z TYPE A LOZ-000169 BALL BEARING 25x42x9...
- Page 18 HM PRO 36 AD ITEM PART NUMBER DESCRIPTION Q-TY KOL-0521-08-01-00-0 GEAR z63 LOZ-000100 BALL BEARING 30x42x7 PRS-000021 EXTERNAL RETAINING RING 30z TYPE A SPR-000063 DISC SPRING fi27.99xfi21.74x0.3 WLK-0521-07-00-00-0 PINION SHAFT z16 z32 ASSY LOZ-000038 BALL BEARING 12x28x8 PDK-000221 WASHER 20x28x0.1 PDK-0521-13-00-00-0 SETTING WASHER SLN-0521-03-00-00-1...
- Page 19 HM PRO 36 AD ITEM PART NUMBER DESCRIPTION Q-TY MDL-0378-14-04-00-4 ELECTRONIC MODULE SW=35A - 230V MDL-0378-14-04-00-3 ELECTRONIC MODULE SW=35A - 120V PDK-000041 SPRING WASHER 3.1 NKR-000009 HEX NUT M3 NKR-000040 STRAIN RELIEF NUT WLC-000006 START-STOP SWITCH - 120V WLC-000008 START-STOP SWITCH - 230V PNK-000013 POWER SWITCH WKR-000289...
- Page 20 HM PRO 36 AD...
- Page 21 HM PRO 36 AD ITEM PART NUMBER DESCRIPTION Q-TY WKR-000241 SELF-TAPPING SCREW 4x20 PKR-0440-03-02-00-0 MOTOR COVER WKR-000359 SCREW 3x13 PLY-0271-03-07-00-0 BRUSH HOLDER PRESSURE PLATE SCT-0271-03-06-00-0 BRUSH HOLDER SCZ-000008 MOTOR BRUSH 6x9x17 OBD-0272-03-01-01-1 STATOR HOUSING WKL-000001 BEARING INSERT 19x7.5 STN-000002 STATOR – 120V STN-000004 STATOR –...


Need help?
Do you have a question about the HOLEMAKER HMPRO36AD and is the answer not in the manual?
Questions and answers