GEIGER SOLIDline Original Assembly And Operating Instructions
For cassette awnings
Hide thumbs
Also See for SOLIDline:
- Original assembly and operating instructions (12 pages) ,
- Original assembly and operating instructions (16 pages)
Table of Contents
Advertisement
Quick Links
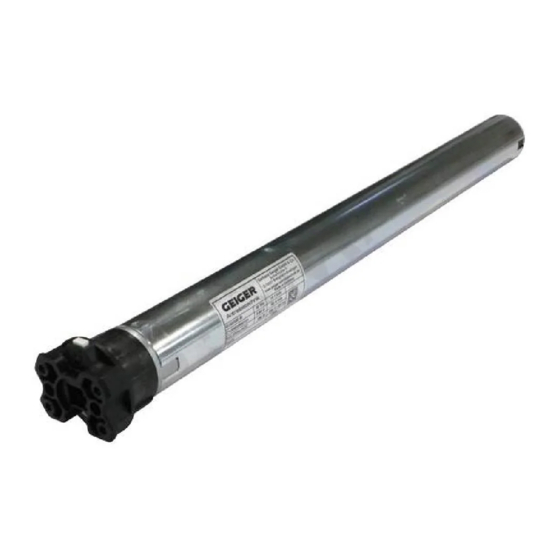
Tubular motor:
GEIGER-SOLIDline
Motor control:
SOLIDline SoftPlusWireless-Qi (GU45...-F02)
for cassette awnings
Original-Montage- und
DE
Betriebsanleitung
Original assembly and
EN
operating instructions
Notice originale de montage
FR
et d'utilisation
Instrucciones originales de
ES
instalación y funcionamiento
Istruzioni originali di installazione
IT
e funzionamento
www.geiger.de
EN
1
EN
Advertisement
Table of Contents

Related Manuals for GEIGER SOLIDline


Summary of Contents for GEIGER SOLIDline
- Page 1 Tubular motor: GEIGER-SOLIDline Motor control: SOLIDline SoftPlusWireless-Qi (GU45...-F02) for cassette awnings Original-Montage- und Betriebsanleitung Original assembly and operating instructions Notice originale de montage et d’utilisation Instrucciones originales de instalación y funcionamiento Istruzioni originali di installazione e funzionamento www.geiger.de...
-
Page 2: Table Of Contents
1. General information Dear customer, By purchasing a GEIGER motor you have decided on a quality product from GEIGER. Thank you very much for your decision and the confidence placed in us. Before you put this drive into operation please observe the following safety instructions. It serves for the prevention of danger and for the avoidance of personal injury and damage to property. -
Page 3: Intended Use
3. Intended use The motors of the model range SOLIDline (GU45...-F02) with the SoftPlusWireless-Qi control are designed exclusively for the operation of cassette awnings. The motors may not be used for the operation of roller grilles, garage doors, furniture and lifting tools. -
Page 4: Safety Instructions For Assembly
A plug for the disconnection of the motor from the power supply must be accessible after installation. f Damaged connecting cables must be replaced by GEIGER connecting cables of the same type. f The device must be mounted as described in the installation instructions. Fixations shall not be made with adhesives since they are regarded as unreliable. -
Page 5: Installation Instructions
– Place the motor into the existing engine bearer and lock – Place the motor in a compatible engine bearer with clip system and lock with spring or rotating lever The GEIGER SOLIDline motor is suitable for shaft diameters from 50 mm! www.geiger.de... -
Page 6: Information For The Specialist Electrician
3 meters as an “antenna“. Definition of “far range“: Distance of the handheld transmitter to the motor control: min.1,5 meter min. Distance of the handheld transmitter to the motor connec- 1,5 m ting cable min.0,5 meter Gerhard Geiger GmbH & Co. KG | 100W1533 V000 0619... - Page 7 If the minimum distance of 25 cm between the upper and lower end stops has not been respected, the learning mode is still activated and the motor starts with a jerk. www.geiger.de...
-
Page 8: Programming The Intermediate Position
5 sec. – the motor responds click with 1 x “click-click” after 3 sec. - until the motor confirms the deletion (3 x “click-click“). min. 1,5 m Gerhard Geiger GmbH & Co. KG | 100W1533 V000 0619... -
Page 9: Learning / Deleting The Transmitters
Keep the key pressed about 5 sec. until the motor confirms the deleting of the transmitters with 1 x “click-click”. approx 5 sec. Please note: You can only delete all transmitters and sensor trans- mitters together. It is not possible to delete individual transmitters. www.geiger.de... -
Page 10: Changing The End Positions
UP key and keep it pushed for about 5 seconds until the motor confirms (2 x “click-click“). The motor must be briefly disconnected from the mains to activate the close-range function. Gerhard Geiger GmbH & Co. KG | 100W1533 V000 0619... -
Page 11: Transmitters
Recommendation: Motors operated via a different pair of keys, or through a different transmitter, should be disconnected from the power line during initial operation. By the handheld and wall transmitters of the LC series the first 6 digits are configurable. The DIP switch Nr. 7, 8 and 9 have no functions. www.geiger.de... -
Page 12: Initiating End Positions
The block is removed if the motor has been operated in the opposite direction for a certain time. An obstacle must thus first be released before the motor can be operated again in the direction of the obstacle. Gerhard Geiger GmbH & Co. KG | 100W1533 V000 0619... -
Page 13: End Position Correction
3 seconds. • The learning mode time is over (30 minutes). In order to activate the short range, disconnect the motor from the power supply for about 3 seconds. 18. Maintenance The drive is maintenance-free. www.geiger.de... -
Page 14: Declaration Of Conformity
Gerhard Geiger GmbH & Co. KG Schleifmühle 6 | D-74321 Bietigheim-Bissingen Phone +49 (0) 7142 9380 | Fax +49 (0) 7142 938 230 | info@geiger.de | www.geiger.de Sitz Bietigheim-Bissingen | Amtsgericht Stuttgart HRA 300591 | USt-IdNr. DE145002146 Komplementär: Geiger Verwaltungs-GmbH | Sitz Bietigheim-Bissingen | Amtsgericht Stuttgart HRB 300481 Geschäftsführer: Roland Kraus | WEEE-Reg.-Nr. -
Page 15: Technical Data
The average sound pressure level data are intended for guidance only. The values were determined by GEIGER at a distance of 1 m, with a hanging motor at idle speed and averaged over 10 seconds. There is no reference to any specific test standard. - Page 16 They will be happy to assist you. Gerhard Geiger GmbH & Co. KG Schleifmühle 6 | D-74321 Bietigheim-Bissingen T +49 (0) 7142 9380 | F +49 (0) 7142 938 230 info@geiger.de | www.geiger.de Gerhard Geiger GmbH & Co. KG | 100W1533 V000 0619...
Need help?
Do you have a question about the SOLIDline and is the answer not in the manual?
Questions and answers