Avaya J169 Quick Manual
Hide thumbs
Also See for J169:
- User manual ,
- Installing and administering (203 pages) ,
- Instructions manual (179 pages)
Advertisement
Quick Links
Advertisement

Related Manuals for Avaya J169


Summary of Contents for Avaya J169
- Page 1 QUICK GUIDE J169 DESKTOP PHONE...
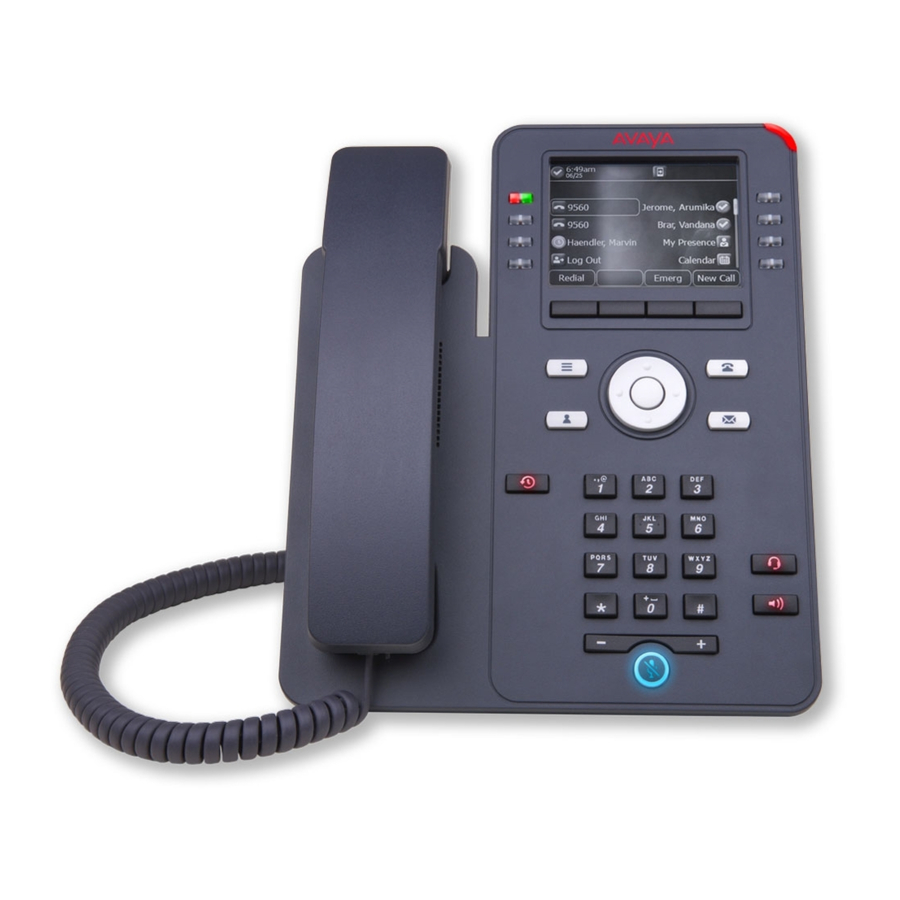
- Page 2 Description The high-performing Avaya IP Phone J169 features four soft keys, high definitionaudio quality, integrated Gigabit Ethernet interface, headset support, and up to three 24-buttonExpansion Modules. The phones deliver sophisticated voice communications from headquarters, remote locations, or home offices. The J179 phone in addition supports the optional WiFi module for wireless connectivity as well as Bluetooth.
- Page 3 15. (2,15)—see below. 9. Headset—Used to turn on headset, and also to toggle your 16. Phone key—Displays the Phone screen. call from the speaker to headset. 10. Speaker—Used to turn on the speaker. © 2020 Avaya Inc. All Rights Reserved.
- Page 4 6. Handset Jack—To connect the handset. 3. Network port—To connect the Ethernet cable. 7. Headset Jack—To connect the headset. 4. PC port—To connect the computer. Note: PC port is disabled when a Wi-Fi network is used. © 2020 Avaya Inc. All Rights Reserved.
- Page 5 Instructions To connect the Avaya J169/J179 IP Phone to the Avaya Cloud Office, you must first 3. Once the device is boots up, it will obtain an IP address from your network. connect the device to the network and power it up.
- Page 6 Avaya.com © 2020 Avaya Inc. All Rights Reserved.
Need help?
Do you have a question about the J169 and is the answer not in the manual?
Questions and answers