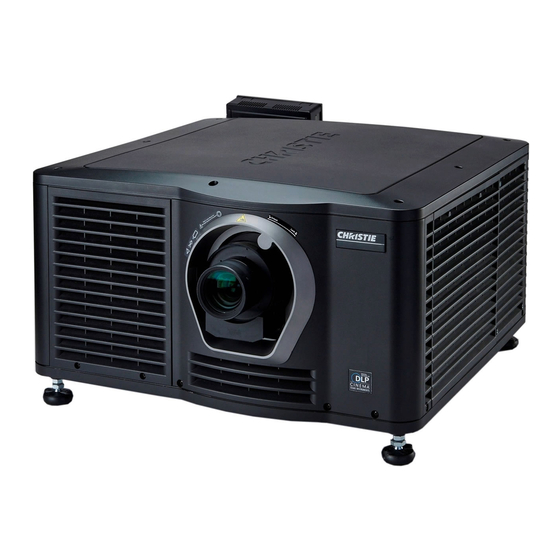
Christie Solaria One Retrofitting Manual
Retrofitting with adolby ims3000 imb
Hide thumbs
Also See for Solaria One:
- User manual (136 pages) ,
- Service manual (88 pages) ,
- Instruction sheet (20 pages)
Table of Contents
Advertisement
Quick Links
Retrofitting the Solaria
One projector with a
Dolby IMS3000 IMB
This document describes the steps for installing an integrated media block (IMB) faceplate retrofit kit,
allowing the use of the Dolby IMS3000 third party IMB in Solaria One series projectors.
Affected products
These instructions apply to the following products
•
Christie Solaria One
•
Christie Solaria One+
Prerequisites
The following components are required to complete the installation.
•
003-109982-01 Kit Solaria IMS3000, containing the following components:
•
Faceplate (QTY: 1)
•
EMI gaskets (QTY: 2)
•
IMS3000 support bracket (QTY: 1)
•
Void warranty label (QTY: 1)
•
Electrostatic discharge bag (QTY: 1)
Installing the Christie Solaria One IMS3000 IMB Faceplate Kit Instruction Sheet
020-103421-02 Rev. 1 (11-2020)
Copyright
©
2020 Christie Digital Systems USA, Inc. All rights reserved.
1
Advertisement
Table of Contents

Summary of Contents for Christie Solaria One
- Page 1 Dolby IMS3000 IMB This document describes the steps for installing an integrated media block (IMB) faceplate retrofit kit, allowing the use of the Dolby IMS3000 third party IMB in Solaria One series projectors. Affected products These instructions apply to the following products •...
-
Page 2: Required Tools
Warning! If not avoided, the following could result in death or serious injury. • SHOCK HAZARD! Disconnect the product from AC before installing, moving, servicing, cleaning, removing components, or opening any enclosure. Installing the Christie Solaria One IMS3000 IMB Faceplate Kit Instruction Sheet 020-103421-02 Rev. 1 (11-2020) Copyright ©... -
Page 3: Upgrading The Projector Software
1. Place the electrostatic discharge mat on a clean flat surface. 2. Put on the grounded electrostatic discharge wrist strap. 3. Cut the void warranty label. Installing the Christie Solaria One IMS3000 IMB Faceplate Kit Instruction Sheet 020-103421-02 Rev. 1 (11-2020) Copyright ©... - Page 4 5. Using the two handles, pull the card cage faceplate assembly out of the card cage. 6. Place the assembly on the electrostatic discharge mat as shown. Installing the Christie Solaria One IMS3000 IMB Faceplate Kit Instruction Sheet 020-103421-02 Rev. 1 (11-2020) Copyright ©...
- Page 5 8. Using a 3/16 nut driver, remove the two nuts on either side of the AES3 output. Set the nuts aside. 9. Using a 2.5 mm ball hex driver, remove the left screw securing the Christie IMB to the faceplate. Set the screw aside.
- Page 6 Retrofitting the Solaria One projector with a Dolby IMS3000 IMB 10. Rotate the assembly 180 degrees. 11. Using a 2.5 mm ball hex driver, remove the right screw securing the Christie IMB to the faceplate. Set the screw aside. 12. Using a 2.5 mm hex driver, remove the two screws on the bottom of the PIBS1 board. Set the screws and support bracket aside.
- Page 7 ® 16. Using a #1 Phillips screwdriver, remove the two screws securing the PIBS1 board to the faceplate. Set the screws aside. Installing the Christie Solaria One IMS3000 IMB Faceplate Kit Instruction Sheet 020-103421-02 Rev. 1 (11-2020) Copyright © 2020 Christie Digital Systems USA, Inc. All rights reserved.
- Page 8 Set the handles and screws aside. 20. Remove the EMI gasket and set it aside. Installing the Christie Solaria One IMS3000 IMB Faceplate Kit Instruction Sheet 020-103421-02 Rev. 1 (11-2020) Copyright ©...
- Page 9 Retrofitting the Solaria One projector with a Dolby IMS3000 IMB Installing the faceplate kit Complete the following procedure to install the Dolby IMS3000 IMB to the Solaria One faceplate provided in the conversion kit. 1. Place the Dolby IMS3000 IMB and included parts on the electrostatic discharge mat.
- Page 10 5. Secure the PIB faceplate board to the faceplate using the four nuts set aside in step 18 of the disassembly procedure. Torque the nuts to 10 in-lb. 6. Install the EMI gasket provided with the Dolby IMS3000 to the faceplate, as shown. Installing the Christie Solaria One IMS3000 IMB Faceplate Kit Instruction Sheet 020-103421-02 Rev. 1 (11-2020) Copyright ©...
- Page 11 11. Secure the support bracket from the conversion kit to the PIBS1 board using the two screws removed in step 12 of the disassembly procedure. Torque the screws to 10 in-lb. Installing the Christie Solaria One IMS3000 IMB Faceplate Kit Instruction Sheet 020-103421-02 Rev. 1 (11-2020) Copyright ©...
- Page 12 14. To hold the IMS3000 in place, engage the support bracket. 15. Insert the EMI gasket removed in step 20 of the disassembly procedure. Installing the Christie Solaria One IMS3000 IMB Faceplate Kit Instruction Sheet 020-103421-02 Rev. 1 (11-2020) Copyright ©...
- Page 13 Torque the screws to 10 in-lb. 19. Apply the void warranty label as shown. 20. Place the Christie IMB (without the faceplate) into the provided electrostatic discharge bag. 21. Place the bag into the box, as shown, and cover with the top foam lid.
-
Page 14: Technical Support
Devices Configuration. 3. In the IMB Installed list, select Doremi (Dolby). 4. Add the Solaria One projector as a device on the Dolby IMS3000. For more information, refer to the Adding the Series II Projector as a device on the Dolby IMS3000 technical bulletin (P/N: 020-200488-XX). - Page 15 • South Korea: +82 2 702 1601 • Christie Professional Services: +1-800-550-3061 or NOC@christiedigital.com Installing the Christie Solaria One IMS3000 IMB Faceplate Kit Instruction Sheet 020-103421-02 Rev. 1 (11-2020) Copyright © 2020 Christie Digital Systems USA, Inc. All rights reserved.


Need help?
Do you have a question about the Solaria One and is the answer not in the manual?
Questions and answers