Table of Contents
Advertisement
Quick Links
Advertisement
Table of Contents

Related Manuals for Danfoss DDC20


Summary of Contents for Danfoss DDC20
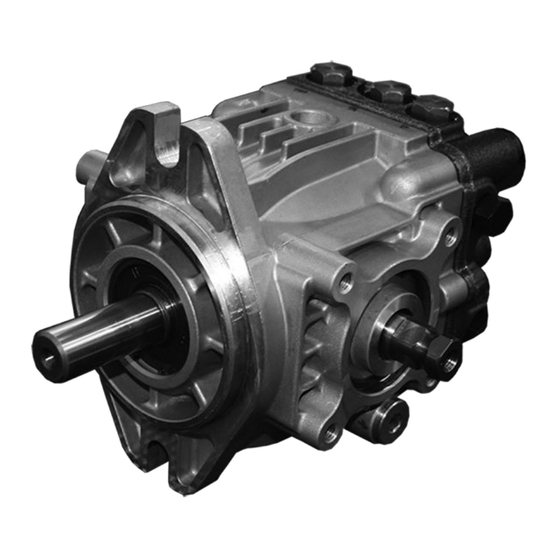
- Page 1 Service Manual Axial Piston Pumps DDC20/24 www.danfoss.com...
- Page 2 Service Manual DDC20/24 Axial Piston Pumps Revision history Table of revisions Date Changed August 2019 Added DDC24 0401 August 2017 change charge pump housing 0302 March 2015 add implement pump option March 2014 Danfoss layout September 2011 First printing L1120413 | AX00000135en-000401 ©...
-
Page 3: Table Of Contents
Service Manual DDC20/24 Axial Piston Pumps Contents Introduction Overview......................................4 Warranty......................................4 General instructions..................................4 Remove the unit..................................4 Keep it clean....................................4 Lubricate moving parts................................4 Replace all O-rings and gaskets............................. 4 Secure the unit..................................... 5 Safety Precautions....................................5 Unintended machine movement............................5 Flammable cleaning solvents..............................5 Fluid under pressure.................................. -
Page 4: Overview
A worldwide Global Service Partner Network is available for major repairs. Major repairs require the removal of the unit’s endcap, which voids the warranty unless done by a Global Service Partner. Danfoss Global Service Partners are trained by the factory and certified on a regular basis. You can locate your nearest Global Service Partner using the distributor locator at www.danfoss.com. -
Page 5: Secure The Unit
Service Manual DDC20/24 Axial Piston Pumps Introduction Secure the unit For major repair, place the unit in a stable position with the shaft pointing downward. It is necessary to secure the pump while removing and torquing components and fasteners. Safety Precautions Always consider safety precautions before beginning a service procedure. -
Page 6: Gauge Port Locations And Installation
Service Manual DDC20/24 Axial Piston Pumps Gauge port locations and installation DDC20/24 gauge port locations and sizes- with Aux pad The following drawing and table show the gauge port locations and gauge sizes needed. DDC20/24 with aux pad M3 Charge gauge / E - Charge inlet... -
Page 7: Gauge Port Locations And Sizes- With Gerotor
Service Manual DDC20/24 Axial Piston Pumps Gauge port locations and installation DDC20/24 gauge port locations and sizes- with Gerotor The following drawing and table show the gauge port locations and gauge sizes needed. DDC20/24 with gerotor L1 Case Drain M3 Charge Pressure Gauge Port... -
Page 8: Gauge Port Locations And Sizes- With Implement Pump
Service Manual DDC20/24 Axial Piston Pumps Gauge port locations and installation DDC20/24 gauge port locations and sizes- with implement pump The following drawing and table show the gauge port locations and gauge sizes needed. DDC20/24 with implement pump A System Port... -
Page 9: Adjustments
5. If there are signs of contamination in the hydraulic fluid, drain the hydraulic system, replace all filters, flush the lines and fill the system with the proper hydraulic fluid. DDC20/24 charge pressure relief valve adjustment The following procedure explains how to check for proper operation of the charge pressure relief valve. -
Page 10: High Pressure Relief Valve
Factory set at 1800 min (rpm) with a reservoir temperature of 50° C [120° F]. DDC20/24 high pressure relief valve (HPRV) adjustment The HPRV valves are set at the factory. No adjustment is possible. If you suspect a HPRV valve malfunction, replace valve with identical relief setting and test operation of pump. -
Page 11: Loop Flushing Valve
N100 J140 QJ020 P109625 DDC20/24 loop flushing valve adjustment The loop flushing valve is not adjustable. If the loop flush valve is malfunctioning, disassemble the valve and check for worn, damaged or scored components. Replace parts if necessary. Refer to Removal for replacement procedures. -
Page 12: Troubleshooting
System pressure. Frequent or long term operation over system relief setting will Measure system pressure. If pressure is too high, reduce loads. create heat in system DDC20/24 transmission operating normally in one direction only Cause Problem Solution Control linkage... -
Page 13: Sluggish System Response
Service Manual DDC20/24 Axial Piston Pumps Troubleshooting Cause Problem Solution Low charge Low charge pressure insufficient to recharge system loop Measure charge pressure with the pump in neutral. If pressure is pressure with pump low, go to Pump charge relief valve... -
Page 14: Minor Repair
Service Manual DDC20/24 Axial Piston Pumps Minor repair Charge pump DDC20/24 charge pump disassembly Charge pump cover orientation Clockwise rotation Counterclockwise rotation Flat Flat side side P109624 Please note the orientation of the charge pump during disassembly (clockwise and counterclockwise). - Page 15 Service Manual DDC20/24 Axial Piston Pumps Minor repair DDC20/24 Remove charge pump K200 K150 K100 K010 K050 P109623 Charge pump cover mounting bolts Item Wrench size Torque K200 6 mm internal hex 20 N•m [15 lbf•ft] L1120413 | AX00000135en-000401 | 15 ©...
-
Page 16: Implement Pump
Service Manual DDC20/24 Axial Piston Pumps Minor repair Implement pump DDC20/24 implement pump removal 1. Position the pump with the shaft end pointing down. 2. Remove cap screws (K200/K210). Remove the implement pump housing (K150). 3. Remove and discard O-ring (K100/K110). -
Page 17: Shaft And Shaft Seal
Service Manual DDC20/24 Axial Piston Pumps Minor repair DDC20/24 machined surface inspection Inspect all machined surfaces for wear or damage. If any nicks, scratches or wear are found replace the housing and/or gerotor. DDC20/24 implement pump assembly 1. Install locating pins (K250) into the endcap. - Page 18 Service Manual DDC20/24 Axial Piston Pumps Minor repair Remove Seal, Shaft, Bearing F125 F120 F115 F110 F105 F100 L1120413 | AX00000135en-000401 18 | © Danfoss | August 2019...
- Page 19 3. Inspect for wear, or pitting. If excessive wear is found, replace the bearing. DDC20/24 shaft and seal assembly 1. Position the pump with the shaft end pointing up. If previously removed; press bearing onto shaft by applying force to the inner race.
- Page 20 Service Manual DDC20/24 Axial Piston Pumps Minor repair 5. Using retaining ring pliers, install the retaining ring (F115). 6. Cover shaft splines with an installation sleeve or packaging tape to protect seal during installation. Lubricate new shaft seal (F120), press into housing until it bottoms out. Press evenly to avoid binding and damaging the seal.
-
Page 21: High Pressure Relief Valve (Hprv)
DDC20/24 Axial Piston Pumps Minor repair High pressure relief valve (HPRV) DDC20/24 high pressure relief valve (HPRV) removal 1. Mark the location of each valve for proper reassembly. 2. Remove the HPRV valve plugs (J140/J150). 3. Remove and discard O-rings (QJ020). -
Page 22: Charge Pressure Relief Valve (Cprv)
DDC20/24 Axial Piston Pumps Minor repair Charge pressure relief valve (CPRV) DDC20/24 charge pressure relief valve (CPRV) removal 1. Remove the charge pressure relief valve plug (J320). Remove and discard O-ring (QJ040). 2. Use a magnet to remove the spring (L200). -
Page 23: Loop Flushing Valve
DDC20/24 Axial Piston Pumps Minor repair Loop flushing valve DDC20/24 loop flushing valve removal 1. Remove the loop flushing valve plugs (J220/J230). Remove and discard O-rings (J220A/J230A). 2. Use a magnet to remove the springs (H150) and spring guides (H200). -
Page 24: Bypass Valve
Service Manual DDC20/24 Axial Piston Pumps Minor repair Bypass valve DDC20/24 bypass valve removal 1. Remove the bypass valve (M100). 2. Remove and discard the O‑rings (M130 and M110) and the backup ring (M120). DDC20/24 bypass valve inspection 1. Inspect the valve. If the bypass valve is damaged, replace it. -
Page 25: Optional Coupling
Service Manual DDC20/24 Axial Piston Pumps Minor repair Optional coupling DDC20/24 optional coupling removal Remove the coupling (J538). DDC20/24 coupling inspection Inspect the coupling. If the coupling is damaged, replace it. DDC20/24 coupling assembly Lubricate and install the coupling (J538). -
Page 26: Torque Charts
Service Manual DDC20/24 Axial Piston Pumps Torque charts DDC20/24 charge pump fasteners and torque chart Aux pad (left) and gerotor (right) J550 J550 K200 Item Fastener Wrench size Torque K200 Charge pump cover 6 mm internal hex 20 N•m [15 lbf•ft]... -
Page 27: Gerotor Plugs And Torque
Service Manual DDC20/24 Axial Piston Pumps Torque charts DDC20/24 Gerotor- plug sizes and torque chart J320 J140 M200 J220 Warning Do not over torque the case drain plugs (L1, L2, L3) Item Plug Port dimensions Wrench size Torque J140/J150 HPRV... -
Page 28: Auxiliary Pad Plug Sizes And Torque Chart
Service Manual DDC20/24 Axial Piston Pumps Torque charts DDC20/24 aux pad plug sizes and torque chart J320 J140 J220 M100 M3 / E J150 J230 Warning Do not over torque the case drain plugs (L1, L2, L3). Item Plug Port dimensions... -
Page 29: Implement Pump Plug Sizes And Torque Chart
Service Manual DDC20/24 Axial Piston Pumps Torque charts DDC20/24 implement pump plug sizes and torque chart M3 / E M3 / E J140 J320 M200 J150 Warning Do not over torque the case drain plugs (L1, L2, L3). Item Plug... - Page 30 Phone: +86 21 3418 5200 Danfoss can accept no responsibility for possible errors in catalogues, brochures and other printed material. Danfoss reserves the right to alter its products without notice. This also applies to products already on order provided that such alterations can be made without subsequent changes being necessary in specifications already agreed.
Need help?
Do you have a question about the DDC20 and is the answer not in the manual?
Questions and answers