Table of Contents
Advertisement
Advertisement
Table of Contents

Subscribe to Our Youtube Channel
Related Manuals for Antelope Zen Go Synergy Core


Summary of Contents for Antelope Zen Go Synergy Core
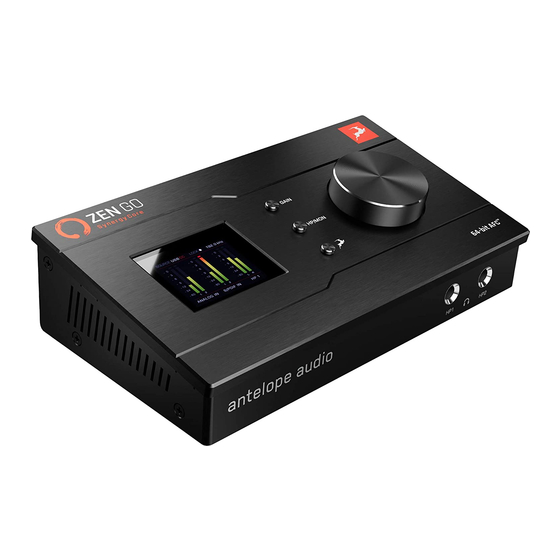
- Page 1 Antelope Audio Zen Go Synergy Core USER MANUAL...
-
Page 2: Table Of Contents
Monitors & Headphones view Synergy Core FX Rack Mixer Output volume and metering Digital Outs view DAW I/O view AuraVerb Loopback function for streaming Edge & Verge mic emulations CUSTOMER SUPPORT INFORMATION Antelope Audio Zen Go Synergy Core User Manual Page 1... - Page 3 MY ANTELOPE AUDIO PRODUCT ISN’T WORKING. LIMITED WARRANTY POLICY SAFETY NOTES TECHNICAL SPECIFICATIONS Antelope Audio Zen Go Synergy Core User Manual Page 2...
-
Page 4: Before You Begin
Congratulations on your purchase! We would like to turn your attention to the following: Zen Go Synergy Core is the first ever bus-powered desktop interface packed with tech featured only in high-end professional studios, giving you instant access to premium sound quality wherever you are. - Page 5 Facebook group and ask for advice. The Knowledge Base is also a valuable source of information. We hope you will enjoy working with the Zen Go Synergy Core. Best wishes, Team Antelope Antelope Audio Zen Go Synergy Core User Manual...
-
Page 6: System Requirements
Memory (RAM): 4 GB minimum (8 GB or more recommended) • CPU: Intel Core i3™ or AMD FX (Higher recommended) Additional Information: • Stable Internet connection is required to download and update your Antelope Audio Software Antelope Audio Zen Go Synergy Core User Manual Page 5... -
Page 7: Product Activation
1. Connect the Zen Go Synergy Core to a Windows or macOS computer. 2. Open your internet browser and navigate to https://en.antelopeaudio.com/login/ 3. Login to the Antelope Audio user area with your e-mail and password. If you don't have an account, visit https://en.antelopeaudio.com/sign-up/ to create one. - Page 8 7. Open the Antelope Launcher application and click on the 'Login' button. Enter the e- mail and password you used to login into the Antelope Audio user area and click 'Login'. Antelope Audio Zen Go Synergy Core User Manual Page 7...
- Page 9 8. Click on 'Activate device'. Note: If the Zen Go Synergy Core does not appear in the 'Devices' tab, click on 'Not seeing your device?' and follow the on-screen instructions. 8. In the Antelope Management Wizard window, choose 'Activate device or assign features' and click 'Continue'.
- Page 10 Please proceed with the 'Setting up' chapter below to configure the Zen Go Synergy Core for use with your Windows or macOS computer. Note: The Zen Go Synergy Core will be listed in the 'My Hardware' page of the Antelope Audio user area with its serial number and activation date.
-
Page 11: Configuring For Windows 10
Configuring for Windows 10 Windows 10 needs a few tweaks to get the Zen Go Synergy Core up and running: 1. Enter the ‘Sounds’ options window from the Control Panel; or right-click the speaker icon in the system tray and choose ‘Open Sound settings’. - Page 12 In some cases, disabling the ‘Exclusive mode’ functionality from the ‘Advanced’ tabs ● might help when running multiple playback applications at the same time. ● Disabling the 32kHz sample rate isn’t mandatory, but it might help in general. Antelope Audio Zen Go Synergy Core User Manual Page 11...
-
Page 13: Configuring For Macos (10.14 And Later)
DAW, despite having everything set up correctly. These steps apply when you are using the Zen Go Synergy Core in a DAW for the first time: 1. Launch your DAW and choose Zen Go Synergy Core as the input device. The following dialog box will appear (if using Ableton Live 10 Suite, for example): 2.Click 'OK' and your DAW should function normally. - Page 14 DAW you want to use. Note: You may have to click the padlock symbol in the bottom left corner and enter your password to make changes. Antelope Audio Zen Go Synergy Core User Manual Page 13...
-
Page 15: Connectivity And Charging Options
Connect to a Windows or macOS computer with USB bus power Simply connect the Zen Go Synergy Core to your computer with a USB cable. Use the USB-C port marked 'AUSB' . The computer will power the interface through the USB connection (bus power). -
Page 16: Connect To A Smartphone Or Tablet While Charging The Mobile Device (Reverse Charging)
USB bus power. The interface needs to be powered from an external USB power source, such as adapter, power bank, or powered USB hub. Here's how to do this: 1. Connect the Zen Go Synergy Core to your mobile device using the USB-C port marked 'AUSB' 2. -
Page 17: Antelope Launcher
Audio products. The application is organized into the following tabs: ‘Devices’ tab All Antelope Audio devices currently connected to your computer are listed in this section. The application functionality is identical for each Antelope device. The following functionality is available in the 'Devices' tab: Device Click the black field to enter a name for your device. - Page 18 Click again to close. Not seeing your device? If a device is missing from the list, the most common reason is driver conflict. The Antelope Launcher makes it easy to re-install drivers and troubleshoot. Click 'Not seeing your device?' to launch the 'Add Drivers' wizard.
- Page 19 Choose your device and connection type from the drop-down menus, disconnect the device from your computer, and click ‘Next’ to perform a driver re-install. Note: If the issue persists, please contact Antelope Audio Customer Support. Antelope Audio Zen Go Synergy Core User Manual Page 18...
- Page 20 'Plug-ins’ tab This section lets you install, update, and uninstall Antelope Audio software such as native mic emulations and AFX2DAW. By default, the Bundle Version drop-down menus show the most recent software bundle available for each product. Clicking the menu shows the currently installed software bundle version and lets you roll-back to an older build.
- Page 21 Restart the Manager Server and enable/disable remote connections from other ● computers on your network. ● Install the Antelope Audio Thunderbolt™ driver. Choose a Bundle Version from the drop-down menu, click the check mark, then click the ‘Update’ button. Antelope Audio Zen Go Synergy Core User Manual Page 20...
- Page 22 Login button Click and enter your Antelope Audio username and password, then click ‘Login’. If you don't have an Antelope Audio account, click ‘Register’ and follow the on-screen instructions. Settings button Click to open the Settings window. Antelope Audio Zen Go Synergy Core User Manual...
- Page 23 Here, you can do the following: Click ‘View Logs’ to view, save, and send activity logs to Antelope Audio Customer ● Support. Click 'Advanced' to enable or disable automatic updates for each of the following: ● Device firmware USB Driver...
- Page 24 Antelope Audio Zen Go Synergy Core User Manual Page 23...
-
Page 25: Panels Explained
● Lock indicator - lights up when the unit is 'locked' to an S/PDIF audio and clock source. ● Current device sample rate e.g. 32kHz - 192kHz. The display is not touch-sensitive. Antelope Audio Zen Go Synergy Core User Manual Page 24... -
Page 26: Control Menu
● Line Out Trim - choose an audio signal trim value for the RCA outputs (14dBu - 20dBu). By default, this option is set to 20dBu. Trim can be used to compensate Antelope Audio Zen Go Synergy Core User Manual Page 25... -
Page 27: System Menu
● Press (and keep pressing) 'HP/MON' to cycle through volume adjustments for the Headphone (HP1, HP2) and Monitor outputs. Turn the rotary control to adjust volume. Press the rotary control to mute and un-mute. Press the 'Antelope button' to exit. - Page 28 USB power to both interface and mobile device. The Zen Go Synergy Core is class-compliant with modern mobile devices and readily connects to them for use with playback and recording apps. Connect a USB power source with at least 1A of electric current to the dedicated Power USB-C port on the interface.
-
Page 29: Front Panel
Front Panel The Zen Go Synergy Core front panel is home to a pair of stereo headphone outputs on 1/4- inch TRS jacks labeled 'HP1' and 'HP2'. The outputs have dedicated volume controls accessed from the 'HP/MON' button on the unit's top panel, and from the Windows/macOS Control Panel application. - Page 30 XLR (microphone) cables instead of 1/4-inch TS/TRS audio cables. However, this is not the correct approach here. Connecting line-level equipment to the Zen Go Synergy Core with XLR cables will activate the interface's microphone preamps and the line-level signal will be amplified to the point of audible distortion.
- Page 31 Monitor outputs The Zen Go Synergy Core has dual 1/4-inch TS/TRS (L/R) and dual RCA (L/R) monitor outputs. While the majority of studio monitor speakers have 1/4-inch audio inputs, smaller monitors and listening speakers (i.e. "desktop", "bookshelf"), home stereo systems, and DJ equipment usually have RCA audio inputs.
- Page 32 Power USB-C port The Power USB-C port is a modern solution that turns the Zen Go Synergy Core into a truly mobile portable audio interface. It has the following applications: ● Power the Zen Tour Synergy Core from an external USB power source, such as adapter, powered USB hub, or power bank (a minimum of 1A electric current is required).
- Page 33 This USB-C port connects to your computer, laptop or mobile device for audio recording, playback, and communication with the Windows/macOS Antelope Audio applications (Antelope Launcher and Control Panel). When connected to a computer or laptop, it supplies USB bus power to the interface. The connection is compatible with USB Type-A ports as well - use a standard USB Type-C to USB Type-A adapter or cable.
-
Page 34: Control Panel
Control Panel Welcome to the Zen Go Synergy Core Windows/macOS Control Panel application! More than just an alternative to the physical top panel controls, it provides straightforward and comprehensive access to each aspect of the interface's functionality. This includes settings, signal routing, audio mixing, effects chains, monitoring, metering, and presets. - Page 35 1. Connect your headphones to input HP1 on the front panel. 2. Connect your Antelope Audio Edge or Verge modeling microphone to inputs A1 and/or A2 on the rear panel. In this example, we are using the Edge Solo, which is connected to input A1.
-
Page 36: Mouse & Keyboard Shortcuts
Record in your DAW Recording with the Zen Go Synergy Core is very simple. First, make sure the interface is chosen as your main input and output device in your DAW. Next, open the Control Panel and click on 'DAW I/O'. Note the following: ●... -
Page 37: Main View
Function strip 1 Contains the following: On/Standby button Click to put the Zen Go Synergy Core in standby mode. Click again to power on. Settings button Click to open the Settings Window with the following options: Antelope Audio Zen Go Synergy Core User Manual... -
Page 38: Settings Window
If panning audio left and right causes a noticeable difference in perceived volume level, adjust Panning Antelope Audio Zen Go Synergy Core User Manual Page 37... - Page 39 ASIO Buffer Size for an optimal balance between digital audio latency and computer performance. Click and drag the fader to adjust the Zen Brightness Go Synergy Core display's brightness. Antelope Audio Zen Go Synergy Core User Manual Page 38...
- Page 40 Click to minimize the Zen Go Synergy Core Control Panel application. Maximize button Click to maximize the Zen Go Synergy Core Control Panel application window. Click the button again, or the adjacent Resize button, to return to default size. Resize button When you maximize or manually resize the Zen Go Synergy Core Control Panel application window, clicking this button will return it to its default size.
- Page 41 Session controls Sessions are 'snapshots' of Control Panel configurations. Think of them as Control Panel presets that you can save, load, and share with other computers and Zen Go Synergy Core users. The field to the left of the 'Save' button shows the currently loaded Session file. Click the 'Save' and 'Load' buttons to save and load Session files (*.as).
- Page 42 Sessions or load the last used Session. Clicking the 'Set Defaults' button restores the component selection to its default setting. Clicking the 'Set Defaults' button followed by the 'Load' button will return the Control Panel application to its default state. Antelope Audio Zen Go Synergy Core User Manual Page 41...
- Page 43 Preamps strip Contains the following controls for the Zen Go Synergy Core's dual analog audio inputs (A2 - A1): Signal type selector Click to choose the signal type you are recording from the drop-down menu: ● Mic - choose this when recording a microphone.
- Page 44 Core's display. When the peak meter is going into the red, it means the signal is too strong and will be degraded by audible distortion and clipping. Occasional dips into the yellow are acceptable. Antelope Audio Zen Go Synergy Core User Manual Page 43...
- Page 45 Mic emulations button Shown in 'Mic' mode. Click to open the Edge & Verge mic emulations window. Mic emulations are explained in the 'Edge & Verge Mic Emulations' chapter. Text label Antelope Audio Zen Go Synergy Core User Manual Page 44...
- Page 46 Click to choose between three Control Panel views - 'Monitors & Headphones', 'Digital Outs', and 'DAW'. The three views are explained in the Control Panel Views sub-chapter below. Understanding them is crucial to operating the Zen Go Synergy Core. AuraVerb button Click to open the AuraVerb effect window.
-
Page 47: Monitors & Headphones View
The 'Monitors & Headphones' view contains two separate 15-channel virtual mixers. One is routed to the Zen Go Synergy Core's Monitor and Headphone 1 (HP1) outputs and is accessed from the 'Monitor/HP1' tab on the left. The other is routed to the secondary headphone output (HP2) and is accessed from the 'Headphones 2' tab on the lower left. - Page 48 Synergy Core FX. Two channels of incoming S/PDIF stereo S/PDIF IN 1 - 2 digital audio. MUTE No audio input. OSCILLATOR 1 - 2 Test signals from oscillators 1 and 2. Antelope Audio Zen Go Synergy Core User Manual Page 47...
-
Page 49: Synergy Core Fx Rack
● Click the 'BP ALL' button to bypass all FX in the rack. Click again to re-activate. ● Click the 'DEL ALL' button to clear the FX Rack. This function is protected with a tooltip: macOS (CMD + Left Click) & Windows (Ctrl + Left Click) Antelope Audio Zen Go Synergy Core User Manual Page 48... -
Page 50: Mixer
● Hold Ctrl (Windows) or Command (Mac) and drag to adjust the effects parameters in smaller increments. A user manual for the Antelope Audio Synergy Core FX library is available here. Mixer This section contains pan controls, volume faders, and Solo/Mute/Link buttons for each channel of the two 15-channel virtual mixers titled 'Monitor/HP1' and 'Headphone 2'. -
Page 51: Output Volume And Metering
Output volume and metering This section contains the following: ● Output volume knob with Dim and Mute buttons for the Zen Go Synergy Core's monitor output. The monitor output is shared between the 1/4-inch TS/TRS and RCA analog outputs on the interface's rear panel. -
Page 52: Digital Outs View
Contains the following: ● Input selectors for digital output channels 'S/PDIF 1' and 'S/PDIF 2'. Click to choose the audio inputs you want to feed into the Zen Go Synergy Core's S/PDIF digital audio outputs. ● Peak meters visualizing the output signal strength. Note the lack of output volume controls. -
Page 53: Daw I/O View
'Monitors & Headphones' view and silence the rest of the channels from the 'Monitor/HP1' mixer controls. Audio from the silenced channels will only be heard through your DAW's Master bus, which is now routed to your monitoring equipment. Antelope Audio Zen Go Synergy Core User Manual Page 52... - Page 54 You can also visit Antelope Audio on YouTube explore our video tutorials or join the Antelope Audio Users Facebook group and ask for advice. The Knowledge Base is also a great resource. Antelope Audio Zen Go Synergy Core User Manual Page 53...
-
Page 55: Auraverb
(pictured above) to hear the reverb applied to it. Drag the faders in the 'Returns' area to hear AuraVerb from the monitor and/or headphone outputs. Parameters The following parameters are available in AuraVerb: Antelope Audio Zen Go Synergy Core User Manual Page 54... - Page 56 This is the linear gain value for all early reflections. These reflections are perceptually grouped with the direct sound when set at lower levels and can nicely thicken a track when increased. Antelope Audio Zen Go Synergy Core User Manual Page 55...
- Page 57 Setting Reverb Time to 50% gives a natural sounding tail for all room sizes. Interesting big spaces or subtle ambience reverbs can be created by setting Reverb Time unusually high or low with respect to the Room Size parameter. Antelope Audio Zen Go Synergy Core User Manual Page 56...
- Page 58 The Preset Manager lets you save and load presets. Use the drop-down menu to choose a preset. Click the ‘S’ button to save a preset. Click the ‘L’ button to load a preset. Antelope Audio Zen Go Synergy Core User Manual Page 57...
-
Page 59: Loopback Function For Streaming
Loopback function for streaming This chapter explains how to configure the Zen Go Synergy Core for use with a streaming application. The basic workflow is like this: 1. Use the Control Panel application to create the audio mix you want to send to your streaming application. - Page 60 Using Mic Emulations In the ‘Mic Emulations’ window, click and rotate the dial to access the emulations available for your modeling microphone: Following is a guide to using the mic emulations for each Antelope Audio modeling microphone. Edge Solo Antelope Audio Zen Go Synergy Core User Manual...
- Page 61 ‘MIC EMU’ output. Edge Solo mic emulations work on a single input audio channel. Recording and monitoring both ‘dry’ and ‘mic emulation’ audio means dealing with two mono tracks. Antelope Audio Zen Go Synergy Core User Manual Page 60...
- Page 62 Choose mic emulations from the drop-down menu in the middle. Click and turn the ‘Phase Invert’ dial to flip the microphone’s polarity. ● Click and drag the ‘48V' switch to activate or turn off phantom power. ● Antelope Audio Zen Go Synergy Core User Manual Page 61...
- Page 63 Route the ‘PREAMP’ inputs occupied by Edge Duo to your desired outputs to monitor ‘dry’ audio and record from Inputs 1 – 8 in your DAW (e.g. you are using Channel 1 in the mixer, so you are recording from Input 1). Antelope Audio Zen Go Synergy Core User Manual Page 62...
- Page 64 Verge is a small-diaphragm condenser microphone that’s as simple to use as the Edge Solo. Its dimensions and ability to handle high sound pressure levels make it a better fit for positioning in tight spaces and recording very loud sources, such as drum kits. Antelope Audio Zen Go Synergy Core User Manual Page 63...
- Page 65 Route the ‘PREAMP’ input for Verge to your desired outputs to monitor ‘dry’ audio. ● Route the ‘EMU MIC’ output for Verge (same number as the ‘PREAMP’ input) to your ● desired outputs to monitor ‘mic emulation’ audio. Antelope Audio Zen Go Synergy Core User Manual Page 64...
- Page 66 Route ‘PREAMP’ and ‘EMU MIC’ blocks to your desired outputs to monitor and record ● both ‘dry’ and ‘mic emulation’ audio. Record from Inputs 1 – 8 in your DAW. ● For more information about Verge, visit its product page. Antelope Audio Zen Go Synergy Core User Manual Page 65...
-
Page 67: Customer Support Information
CUSTOMER SUPPORT INFORMATION Antelope Audio Customer Support can be reached by the following means: Online Visit support.antelopeaudio.com Phone We are there for you around the clock, 21 hours/day, Monday to Friday. North America +1-916-238-1643 01:00 a.m. – 10:00 p.m. (EST) International +44 19 2593 3423 06:00 a.m. - Page 68 Please, don't attempt to send us your device without receiving a RMA number first, as the device will be returned and not serviced. How do I get an RMA number? The Antelope Audio Customer Support team is in charge of issuing RMA numbers. Visit support.antelopeaudio.com and get in touch.
- Page 69 The shipping costs are covered by the owner of the product. Antelope Audio will not cover any local customs charges. We recommend using a courier service of your choice (e.g. DHL, UPS, FedEx). The package...
- Page 70 Antelope Audio Limited Warranty or under their consumer law rights. All claims made under the Antelope Audio Limited Warranty will be governed by the terms set out in this warranty document.
- Page 71 3) to refund the price paid. Should Antelope Audio decide to refund the price paid, it may deduct from the paid Product’s price any damages caused to the Product; where, within...
- Page 72 These warranty obligations are conditioned upon the hardware being returned to the original place of purchase, or another place as directed by Antelope Audio, with the original sales receipt attached. You will be required to pay shipping and handling charges for returning the product.
- Page 73 Antelope Audio or any of its authorized manufacturing partners; (ii) Products purchased from a person or entity which is not an authorized dealer or re-seller of Antelope Audio; (iii)Product sold “as is” or “with all faults”, to the extend permitted by local law.
- Page 74 Product. Returning Your Product In the event that you need to return your Antelope Audio products for repair or replacement, Antelope Audio will provide you with a Return Merchandise Authorization Number (RMA#) as well as return instructions.
- Page 75 (B2B) / Direct customers of Antelope Audio please email us at techsupport@antelopeaudio.com (ii) A valid proof of purchase is required for RMA processing (i.e. receipt, invoice, etc). Antelope Audio will provide you with the RMA number within 2 working days as of the claim submission date.
- Page 76 ● Do not use harsh chemicals to clean your unit. Clean only with specialized cleaners for electronics equipment. ● Connect all your devices before powering your unit. ● Never operate the unit without this earth connection. Antelope Audio Zen Go Synergy Core User Manual Page 75...
- Page 77 1 × Secondary Monitor Out on RCA mirrored from the primary out 2 × Stereo Headphone Outputs Mic Preamp EIN: -128 dBu (A-weighted) Dynamic Range: -121 dB (A-weighted) THD: -106 dB Antelope Audio Zen Go Synergy Core User Manual Page 76...
- Page 78 Digital Outputs 1 × S/PDIF Computer I/O 1 × USB-C (compatible with USB Type A) 2.0 Power Bus-powered through USB-C Additional USB-C connector available for power only. Supports reverse charging. CLOCKING Antelope Audio Zen Go Synergy Core User Manual Page 77...
- Page 79 IPS Screen on a 2.5″ Display Filter In-the-Box Contents • Zen Go Synergy Core • Warranty card • USB-C to USB-C cable • USB-C to USB-A adapter • Getting Started leaflet Antelope Audio Zen Go Synergy Core User Manual Page 78...
Need help?
Do you have a question about the Zen Go Synergy Core and is the answer not in the manual?
Questions and answers