Table of Contents
Advertisement
Advertisement
Table of Contents

Related Manuals for Antelope ZEN TOUR


Summary of Contents for Antelope ZEN TOUR
- Page 1 Owner’s Manual ™ Portable Thunderbolt / USB Audio Interface www.AntelopeAudio.com...
-
Page 3: Table Of Contents
Contents Safety Notes Introduction Features Installation Guide Activation Guide Front Panel Explained Rear Panel Explained Touchscreen Explained Software Control Panel 10. In the Box Troubleshooting 12. Technical Specifications 13. Antelope Audio Support Resources... -
Page 5: Safety Notes
1. Safety Notes • To reduce the risk of electrical shocks, fire, and related hazards: • Do not remove screws, cover, or cabinet. There are no user serviceable parts inside. Refer servicing to qualified service personnel. • Do not expose this device to rain, moisture or spillover of liquid of any kind. •... -
Page 6: Introduction
In Zen Tour portability meets studio power like in no other device. No longer will portable interface stand for a starting point for your career, Antelope turned Zen Tour in a powerful tool for growing huge in the crazy music business! The custom FPGA is a rock-solid platform for creating multiple, zero latency mixes and applying an exciting stack of effects. -
Page 7: Features
3. Features • 1x Custom USB 2.0 Type-B Connector • 1x Thunderbolt™ Gen1 • 4x Mic / Line In on TRS / XLR combo • 4x Hi-Z / Line In on TRS • 8x Line Out on DB25 (8 channels) •... -
Page 8: Installation Guide
Open your preferred DAW and ensure the device is selected as an input and output. Note Make sure your Zen Tour has the most recent firmware installed. Check this by selecting the Options panel and clicking on the Firmware Update button. -
Page 9: Activation Guide
5. Activation Guide It is essential to activate Zen Tour before using it. Once the DC power source is plugged and the device is connected to your computer via USB or Thunderbolt™ follow the steps below: Navigate to www.antelopeaudio.com/products/zen-tour/. Download the Zen Tour Launcher. -
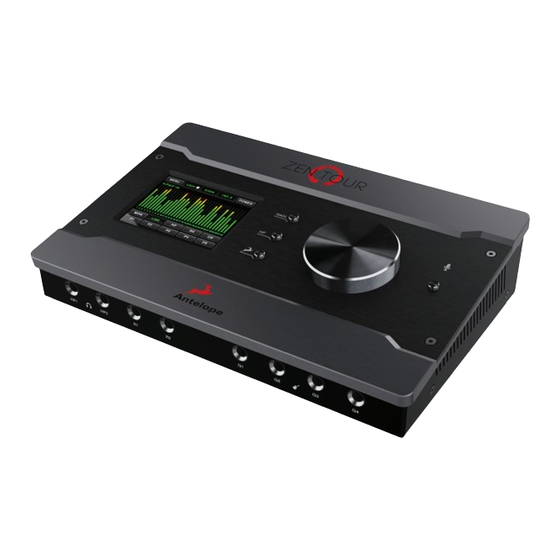
Page 10: Front Panel Explained
Multi function touchscreen that displays various information and control options. Gain Button Press to adjust the volume level of Zen Tour using the Rotary Control Knob. Headhone Select Press to switch between the two headphone outputs and adjust their volume levels. -
Page 11: Rear Panel Explained
Custom USB interface for Zen Tour control via Antelope Audio Software Control Panel. 16. Thunderbolt Port ™ Enables you to connect your Zen Tour to a Thunderbolt™ port on a Mac computer using a Thunderbolt™ cable (not included). 17. DC Power Connector For use with Antelope’s DC power supply only! -
Page 12: Touchscreen Explained
7. Touchscreen Explained Zen Tour features a touchscreen on its front panel. From it you can access all functions of the device. The touchscreen features the following options: MENU Here you can adjust different Zen Tour parameters: Brightness Adjusts the touchscreen brightness. -
Page 13: Main Display
Power Powers off the device. When in standby mode the Zen Tour touchscreen will be switched off. Tap it to see the power icon then tap it again to switch the device on. ACTIVATE This screen indicates you have to activate your device. - Page 14 Enter the Monitor menu to adjust the Monitor volume level from the main Volume Knob. Tap speaker icon to mute (or press the Zen Tour knob). LINE Enter the Line Out menu to adjust the output volume level. Tap speaker icon to mute (or press the Zen Tour knob).
-
Page 15: Sample Rate
/ mute Talkback on Headphone Outs 1 & 2 and on Monitors. GAIN Tap here to select the input mode or press the Gain button on the Zen Tour Front Panel to adjust the gain levels of the inputs and cycle through the different modes (Line/Mic/Hi-Z). - Page 16 METERS Select a signal type to be displayed in Meters mode. Presets 1–5 The Global Presets save all device settings to one of the five available Preset slots. By pressing buttons P1 to P5 you switch between all customizable presets.
-
Page 17: Software Control Panel
Monitor A/B select button Monitor volume slider Monitor mute Clock Source select This dropdown menu allows you to select how the Zen Tour is to be clocked. Sample Rate Select Lock light Devices This dropdown menu allows you to switch between Antelope Audio devices connected to your computer or on the same network. - Page 18 19. ‘To’ Section (from Routing tab) 20. Mixer Section 21. Effects Section 22. Meters Section 23. Presets 24. Undo/Redo Routing; Save/Load (from Routing tab) 25. Hi-Z and Line (Front inputs on TRS) modes selectable via dropdown menu (please ensure your selection from the dropdown menu matches the type of signal being inputted) 26.
-
Page 19: Mixer Tab
10. Master Mix Mute Mixer 1–4 Show/Hide Zen Tour offers four software low latency mixers which provide near zero latency mix and monitoring that can be distributed to any output from the control panel. For example, you can drag all of the 24 USB PLAY channels to MIXER 1 channels and then drag and drop MIX 1 L/R to LINE OUT 1&2 providing a stereo bus mix to LINE OUT channels... - Page 20 By default the effect is switched off. Quick Start AuraVerb appears as a pre-fader send effect on the Zen Tour’s Mixer 1. To send a signal to the reverb, turn up the send control on a mixer channel and use the reverb output level to adjust the return to the mixer’s master channel.
- Page 21 The S & L icons stand for saving and loading your own AuraVerb presets. 8.3. Effects Tab Click on the Effects Tab to reveal the 16 AFX Channel strips. The Zen Tour Effects tab allows you to stack up to 8 effects (viewable in pairs) on each channel strip. You can choose between EQ (including classic hardware EQ emulations), Compressor, Vintage Guitar Amps and Cabs.
- Page 22 22. Add Effect to Channnel Strip & Bypass 8.4. Meters Tab The Meters tab allows you to measure the volume levels of all audio signals coming from and to the Zen Tour. A dropdown menu allows you to easily switch between the routing...
- Page 23 The peak meters shown in the Meters Tab will appear on the Zen Tour display as well. 8 & 9 10 &11 8.5. Settings Tab Click on the gear icon to open the “Settings” window.
-
Page 24: In The Box
DAW before finally checking the Zen Tour sample rate. For Windows, first check in play back devices, right click on the Zen Tour then click properties before then moving to the advanced tab. Then repeat the above by checking the DAW’s sample rate, the Zen Tour’s or your ASIO drivers. - Page 25 Is the Zen Tour device selected in the relevant sound card section of the DAW’s preferences? If the Zen Tour doesn’t show up in you DAW, first try unplugging and plugging back the Thunderbolt™ cable (or the USB cable), then restarting your Computer and finally re-install...
-
Page 26: Technical Specifications
11.Technical Specifications Inputs Analog 4 x Hi-Z / Line inputs on TRS ¼ jacks on front 4 x Mic / Line inputs on XLR & TRS ¼ combo on rear Digital 2 x ADAT (up to 16CH) 1 x S/PDIF Outputs Analog 2 x Main Monitor outs on TRS ¼... - Page 27 Clock Specs Clocking System 4th Generation Acoustically Focused Clocking 64-bit DDS Oven Controlled Crystal Oscillator Clocking Stability <+/-0.02 ppm, oven controlled at 64.5ºC/ 148.1ºF Clocking Aging < 1 ppm per year Clocking Calibration <+/-0.001 ppm Sample rates (kHz) 32, 44.1, 48, 88.2, 96, 176.4, 192 Operating 0-50ºC/32-122ºF temperature...
-
Page 28: Antelope Audio Support Resources
Get social with Antelope Audio and never miss an update: https://facebook.com/AntelopeAudio/ YouTube Page Tutorial videos, interviews, user cases and promos for forthcoming products: http://goo.gl/yfOmZf Web Blog Regular blog posts will update you on the latest user cases with the Zen Tour: http://antelopeaudio.com/products/zen-tour/... - Page 29 Notes ................................................................................................................................................................................................................................................................................................................................................................................................................................................................................................................................................................................................................
- Page 32 Owner’s Manual ™ Portable Thunderbolt / USB Audio Interface Version 2.0 / 09.30.2016...
Need help?
Do you have a question about the ZEN TOUR and is the answer not in the manual?
Questions and answers