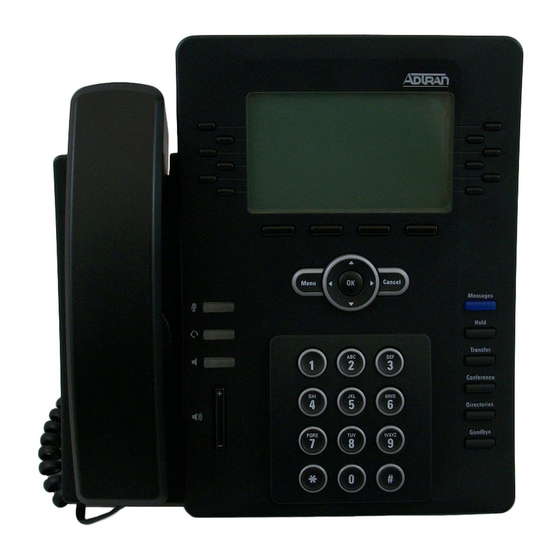
ADTRAN IP 712 User Manual
Ip 700 series
Hide thumbs
Also See for IP 712:
- Quick reference manual (24 pages) ,
- Administrator's manual (85 pages) ,
- Release notes (7 pages)
Table of Contents
Advertisement
Quick Links
Advertisement
Table of Contents

Subscribe to Our Youtube Channel
Related Manuals for ADTRAN IP 712


Summary of Contents for ADTRAN IP 712
- Page 1 IP 700 Series Phone User Manual Firmware Version 2.x.x 6AOSUG0001-1A April 2011...
-
Page 2: Software Licensing Agreement
To the Holder of the Manual The contents of this manual are current as of the date of publication. ADTRAN reserves the right to change the contents without prior notice. In no event will ADTRAN be liable for any special, incidental, or consequential damages or for commercial losses even if ADTRAN has been advised thereof as a result of issue of this publication. - Page 3 ADTRAN IP 700 Series Phone User Manual Conventions Notes provide additional useful information. Cautions signify information that could prevent service interruption or damage to equipment. Warnings provide information that could prevent injury or endangerment to human life. 6AOSUG0001-1A Copyright © 2011 ADTRAN, Inc.
-
Page 4: Save These Important Safety Instructions
They may explode. Check with local codes for special disposal instructions. 5. The socket-outlet shall be installed near the equipment and shall be easily accessible. Save These Important Safety Instructions ADTRAN IP 700 Series Phone User Manual Copyright © 2011 ADTRAN, Inc. 6AOSUG0001-1A... -
Page 5: Fcc Radio Frequency Interference Statement
ADTRAN IP 700 Series Phone User Manual FCC Radio Frequency Interference Statement This equipment has been tested and found to comply with the limits for a Class B digital device, pursuant to Part 15 of the FCC rules. These limits are designed to provide reasonable protection against harmful interference when the equipment is operated in a commercial or residential environment. -
Page 6: General Information
General Information The IP 706 and IP 712 phones are designed to operate in both Key Systems and PBX Systems. The IP 706 or IP 712 phone will be aware of its operating mode and respond appropriately. Certain features may or may not be offered in certain modes. -
Page 7: Table Of Contents
Using Directories..............41 6AOSUG0001-1A Table of Contents Copyright © 2011 ADTRAN, Inc. - Page 8 Index ................53 ADTRAN IP 700 Series Phone User Manual Copyright ©...
- Page 9 Line Keys and Soft Keys for an IP 712 Phone .......
- Page 10 List of Figures ADTRAN IP 700 Series Phone User Manual Copyright © 2011 ADTRAN, Inc. 6AOSUG0001-1A...
-
Page 11: List Of Tables
Menu Navigation Bar ........... . . 34 6AOSUG0001-1A List of Tables Copyright © 2011 ADTRAN, Inc. - Page 12 List of Tables ADTRAN IP 700 Series Phone User Manual Copyright © 2011 ADTRAN, Inc. 6AOSUG0001-1A...
-
Page 13: Introduction
ADTRAN IP 700 Series Phone User Manual INTRODUCTION Congratulations on choosing the IP 706 or IP 712 phone from ADTRAN. ADTRAN IP phones are full-duplex, handsfree IP telephones that offer business-class features, such as multiple call appearance, hold, transfer, and conferencing. This user manual provides details about using the many features of the IP phone, completing basic tasks, as well as troubleshooting tips. -
Page 14: Assembly And Installation
The following sections list the items included in your phone shipment and provide instructions for assembling the IP 706 and IP 712 phones. For questions dealing with missing parts or difficulty in assembly, contact your ADTRAN reseller or your system administrator. -
Page 15: Assembling The Phone
ADTRAN IP 700 Series Phone User Manual Assembling the Phone The IP 706 and IP 712 phones require minimal assembly. The parts that must be assembled include the desk stand and handset. Attaching the Desk Stand 1. Insert the stand through the bracket (rotating it so it fits through the opening). -
Page 16: Figure 3. Connecting The Handset And Headset
2. Optional. Connect your headset to the jack in the back of the phone console labeled with the headset icon as shown in the IP 706 or IP 712 phone. For a list of compatible headsets for the IP phones, refer to the ADTRAN website at www.adtran.com/phones. Once the headset is connected, the headset feature is ready to use. -
Page 17: Connecting To The Power Source
CONNECTING TO THE POWER SOURCE Once the IP 706 and IP 712 phones have been assembled, it is necessary to connect the phones to a power source and the phone system. There are two options available to supply power to your IP phone. Use the Local Power Option if your wall jack is not Power over Ethernet (PoE) enabled. -
Page 18: Inline Power Option
Network connectivity is provided through the PoE wall jack, allowing an optional PC connection through the IP phone. PoE Wall Figure 5. Connecting to the Inline Power Source ADTRAN IP 700 Series Phone User Manual Optional PC Connection Jack Copyright © 2011 ADTRAN, Inc. -
Page 19: Phone Overview
Phone Diagrams The following diagrams give an overview of both the IP 706 and IP 712 model phones. The primary difference between the two models is the number of line keys available. The IP 706 model phone has 6 line keys, while the IP 712 model phone has 12 line keys. -
Page 20: Key Descriptions
Key Descriptions The IP 706 and IP 712 phones use a variety of keys for phone navigation and feature use. The three main categories are: function keys, line keys, and soft keys. The following sections describe each key type and how it is used. -
Page 21: Figure 8. Function Key Location
ADTRAN IP 700 Series Phone User Manual Function Keys Most function keys are used when the phone is either in an idle state or during an active call. Keys that can be used while in an idle state include Messages and Directories. Keys that can be used during an active call include Hold, Transfer, Conference, and Goodbye. - Page 22 LED illuminates Green when in use. Speaker LED illuminates Green when active. Volume ADTRAN IP 700 Series Phone User Manual Description Press to add a third party to an active call. Press to access the System and Personal Contacts directories.
-
Page 23: Figure 9. Line Keys And Soft Keys For An Ip 712 Phone
ADTRAN IP 700 Series Phone User Manual Line Keys The IP 706 phone has 6 line keys, while the IP 712 phone has 12 line keys. These keys are located on either side of the LCD display. See Figure 6 on page 19 each model. -
Page 24: Lcd Menus
Icon Definitions Because the IP 706 and IP 712 phones are accessed either through the Web-based graphical user interface (GUI) or LCD menu, they contain a system of iconic language that every user should recognize and understand. The following section details the most common icons and their meanings. Take a few moments to look these over before moving on to the main features of the phone. - Page 25 ADTRAN IP 700 Series Phone User Manual Table 2. Icon Definitions (Continued) Icon Icon Name Voicemail Not registered Progressing ringback Speed dial entry Busy Lamp Field Busy Lamp Field Busy Lamp Field 6AOSUG0001-1A Where It Appears In the line key label area.
-
Page 26: Phone Settings
PHONE SETTINGS The following sections describe the basic settings of the IP 706 and IP 712 phones. Each section describes a different setting, its purpose, and the appearance of the LCD screen. To get the most from the IP phone, it is recommended that you review this section in its entirety before using your phone. -
Page 27: Time Format
ADTRAN IP 700 Series Phone User Manual Time Format The IP phones support both 12-hour and 24-hour time formats. To change the time format, use the following steps: 1. Press Menu. 2. Press 2 for Phone Settings. 3. Press 2 for Clock. -
Page 28: Setting Ring Tones
10. Press the Exit soft key until the idle screen appears, or press CANCEL on the navigation bar to return directly to the idle screen. ADTRAN IP 700 Series Phone User Manual Load PhoneBook on page Copyright © 2011 ADTRAN, Inc. -
Page 29: Adjusting Volume
ADTRAN IP 700 Series Phone User Manual Adjusting Volume Ringer Volume To adjust the ring volume of the phone, when the phone is idle, use the following steps: 1. Press the + (plus) end of the volume function key to increase the volume. -
Page 30: Configuring Message Waiting Indicator
5. Press the Ok soft key or OK on the navigation bar. 6. Press the Exit soft key until the idle screen appears, or press CANCEL on the navigation bar to return directly to the idle screen. ADTRAN IP 700 Series Phone User Manual Copyright © 2011 ADTRAN, Inc. 6AOSUG0001-1A... -
Page 31: Programming Speed Dials
ADTRAN IP 700 Series Phone User Manual Programming Speed Dials Speed dial members are dynamically placed on line keys not occupied by Line or DND line keys. The number of line keys available for Speed members also depends on the number of BLF members defined in your phone’s status group (managed by the system administrator). -
Page 32: Basic Features
Basic Features BASIC FEATURES The following sections describe the basic features of the IP 706 and IP 712 phones. Each section describes a different feature, explains how it is accessed, its purpose, and the appearance of the LCD screen. To get the most from the IP phone, it is recommended that you review this section in its entirety before using your phone. -
Page 33: Answering Calls
ADTRAN IP 700 Series Phone User Manual Answering Calls Similar to making a call, answering calls may be done with the handset, headset, or speaker. Use the following steps to answer a call: 1. Pick up the handset, press the headset key, or press the speaker key. -
Page 34: Muting Calls
Using the Navigation Bar The IP 706 and IP 712 phone settings are accessed through the various menus presented on the LCD display. As previously discussed, there are menus associated with soft keys (displayed across the bottom of the LCD), as well as a main menu that is displayed when the Menu key in the center of the phone’s face is... -
Page 35: Using Hfaai
ADTRAN IP 700 Series Phone User Manual Using HFAAI Handsfree auto answer intercom (HFAAI) allows the IP phone to automatically answer calls through the phone speaker without user intervention. Both parties must have HFAAI enabled to make and receive HFAAI calls. If HFAAI is not enabled on the receiving phone, the call will ring normally and must be answered manually. -
Page 36: Using Park
Any phone subscribed to a status group containing the park zone will be able to retrieve the call. To retrieve an automatically parked call, press the Retrieve line key. ADTRAN IP 700 Series Phone User Manual Copyright © 2011 ADTRAN, Inc. -
Page 37: Transferring Calls
ADTRAN IP 700 Series Phone User Manual Transferring Calls Transferring a call moves active calls from one extension to another. Transferring can be done three ways: Unattended Transfer, Attended Transfer, or Blind Transfer. Using Unattended Transfer 1. During an active call, press the Transfer function key. -
Page 38: Redialing
6. Press the Ok soft key. The last line key (line key 6 on the IP 706 phone and line key 12 on the IP 712 phone) will display the following icon to indicate that the DND function has been assigned to it: 7. -
Page 39: Retrieving Messages
ADTRAN IP 700 Series Phone User Manual 8. When you choose to implement DND, press the line key labeled DND. When DND is enabled, the DND line key icon, as well as the icons for all other available lines, will change to the following icon: 9. -
Page 40: Using Conference Drop
If either of the conferenced parties hangs up, the call returns to a normal active call between two parties. ADTRAN IP 700 Series Phone User Manual Copyright © 2011 ADTRAN, Inc. 6AOSUG0001-1A... -
Page 41: Directories And Call Logs
DIRECTORIES AND CALL LOGS The IP 706 and IP 712 phones provide many ways for call information to be viewed, stored, and retrieved, making it very easy for all your contact information to be accessed at any time. The primary method for managing call information is through the use of directories. - Page 42 Users cannot add information to the System directory, as this function is reserved for the system administrator. ADTRAN IP 700 Series Phone User Manual Copyright © 2011 ADTRAN, Inc. Load PhoneBook on ...
-
Page 43: Viewing Call Logs
ADTRAN IP 700 Series Phone User Manual Use the following steps to access the System directory information: 1. Press the Directories function key. 2. Press 2 for System. 3. Using the arrow keys, scroll to highlight the desired contact. 4. Press the View soft key to view contact information. -
Page 44: Web Gui
WEB GUI WEB GUI There are many features of ADTRAN’s IP phones that can be more easily accessed using the GUI. The following sections explain how to use the GUI to manage the IP 706/IP 712 phones. Locating the IP Address of the Phone Before you can access the GUI, you must locate your phone’s IP address. -
Page 45: Figure 10. Call Summary Menu
ADTRAN IP 700 Series Phone User Manual Phone Manager Main Menu From the main menu, there are several topics available: • Call Summary • Missed Calls • Phone Status • Backup PhoneBook • Load PhoneBook • Change Password Each of these topics are explained in the following sections. -
Page 46: Figure 11. Missed Calls Menu
Phone Status The Phone Status menu displays phone information and the current line assignments. The following illustration depicts the Phone Status menu: ADTRAN IP 700 Series Phone User Manual Figure 11. Missed Calls Menu Figure 12. Phone Status Menu Copyright © 2011 ADTRAN, Inc. -
Page 47: Figure 13. Backup Personal Phonebook Menu
ADTRAN IP 700 Series Phone User Manual Phone settings (such as Line Type) cannot be configured from the GUI. These parameters must be set from the phone itself. Backup PhoneBook The Backup PhoneBook option saves the Personal directory/phone book from your phone as a comma separated value (CSV) file on your computer. -
Page 48: Figure 14. Load Personal Phonebook Menu
Change Password The Change Password option allows for the GUI login password to be changed. The following illustration depicts the Change Password menu: ADTRAN IP 700 Series Phone User Manual Figure 15. Change Password Menu Copyright © 2011 ADTRAN, Inc. -
Page 49: Exiting The Gui
ADTRAN IP 700 Series Phone User Manual To change the password, follow these steps: 1. Enter the old password in the Old Password field. 2. Enter the new password in the New Password field. 3. Re-enter the new password in the Re-Enter New Password field. - Page 50 ADTRAN IP 700 Series Phone User Manual WEB GUI 6AOSUG0001-1A Copyright © 2011 ADTRAN, Inc.
-
Page 51: Appendix A. Glossary
DHCP: Dynamic Host Configuration Protocol. DHCP is a protocol that assigns dynamic IP addresses to devices on a network. Each time the IP 706/IP 712 phone connects to the network, its IP address may change. The DHCP keeps track of the address changes. - Page 52 IP phones. Link: The connection between the IP 706/IP 712 phone and the network or other devices. Message Waiting Indicator (MWI): The LED that illuminates the Message function key that alerts the user there are waiting voicemail messages.
-
Page 53: Index
Conference 39 Description 20 Directories 41 Goodbye 33 Headset 33 Icons 24 Listing of 20 Menu 34 Messages 39 Mute 34 Speaker 33 Transfer 37 Function Keys 51 Goodbye 33 Handset 16 Connection 16 Headset 32 Copyright © 2011 ADTRAN, Inc. - Page 54 Phone Overview 19 Phone Settings 26 Label 26 Language 29 LCD Contrast 29 Time/Date 26 Formats 27 Ping 52 Placing Calls 32 PoE Power Supply 52 Power Source Connection 17 Proxy 52 Quick Setup 13 Copyright © 2011 ADTRAN, Inc. 6AOSUG0001-1A...
- Page 55 Access 44 Append Personal Contacts 48 Call Summary 45 Exit 49 Forwarding 45 Line Key Appearances 46 Login 44 Missed Calls 46 Passwords 44 Personal Contacts 47 Phone Status 46 Replace Personal Contacts 48 Copyright © 2011 ADTRAN, Inc. Index...
Need help?
Do you have a question about the IP 712 and is the answer not in the manual?
Questions and answers