
Related Manuals for Dräger Vamos


Summary of Contents for Dräger Vamos
- Page 1 RETURN TO THIS MANUAL'S TABLE OF CONTENTS RETURN TO CD-ROM TABLE OF CONTENTS M E D I C A L Vamos Variable Anesthetic Gas Monitor Operating Instructions Software 2.n...
- Page 2 RETURN TO THIS MANUAL'S TABLE OF CONTENTS RETURN TO CD-ROM TABLE OF CONTENTS N N N N O O O O T T T T I I I I C C C C E E E E P P P P r r r r o o o o p p p p r r r r i i i i e e e e t t t t a a a a r r r r y y y y I I I I n n n n f f f f o o o o r r r r m m m m a a a a t t t t i i i i o o o o n n n n This document contains information in which Dräger claimed proprietary rights.
-
Page 3: Table Of Contents
Troubleshooting ........39 Vamos – Variable Anesthetic Gas Monitor ... . . 10 What's What . -
Page 4: Important Safety Information
RETURN TO THIS MANUAL'S TABLE OF CONTENTS Important Safety Information RETURN TO CD-ROM TABLE OF CONTENTS Operator's Responsibility for Patient Safety Important Safety Information Limitation of Liability Operator's Responsibility for Patient Safety For correct and effective use of the product and in order to Dräger's liability, whether arising out of or related to manufacture and sale of the goods, their installation, avoid hazards it is mandatory to carefully read and to... -
Page 5: Warranty
RETURN TO THIS MANUAL'S TABLE OF CONTENTS RETURN TO CD-ROM TABLE OF CONTENTS Important Safety Information Warranty Warranty All Dräger products are guaranteed to be free of defects for a Application of this warranty is subject to the following period of one year from date of delivery. conditions: The following are exceptions to this warranty: 1. -
Page 6: Definitions
RETURN TO THIS MANUAL'S TABLE OF CONTENTS Important Safety Information RETURN TO CD-ROM TABLE OF CONTENTS Definitions Definitions WARNING ! A WARNING statement refers to conditions with a possibility of personal injury if disregarded. CAUTION ! A CAUTION statement designates the possibility of damage to equipment if disregarded. -
Page 7: Summary Of Warnings And Cautions
WARNING ! Dräger cannot warrant or endorse the safe performance Do not use in conjunction with nuclear spin tomography of third party gas sample lines for use with the Vamos (MRT, NMR, or NMI)! monitor. We recommend using genuine Dräger OEM Equipment malfunction may result. - Page 8 Otherwise, incorrect measurements will result. WARNING ! WARNING ! Do not expose the Vamos monitor to mechanical vibra- The Vamos monitor cannot recognize anesthetic gas tions or shock during measurement. Mechanical vibra- mixtures. Consequently, measurements will be incorrect...
- Page 9 - this applies also when returning the Vamos monitor for repair. WARNING ! Never operate the Vamos monitor if it has suffered physi- cal damage or does not seem to operate properly. In this case always refer servicing to DrägerService or factory trained and authorized technical service personnel.
-
Page 10: Intended Use
Vamos – Variable Anesthetic Gas Monitor Intended Use WARNING ! Vamos – Variable Anesthetic Gas Monitor The Vamos anesthetic gas monitor must only be used For measuring and monitoring the CO concentration, under the supervision of qualified medical personnel in... -
Page 11: Operating Concept
1 Turn knob for selecting/setting 2 Press knob for confirming selections/settings. Switch the monitor on with the ON/OFF switch on the back panel. After the self-test, Vamos enters Standby mode. 3 The yellow LED in the » « key lights up. -
Page 12: Structure Of The Measurement Display
(yellow or red) lights up, accompanied by an audible alarm. The respective light color indicates the alarm level. 10 Power supply status light: Vamos — green if device is mains operated, — yellow if device is battery operated. WARNING ! The alarm silence button is intended to provide a way of muting audible alarms while corrective action is taken. -
Page 13: Preparation
Preparation Positioning Connecting the Power Supply Preparation Positioning Place Vamos on a flat surface, e.g. on top of the anesthesia machine. Protect Vamos against falling. WARNING ! Always consult operating instructions of the anesthesia machine with regard to placement of the monitor. -
Page 14: Installing The Water Trap
Installing the Water Trap For operation with the internal battery (available option): As soon as Vamos is connected to AC line power, it will start charging the internal battery. For this, the monitor does not need to be switched on. -
Page 15: Connecting The Sample Line
Vamos WARNING ! Dräger cannot warrant or endorse the safe performance of third party gas sample lines for use with the Vamos monitor. We recommend using genuine Dräger OEM sample line. Other lines may alter the technical data of the monitor. -
Page 16: Connecting The Spo 2 Sensor
RETURN TO THIS MANUAL'S TABLE OF CONTENTS Preparation RETURN TO CD-ROM TABLE OF CONTENTS Connecting the SpO2 Sensor Connecting the SpO Sensor Selecting the sensor The reusable Durasensor DS-100A, 57 20 072 is included in the original delivery package – see Ordering Information, page 49. - Page 17 RETURN TO THIS MANUAL'S TABLE OF CONTENTS RETURN TO CD-ROM TABLE OF CONTENTS Preparation Connecting the SpO2 Sensor Select sensor. Plug the connector of the selected sensor into the »SpO « port on the back panel.
-
Page 18: Operation In Measurement Mode
To start Measuring mode, press » « key. The yellow light will go out. If Vamos is equipped with the battery option: — if the battery is partially discharged the symbol » « appears in the field for the battery status to indicate that the battery is charged automatically. - Page 19 – – – – – – If Vamos has been switched off for less than 3 minutes it automatically switches to measurement mode after the start-up and test routines. In this case the » « key does not have to be pressed.
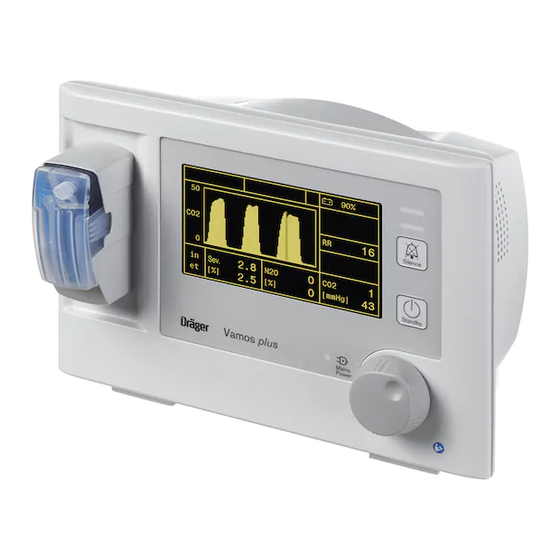
- Page 20 RETURN TO THIS MANUAL'S TABLE OF CONTENTS Operation in Measurement Mode RETURN TO CD-ROM TABLE OF CONTENTS Switching On To the right of the CO real time waveform, the following numeric measurement values are displayed: — Functional oxygen saturation SpO —...
-
Page 21: Spo 2 Measurement
RETURN TO THIS MANUAL'S TABLE OF CONTENTS RETURN TO CD-ROM TABLE OF CONTENTS Operation in Measurement Mode SpO2 Measurement Measurement Tips for avoiding artifacts WARNING ! Only use specified SpO sensors, and position them as instructed – otherwise there is the possibility of incorrect measurements and tissue damage. -
Page 22: Applying The Durasensor Ds-100A
RETURN TO THIS MANUAL'S TABLE OF CONTENTS Operation in Measurement Mode RETURN TO CD-ROM TABLE OF CONTENTS Applying the Durasensor DS-100A Applying the Oxisensor D-25 and D-20 (Option) WARNING ! Do not use self-adhesive sensors if the patient has an all- ergic response to the adhesive strip used. -
Page 23: Applying The Oxisensor I-20 (Option)
RETURN TO THIS MANUAL'S TABLE OF CONTENTS RETURN TO CD-ROM TABLE OF CONTENTS Operation in Measurement Mode Applying the Oxisensor I-20 (Option) Cut nails if necessary. Remove nail varnish where applicable. Remove the protective backing from the adhesive patch. Place the sensor with the sticky side up on a flat surface. Place the fingertip of the index finger centrally over the optical element on the opposite side of the sensor to the lead, and wrap the lateral adhesive tabs around the finger. - Page 24 RETURN TO THIS MANUAL'S TABLE OF CONTENTS Operation in Measurement Mode RETURN TO CD-ROM TABLE OF CONTENTS Applying the Oxisensor I-20 (Option) Reusing sensors If the strip is still sufficiently adhesive, the sensor can be reused on the same patient. Small additional adhesive patches improve the adhesion.
-
Page 25: Setting Alarm Limits
RETURN TO THIS MANUAL'S TABLE OF CONTENTS RETURN TO CD-ROM TABLE OF CONTENTS Operation in Measurement Mode Setting Alarm Limits Setting Alarm Limits When switching the monitor on, and after Standby mode, the default alarm limits listed below are active. lo = Lower alarm limit hi = Upper alarm limit –... -
Page 26: Selecting Co2 Unit Of Measurement/Co2 Scale
RETURN TO THIS MANUAL'S TABLE OF CONTENTS Operation in Measurement Mode RETURN TO CD-ROM TABLE OF CONTENTS Selecting CO2 Unit of Measurement/CO2 Scale To set alarm limits : Turn or press dial knob to select main menu. Turn dial knob to select the »Alarm« parameter. Press dial knob to open the parameter menu. -
Page 27: Selecting Other Spo 2 Averaging Intervals
The volume for the pulse indicator is selectable from 0 to 9. The volume for the alarm is selectable from 1 to 4. Upon switching Vamos on, the default settings are "2" for Pulse and "1" for Alarm Turn or press dial knob to select main menu. -
Page 28: Configure Display Brightness And Medibus Baud Rate
RETURN TO THIS MANUAL'S TABLE OF CONTENTS Operation in Measurement Mode RETURN TO CD-ROM TABLE OF CONTENTS Configure Display Brightness and MEDIBUS Baud Rate Configure Display Brightness and MEDIBUS Baud Rate The brightness of the display can be adjusted in two steps: high, low The following baud rates of the MEDIBUS RS 232 interface exit... -
Page 29: Selecting Parameters To Measure
RETURN TO THIS MANUAL'S TABLE OF CONTENTS RETURN TO CD-ROM TABLE OF CONTENTS Operation in Measurement Mode Selecting parameters to measure Calibration Selecting parameters to measure Monitoring and presentation of anesthetic agents, N O, CO values and SpO , Pulse values can be switched on and off. The default for both settings on power-up is »on«. -
Page 30: In The Event Of An Alarm
3 All measuring parameters where the alarm limits have been exceeded, will begin to flash. Vamos can display a maximum of two alarm messages at the same time, side by side. The alarm message on the left is the Vamos one with the highest priority. -
Page 31: Replacing/Emptying The Waterlock
— When the level has reached the full mark, — or in the event of an »Occlusion!« error message on the monitor: Switch Vamos monitor to Standby mode. Grip water trap by the ridged surfaces and pull it out of its holder. -
Page 32: Terminating Operation
The next time the monitor is operated, the following individually set will again be activated: — CO unit — display brightness Vamos — MEDIBUS baud rate — language For all other parameters the default values will be activated. To shut down the monitor: Switch the ON/OFF switch in the back of the unit to »... -
Page 33: Enabling Anesthetic Agent Measurement
Press dial knob to confirm setting Repeat this procedure for all digits of the Release code. After the last digit has been entered Vamos verifies the entered code. If the correct code has been entered the following message is shown: Agent option released Switch Vamos off and on to enable the option. -
Page 34: Care
RETURN TO THIS MANUAL'S TABLE OF CONTENTS Care RETURN TO CD-ROM TABLE OF CONTENTS Dismantling Care WARNING ! Always follow accepted hospital procedures for handling equipment contaminated with body fluids. Dismantling Disconnect the power plug of the desktop power adapter from the AC power outlet. - Page 35 RETURN TO THIS MANUAL'S TABLE OF CONTENTS RETURN TO CD-ROM TABLE OF CONTENTS Care ® Replacing/Emptying the WaterLock Water Trap CAUTION ! Do not allow any alcohol or detergent/disinfectant to enter the water trap! It may be damaged. CAUTION ! Do not wash or sterilize the water trap! It can be damaged by washing/sterilizing! Disposal...
-
Page 36: Disinfecting/Cleaning/Sterilizing
WARNING ! Follow all accepted hospital procedures for disinfecting parts contaminated by body fluids (protective clothing, eyewear, etc.). Desktop power adapter and Vamos Wipe off visible soiling with a damp, disposable cloth. Wipe-disinfect. Sample gas scavenging hose Wipe off visible soiling with a damp disposable cloth. -
Page 37: Maintenance
DrägerService. WARNING ! To avoid any risk of infection, clean and disinfect the Vamos monitor before any maintenance according to established hospital procedures - this applies also when returning the Vamos monitor for repair. WARNING ! Never operate the monitor if it has suffered physical damage or does not seem to operate properly. -
Page 38: Disposal Procedures
Follow all local, state, and federal regulations with respect to environmental protection when disposing of batteries. Vamos contains built-in rechargeable batteries containing harmful substances. They must be removed and disposed of by DrägerService or factory trained and authorized technical service personnel. -
Page 39: Troubleshooting
RETURN TO THIS MANUAL'S TABLE OF CONTENTS RETURN TO CD-ROM TABLE OF CONTENTS Troubleshooting Troubleshooting Vamos divides alarm messages into 3 priority, identified by exclamation marks: Warning = !!! Top priority message Caution = !! Medium priority message Advisory = ! - Page 40 RETURN TO THIS MANUAL'S TABLE OF CONTENTS Troubleshooting RETURN TO CD-ROM TABLE OF CONTENTS Fault Cause Remedy FiHal lo The inspiratory measured value of the set Check vaporizer setting anesthetic gas is lower than the min. alarm limit Check that the sample line (Luer Lock) is firmly connected FiHal hi The inspiratory measured value of the set...
-
Page 41: What's What
« key for silencing audible alarms for 2 minutes 5 Indicator lights for alarm 6 Power supply indicator light ® 7 WaterLock water trap Vamos 8 Connection port for sample line Rear View 9 ON/OFF switch 10 » « connection for desktop power adapter 11 Connection for RS232 interface –... -
Page 42: Labels
RETURN TO THIS MANUAL'S TABLE OF CONTENTS What's What RETURN TO CD-ROM TABLE OF CONTENTS Labels Labels Main WARNING/CAUTION label left side CAUTION ! RISC OF ELECTRIC SHOCK, DO NOT REMOVE COVER. REFER SERVICING TO A DRAEGER MEDICAL INC. QUALIFIED TECHNICAL SERVICE REPRESENTATIVE. - Page 43 RETURN TO THIS MANUAL'S TABLE OF CONTENTS RETURN TO CD-ROM TABLE OF CONTENTS What's What Labels Power supply label Power Supply for Vamos Ref.: 6870657 Input: 100-240V/50/60Hz Fuse: T 2 A L Output: 15 V=/2A Application acc. EN 60601 FWG8 Made in Germany Dräger Medical AG &...
-
Page 44: Technical Data
RETURN TO THIS MANUAL'S TABLE OF CONTENTS Technical Data RETURN TO CD-ROM TABLE OF CONTENTS Environmental Conditions Performance Characteristics Technical Data Environmental Conditions In operation: Temperature 10 to 40 C (50 to 104 Atmospheric pressure 570 to 1100 hPa Rel. humidity 5 to 90 % In storage: Temperature... -
Page 45: Operating Characteristics
RETURN TO THIS MANUAL'S TABLE OF CONTENTS RETURN TO CD-ROM TABLE OF CONTENTS Technical Data Operating Characteristics Display range for Enflurane 0 to 10 Vol.% Precision ±(0.15 Vol.% + 15 % rel.) Resolution 0.1 Vol.% Display range for Sevoflurane 0 to 10.0 Vol.% Precision ±(0.15 Vol.% + 15 % rel.) Resolution... -
Page 46: Interfaces
RETURN TO THIS MANUAL'S TABLE OF CONTENTS Technical Data RETURN TO CD-ROM TABLE OF CONTENTS Interfaces Duration of power fail alarm >20 sec Power input <25 W during warm-up <15 W in operation Dimensions (W x H x D) (with water trap) 240 x 166 x 165 mm (9.4 x 6.5 x 6.5 inches) Weight without internal battery... -
Page 47: Theory Of Operation
O and volatile anesthetic gas measurement, the stated perfusion for both oxygenated and reduced blood. At the same accuracy of the Vamos is maintained to a respiratory rate of time the absorption characteristics at those wavelenghts differ 75 BPM with an I/E ratio of 1:1 or 1:2. -
Page 48: Abbreviations And Symbols
RETURN TO THIS MANUAL'S TABLE OF CONTENTS Abbreviations and Symbols RETURN TO CD-ROM TABLE OF CONTENTS Abbreviations and Symbols Agent Volatile anesthetic agent Calibration in progress Start calibration ç Conformité Européenne Directive 93/42/EEC on medical devices Desflurane Enflurane exit Return-to-menu fast Short SpO averaging interval... -
Page 49: Ordering Information
RETURN TO THIS MANUAL'S TABLE OF CONTENTS RETURN TO CD-ROM TABLE OF CONTENTS Ordering Information Ordering Information Name/Description Order No. ® WaterLock water trap (12 piece set) 6870567 Sample gas line (set of10) 8290286 T-piece 8600224 Bacteria filter 8600225 Sample gas scavenging hose 1190520 sensors Dura Sensor DS 100 A... -
Page 50: Index
RETURN TO THIS MANUAL'S TABLE OF CONTENTS Index RETURN TO CD-ROM TABLE OF CONTENTS Index ... Patient Safety Operator's responsibility for Abbreviations ........48 Performance characteristics . - Page 51 RETURN TO THIS MANUAL'S TABLE OF CONTENTS RETURN TO CD-ROM TABLE OF CONTENTS This page intentionally left blank...
- Page 52 RETURN TO THIS MANUAL'S TABLE OF CONTENTS These Instructions for Use apply only to RETURN TO CD-ROM TABLE OF CONTENTS Vamos with Serial No.: If no Serial No. has been filled in by Dräger these Instructions for Use are provided for general information only and are not intended for use with any specific...
Need help?
Do you have a question about the Vamos and is the answer not in the manual?
Questions and answers