3Com OfficeConnect 140M User Manual
3com officeconnect 140m: user guide
Hide thumbs
Also See for OfficeConnect 140M:
- User manual (112 pages) ,
- Getting started manual (25 pages) ,
- Datasheet (6 pages)
Table of Contents
Advertisement
Quick Links
Download this manual
See also:
User Manual
Advertisement
Table of Contents

Related Manuals for 3Com OfficeConnect 140M


Summary of Contents for 3Com OfficeConnect 140M
- Page 1 OfficeConnect ® 3C16731 http://www.3com.com/ Part No. DUA1673-1AAA01 Published July 1997 ™ Switch 140M...
- Page 2 LICENSE.TXT. If you are unable to locate a copy, please contact 3Com and a copy will be provided to you.
-
Page 3: Table Of Contents
ONTENTS MPORTANT AFETY NFORMATION ICHTIGE ICHERHEITSHINWEISE L’ INFORMATION DE ÉCURITÉ WITCH DDRESSES BOUT UIDE Introduction 1 How to Use This Guide 1 Conventions 2 Related Documentation 3 NTRODUCTION Network Terminology 1-2 How the Switch Can Be Used 1-4 Switching 1-4 Connecting 10BASE-T and 100BASE-TX Networks MPORTANTE REATING... - Page 4 BOUT WITCH ANAGEMENT Why Manage Your Switch? 3-1 How You Can Manage Your Switch 3-2 Web Interface 3-2 Command Line Interface 3-2 SNMP Network Management 3-3 RMON 3-3 Making a Management Connection to Your Switch 3-4 Managing Through the Console Port 3-5 Managing Over the Network 3-6 RMON Features of the Switch 3-8 ANAGING...
- Page 5 Health Pages 4-27 Port Graph 4-27 Unit Graph 4-28 SING THE OMMAND Using a Terminal Emulator 5-1 HyperTerminal 5-2 Terminal 5-2 Telnet 5-3 Starting the CLI 5-3 Logging On 5-3 Logging Off 5-4 Using the CLI Menus 5-4 CLI Menu Structure 5-5 Navigating the Menus and Entering Commands 5-5 Quick Guide to the Commands 5-6 Commands 5-7...
- Page 6 Solving Problems With the Serial Web Utility C-4 ECHNICAL UPPORT Online Technical Services D-1 World Wide Web Site D-1 3Com Bulletin Board Service D-1 3ComFacts Automated Fax Service D-2 3ComForum on CompuServe Support from Your Network Supplier D-4 ® Online Service D-3...
-
Page 7: Important Safety Information
MPORTANT AFETY WARNING: Warnings contain directions that you must follow for your personal safety. Follow all instructions carefully. Please read the following information carefully before installing the OfficeConnect unit: Exceptional care must be taken during installation and removal of the unit. Only stack the OfficeConnect unit with other OfficeConnect units. -
Page 8: Wichtige Sicherheitshinweise
ICHTIGE ICHERHEITSHINWEISE ACHTUNG: Die Warnungen enthalten Anweisungen, die Sie zur eigenen Sicherheit zu befolgen haben. Lesen Sie bitte die folgenden Informationen sorgfältig durch, bevor Sie das Gerät einbauen: Auf besondere Vorsicht muß während des Ein- und Ausbaus des Gerätes geachtet werden. Stapeln Sie das Gerät nur mit anderen OfficeConnect Gerätes zusammen. -
Page 9: Information De Sécurité
L’ INFORMATION DE AVERTISSEMENT: Les avertissements contiennent les instructions que vous devez suivre pour votre sécurité personnelle. Suivre toutes les instructions avec soin. Veuillez lire à fond l’information suivante avant d’installer l’appareil: Le soin exceptionnel doit être pris pendant l’installation et l’enlèvement de l’appareil. Seulement entasser l’appareil avec les autres appareils OfficeConnect. -
Page 10: Your Switch Addresses
WITCH You can configure IP address information for your switch, enabling you to manage it over the network. It is important that you note down this information as you may need to refer to it when managing the switch again. Use this page to note down your settings. -
Page 11: About This Guide
BOUT UIDE About This Guide provides an overview of this guide, describes the guide conventions, tells you where to look for specific information and lists other publications that may be useful. Introduction This guide describes how to set up, manage and get the most out of your OfficeConnect™... -
Page 12: Conventions
BOUT UIDE Conventions Table 1 Table 2 list conventions that are used throughout this guide. Table 1 Icon Notice Type Alerts you to... Information Important features or instructions note Caution Risk of personal safety, system damage, or loss of data Warning Risk of severe personal injury Table 2... -
Page 13: Related Documentation
Related Documentation The following documents form part of the document set for this product: Quick Reference Guide This contains some useful information from this guide which you may need to refer to regularly. Product Range Sheet This is an overview of the other products in the OfficeConnect range. - Page 14 BOUT UIDE...
-
Page 15: Introduction
NTRODUCTION Welcome to the world of networking with 3Com In the modern business environment, communication and sharing information is crucial. Computer networks have proved to be one of the fastest modes of communication but until now only large businesses could afford the networking advantage. -
Page 16: Network Terminology
IP address information for the switch, if you wish to manage it over the network using the web interface or an SNMP (IP/IPX-based) network management application, for example 3Com’s Transcend ® Manager for Windows Network Terminology... - Page 17 Bandwidth refers to the amount of network traffic the network can carry at any one time (information capacity) measured in bps (bits per second). Workstations or applications that use the network heavily are referred to as using high bandwidth (these are usually users who do a lot of graphical or multi-media work across the network).
-
Page 18: How The Switch Can Be Used
1: I HAPTER NTRODUCTION IP (Internet Protocol) is a data communication protocol used to connect computers and data equipment into computer networks. It is used on a large international network called the Internet, which is composed of universities, government facilities, research institutions and private companies. -
Page 19: Switching Features
lot of bandwidth may benefit from being connected directly to the switch. Figure 1-2 Segmenting Your Network with the Switch How the Switch Can Be Used Switching Features The OfficeConnect Switch 140M behaves as a standard IEEE 802.1D bridge. This means that its functionality conforms to that IEEE specification. -
Page 20: Connecting 10Base-T And 100Base-Tx Networks
1: I HAPTER NTRODUCTION Using the source addresses, the switch can learn which workstations are connected to each of its ports. This information is stored in a switching database, which is a list containing each source address together with the port (through which the device with that address is attached to the switch). -
Page 21: Your Network
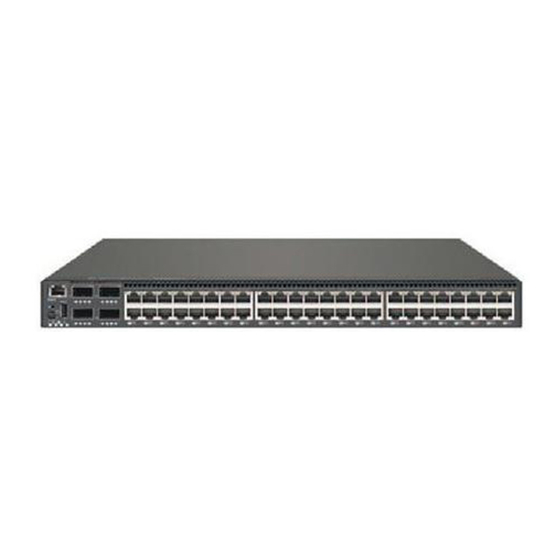
REATING All of the products in the OfficeConnect™ range are designed for ease of use. This chapter describes how to use your OfficeConnect Switch 140M to create your network, and has information on: The switch’s LEDs and ports What you need to create your network Where to position your switch Using the rubber feet and stacking clips Wall mounting your switch... -
Page 22: Creating Your Network
2: C HAPTER REATING ETWORK Figure 2-1 The LEDs and Their Meanings... -
Page 23: Leds And Ports
LEDs and Ports Figure 2-2 The Ports and How to Use Them... -
Page 24: Before You Start
One 10BASE-T or 100BASE-TX adapter card or suitable connection for each workstation or piece of equipment (your equipment may already have an appropriate connection). 3Com produce a range of easy to install network adapters, which can provide your workstation with a 10BASE-T or 100BASE-TX connection. -
Page 25: Twisted Pair (Tp) Cables
You also need a network operating system (for ® example Windows ‘95 or Novell Netware configured on your workstations. Twisted Pair (TP) Cables To connect your hubs and workstations to the switch, you must use ‘Straight-through’ TP cable with RJ45 connectors (all OfficeConnect products with 10BASE-T and 100BASE-TX ports use RJ45 type connectors). -
Page 26: Using The Rubber Feet And Stacking Clips
2: C HAPTER REATING Using the Rubber Feet and Stacking Clips The four self-adhesive rubber feet prevent your hub from sliding around on your desk. Stick the feet to the marked areas at each corner of the underside of your switch. The four stacking clips are used for neatly and securely stacking your OfficeConnect units together. -
Page 27: Wall Mounting Your Officeconnect Switch
Wall Mounting Your OfficeConnect Switch There are two slots on the underside of your OfficeConnect switch which are used for wall mounting. You can mount the unit with the LEDs facing upwards or downwards, to suit your needs. When wall mounting the unit, ensure that it is within reach of the power outlet. -
Page 28: Connecting Officeconnect Hubs To Your Switch
2: C HAPTER REATING 10BASE-T and 100BASE-TX cables are very easy to use. To connect a cable, simply slot the connector into the relevant RJ45 port. When the connector is fully in, its latch locks it in place. To disconnect the cable, push the connector’s latch in and remove it. -
Page 29: Connecting A 100Base-Tx Hub
Connecting a 100BASE-TX Hub You can connect a 100BASE-TX OfficeConnect hub to your switch. When doing so, you must ensure that the total cabling distance between any workstations that are connected to the switch through the 100BASE-TX hub is not greater than 205m (672.4ft), as shown in Figure 2-5. -
Page 30: Checking Hub Connections
2-10 2: C HAPTER REATING Checking Hub Connections When you have connected your hubs, power on the hubs and your switch. The Port Status LEDs for the ports you have used on both the hubs and the switch should be green. If they are not, check your connections and the settings of the MDI/MDIX switches. -
Page 31: About Switch Management
BOUT The OfficeConnect Switch 140M is a manageable product. Management is not required to get your switch working, but it does allow you to change the way it works and to monitor what is happening to your network. This chapter has information on: What you can use to manage your switch The management tasks you can perform How you can make a management connection to... -
Page 32: How You Can Manage Your Switch
3: A HAPTER BOUT WITCH Restart the switch to refresh its statistics and apply any new IP, SLIP and default router information. Initialize the switch to return it to its factory default settings (IP, SLIP and default router information is retained). How You Can Manage Your Switch Each OfficeConnect managed product (including the OfficeConnect Switch 140M) is a separate... -
Page 33: Snmp Network Management
(for example ® Transcend Enterprise Manager for Windows give you total control over your entire 3Com network from a single management station. Using intelligent 3Com software distributed throughout the network (TranscendWare™), 3Com’s Transcend management applications support all of today’s platforms and manage a wide variety of 3Com... -
Page 34: Making A Management Connection To Your Switch
3: A HAPTER BOUT WITCH Making a Management Connection to Your Switch Managing your switch is easy. There are many ways you can connect your management station to your switch, as shown in Figure 3-1. You can manage your switch: Through the console port (known as out-of-band management): Using a web browser... -
Page 35: Managing Through The Console Port
Managing Through the Console Port This section describes how to connect and set up equipment to communicate with the switch through its console port (out-of-band management). The switch automatically detects the baud rate of the management station and adjusts its own baud rate to match, providing that the baud rate of the management station is no more than 19200. -
Page 36: Managing Over The Network
3: A HAPTER BOUT WITCH Using a Terminal Emulator For local management, connect one end of the null modem cable to the console port on the switch, and the other to the serial (RS232) port on your management station. Refer to Chapter 5 for information on setting up the terminal emulator and using the CLI. - Page 37 Using an SNMP Network Management Application 3Com’s Transcend network management applications enable you to get the best out of your switch. Any SNMP (IP/IPX-based) network management application is capable of managing the switch over the network.
-
Page 38: Rmon Features Of The Switch
3: A HAPTER BOUT WITCH RMON Features of the Switch Table 3-1 details the RMON support provided by the switch. You must have an RMON application to use these features; refer to “RMON” For information on how to use RMON, refer to the documentation that accompanies your RMON application. -
Page 39: Managing
ANAGING SING THE This chapter describes how to access and use the web interface to manage your switch. For an overview of what you can do when managing the switch, refer to “Why Manage Your Switch?” on page 3-1. The sections in this chapter are in the order you would perform them when managing the switch for the first time. -
Page 40: Configuring Your Browser
® serial link from a Windows ‘95 management station (connected to the console port of the switch), you must use the 3Com serial web utility (SLIP Driver); refer to Appendix Any number of people can access the web interface over the network, at the same time. There is a password panel to prevent unauthorized management of the switch. -
Page 41: Default User Names And Passwords
To access the web interface: Start your web browser. In the browser, select the option for opening a location. In the browser’s open location window or area, enter the web address URL (Uniform Resource Locator) for the switch. The web address URL for a switch is in the format: http:// nnn.nnn.nnn.nnn / Where nnn.nnn.nnn.nnn is: The SLIP address for the switch, which is... - Page 42 4: M HAPTER ANAGING When using manager and monitor user levels, you may get an error message when performing some of the operations in the web interface. This is because you are trying to perform an operation that the user level is not permitted to do.
-
Page 43: About The Web Interface
About the Web Interface The web interface has been designed so that it is easy to use. It is made up of three areas, as shown in Figure 4-3. The banner and side bar are always displayed, the page changes to show different information about the switch. -
Page 44: Web Interface Map
“Online Help System” If you do not have a connection to the Internet, your web browser is unable to display 3Com pages from the external links (documentation, 3Com Library, 3Com Contacts, 3Com Support). WITCH... -
Page 45: Using The Web Interface
Using the Web Interface Displaying the Unit Pages To display the Unit View and the Unit pages: Click on the unit icon. The page area changes to show the Unit View and the Unit Status page. To display another page, click on part of the Unit View, as shown in Figure 4-5. -
Page 46: Page Components
4: M HAPTER ANAGING To display another page in that management category, click on the link in the row of links. The page area changes to show the new page. You can make changes to the information on the page and choose another page or management category (from the side bar) when ready. -
Page 47: Online Help System
Agent\version\Help. By default, the web interface has been configured to locate the help system in this directory: C:\3Com\agent\ocs01_00\help Therefore, if you use this directory, the web interface will be able to access the help system without requiring further configuration. -
Page 48: Unit Pages
4-10 4: M HAPTER ANAGING Unit Pages This section describes the fields that appear on the pages in the Unit category. The first page displayed is the Unit Status page. Unit View The Unit View is a graphical version of the switch, as shown in Figure 4-7. -
Page 49: Unit Status
Unit Status This page provides detailed information about the unit: System Name The name configured for the switch. Contact The person to contact if there is a problem with the network. Location Where the switch is located. The Unit Name, Location and Contact can be configured using pages in the Management Settings category. -
Page 50: Alert Led
4-12 4: M HAPTER ANAGING The fields are: IP Address Provides a box for you to type the IP address of the switch. Subnet Mask Provides a box for you to type the subnet mask for the IP address. Default Router Provides a box for you to type the IP address of the default router (if you have one) which is used by the switch to communicate with other networks. -
Page 51: Default Settings
Default Settings By default, the Alert LED is configured to light if a medium level (over 40% for 10BASE-T ports, 4% for the 100BASE-TX port) of broadcast traffic is detected in a 20 second period. What Has Caused the Alert LED to Light? If any Alert conditions are active, an orange Alert LED graphic is displayed next to the condition. - Page 52 4-14 4: M HAPTER ANAGING If the Login Violation, Port Security Violation, Authentication Failure or Remote Poll Failure conditions caused the Alert LED to light, an Acknowledge checkbox is displayed for the condition. To acknowledge the condition (and turn the LED off if no other conditions are causing it to light) check the associated checkbox and click on Apply.
-
Page 53: Console Port Configuration
Console Port Configuration This page configures the console port. The switch’s console port is already correctly configured by default, for direct connection to a management station. Only alter these default settings if you are connecting a modem to the console port. If you want to change the settings but are unsure of the correct settings to use, refer to the user documentation that accompanies your management... -
Page 54: Port Setup
4-16 4: M HAPTER ANAGING Port Setup This page specifies the state (enabled or disabled), and configuration of the port, as shown in Figure 4-11. Figure 4-11 Port Setup Page No configuration is required for normal network operation. The fields on this page simply allow you to customize the port functionality to suit your network configuration and operation, to ensure peak network performance. - Page 55 Interactive Access should only be enabled on ports that connect to a single workstation, switch, bridge or router. You should disable Interactive Access on a port The port is connected to a hub (for example OfficeConnect Hub 8/TPO). The port is connected to a device with Interactive Access enabled.
-
Page 56: Management Settings Pages
Apply. By default, the documentation link is specified as pointing to the user guide support page in the 3Com web site (http://www.3com.com/temdoc). If you have access to the Internet, and wish to specify the... -
Page 57: Getting Started
Alternatively, you can copy the online documentation’s files onto your local drive or a network drive, and specify that location. When specifying the locations of the help system and documentation, use forward-slashes (‘/’) instead of back-slashes (‘\’). For example, c:\myfile becomes c:/myfile. -
Page 58: Location
4-20 4: M HAPTER ANAGING You do not have to use the Getting Started pages to configure this information, as it can all be configured using other pages in the web interface. If you have already configured some of this information for the switch, it appears in the appropriate fields on the pages. -
Page 59: System Name
The fields are: New Password Type the new password you want to use. Confirm Password Retype the password for confirmation. If you have made a mistake when typing a new password, click Clear to clear the fields. System Name This page allows you to enter a name for the switch. Use a descriptive name, for example ‘First floor switch’. -
Page 60: Forwarding Mode
4-22 4: M HAPTER ANAGING Forwarding Mode This page allows you to specify the forwarding mode, as shown in Figure 4-14. Figure 4-14 Forwarding Mode Page The fields are: Forwarding Mode Fast Forward / Fragment Free / Store and Forward / Intelligent This field specifies the forwarding mode, which can be one of the following: Fast Forward —... -
Page 61: Initialize
Initialize This page is used to initialize the switch. Initializing the switch causes it to return to its factory default settings, and the switch is reset. You may want to do this if the switch has been previously used in a different part of your network, and its settings are incorrect for its new environment. -
Page 62: Reset
4-24 4: M HAPTER ANAGING Reset This page is used to reset the switch. Resetting the switch simulates powering off and powering on the switch. You may want to do this if you want to: Apply any changes made to the switch’s IP, SLIP and default router information. -
Page 63: Switch Database
During a software upgrade, the web browser is unable to communicate with the switch. After a successful upgrade, the switch resets itself and communication is restored. The upgrade process may take a few minutes. The fields are: Filename Type the filename of the upgrade file. The file name format is: xx_yy .slx... - Page 64 4-26 4: M HAPTER ANAGING Every time the switch sees a source address that it does not have in its switch database (an unknown address), it learns what port the device is on. When the switch database is full, no new addresses are learnt.
-
Page 65: Health Pages
To delete an entry from the switch database, select the port the device is on and enter the device’s MAC address, then choose Delete as the action type and click Do Action. To search for a MAC address in the switch database, select the port the device is on (you can select All Ports) and enter part or all of the MAC address, then choose Search as the action type and click Do... -
Page 66: Unit Graph
4-28 4: M HAPTER ANAGING The fields are: Port Specifies the port that the graphs are displayed for. Graph Type Specifies the type of graph that is displayed: Utilization — Shows the amount of bandwidth that is used on that port. A high bandwidth level could indicate high network activity, which can slow network response times. - Page 67 The fields are: Graph Type Specifies the type of graph that is displayed: Bandwidth Utilization — Shows the current amount of bandwidth that is used on the ports. A high bandwidth level could indicate high network activity, which can slow network response times.
- Page 68 4-30 4: M HAPTER ANAGING WITCH SING THE NTERFACE...
-
Page 69: Using The Command Line Interface
SING THE This chapter describes how to use the Command Line Interface (CLI). The CLI is a quick and simple interface that is built into your switch, which allows you to enter various IP address settings, and reset and initialize the switch. Using the web interface, you can change all of the parameters that the CLI allows you to change. -
Page 70: Hyperterminal
5: U HAPTER SING THE OMMAND HyperTerminal HyperTerminal can usually be found from the Windows Start menu, in Programs, Accessories. To start a HyperTerminal session (after connecting to the hub’s console port): Double-click on the ‘Hypertrm.exe’ icon to start the application. -
Page 71: Telnet
Telnet To access the CLI over the network, you must use an application that has Telnet capabilities. Microsoft Windows also comes with a suitable program called ‘Telnet’. The Telnet application (‘Telnet.exe’) can usually be found in the Windows directory on your PC. To start a Telnet session: Run the ‘Telnet.exe’... -
Page 72: Logging Off
5: U HAPTER SING THE OMMAND If you have logged on correctly, the initial menu appears. If you have not logged on correctly, the message Incorrect password appears and the login sequence starts again. Logging Off At the top level of the CLI, if you enter the command logout, the management session is terminated. -
Page 73: Cli Menu Structure
CLI Menu Structure Figure 5-2 shows the menu/command structure for the CLI. Figure 5-2 CLI Menu Structure From the top-level menu, you can access two sub-menus. IP Menu — From here, you can configure IP parameters and PING other devices (to test your network connections). -
Page 74: Entering Commands
5: U HAPTER SING THE OMMAND As you navigate through the menus, the prompt changes to display your current position in the hierarchy. For example, if you are in the system menu ready to enter your next option, the prompt reads: Select menu option (system): Entering Commands When you reach the menu level containing the... -
Page 75: Enabling And Disabling Bootp
Commands The remaining sections in this chapter detail the management functions that can be carried out from the CLI. Enabling and Disabling BOOTP If BOOTP is enabled and you have a BOOTP server on your network, the server can automatically allocate an IP address, subnet mask and default router address to the switch. -
Page 76: Viewing The Configuration
You can use the display command to show current configuration information for your switch. Displaying the Switch Configuration From the top-level menu, enter: system display The CLI shows information similar to this example: 3Com OfficeConnect Switch 140M, SW Version:1.00 Unit Name Location Contact Time since reset Operational Version... -
Page 77: Resetting The Switch
Displaying the IP Configuration At the prompt, enter the command: ip interface display The CLI displays the IP address, subnet mask, default router address, SLIP address and SLIP subnet mask for the switch. For information on changing these values, refer to “Setting the IP Configuration”... -
Page 78: Initializing The Switch
5-10 5: U HAPTER SING THE OMMAND Initializing the Switch Initializing the switch causes it to return to its factory default settings, and the switch is reset. You may want to do this if the switch has been previously used in a different part of your network, and its settings are incorrect for its new environment. -
Page 79: Problem Solving
ROBLEM The OfficeConnect Switch 140M has been designed to aid you when detecting and solving possible problems with your network. These problems are rarely serious, the cause is usually a disconnected or damaged cable, or incorrect configuration. If this chapter does not solve your problem, contact your supplier for information on what to do next. -
Page 80: Solving Problems With The Switch
6: P HAPTER ROBLEM OLVING Solving Problems With the Switch Power LED not lit. Check your power adapter connection. If there is still no power, you may have a faulty power adapter which needs replacing with another OfficeConnect power adapter. Do not use any other power adapter with the switch. -
Page 81: Solving Problems With The Web Interface
CLI to check that: If you have a management station running Windows ‘95, you are using the 3Com serial web utility (SLIP Driver). Refer to You are using the right cable. For examples of the pin wiring for suitable cables, refer to Null Modem Cables You Can Use”... - Page 82 The web browser cannot access the switch over a serial link from a Windows ‘95 management station. You must use the 3Com serial web utility (SLIP Driver). Check that it is installed correctly. Refer Appendix Some of the web interface is not displayed in the web browser after downloading.
-
Page 83: Solving Problems With The Command Line Interface
Solving Problems With the Command Line Interface The terminal or terminal emulator cannot access the switch through the console port. Check that: Your terminal or terminal emulator is correctly configured to operate as a standard terminal. If this doesn’t work, try configuring it to operate as a VT100 terminal. -
Page 84: Solving Problems With An Snmp Network Management Application
6: P HAPTER ROBLEM OLVING Solving Problems With an SNMP Network Management Application The SNMP network management application cannot access the stack. Check that: The switch’s IP address, subnet mask and default router are correctly configured and that the switch has been reset since configuring this information;... -
Page 85: Dimensions And Operating Environment
IMENSIONS Dimensions and Operating Environment Figure A-1 Dimensions and Operating Environment for the Switch BABT Approval (for U.K. Users Only) The OfficeConnect 140M is covered by Oftel Switch General Approval, NS/G/12345/J/100003, for indirect connection to a public telecommunications system. This can be achieved using the console port and an approved modem. -
Page 86: 10Base-T
A: D PPENDIX IMENSIONS TANDARDS AND Cabling 10BASE-T Figure A-2 Pin Numbering for the 10BASE-T Port Straight-through Figure A-3 Straight-through 10BASE-T Cabling ABLING Crossover Figure A-4 Crossover 10BASE-T Cabling Console Figure A-5 Pin Numbering for the Console Port... -
Page 87: Examples Of Null Modem Cables You Can Use
Examples of Null Modem Cables You Can Use Figure A-6 Example of Null Modem Cabling for a 9-Pin Management Station Figure A-7 Example of Null Modem Cabling for a 25-Pin Management Station Cabling... -
Page 88: Modem Cable
A: D PPENDIX IMENSIONS TANDARDS AND Modem Cable Figure A-8 Modem Cabling for a 25-Pin Modem ABLING Management Settings Before accessing the CLI, you need to set your management equipment’s serial port to: Character size — 8 Stop bit — 1 Parity —... -
Page 89: Ip Addresses
IP Addresses A worldwide network such as the Internet needs a globally-accepted method of identifying individual devices (workstations and network equipment). Devices on the Internet are assigned unique addresses. The Internet then uses these assigned addresses when sending or receiving packets. Internet addressing uses a 32-bit (or 4-octet) address field. -
Page 90: Obtaining A Registered Ip Address
B: IP IPX A PPENDIX DDRESSES Obtaining a Registered IP Address InterNIC Registration Service is the organization responsible for supplying registered IP addresses. The following contact information is correct at time of publication: Network Solutions, Inc. Attn: InterNIC Registration Services 505 Huntmar Park Drive Herndon VA 20170... - Page 91 Class A. The highest order bit is set to 0, giving a seven-bit network number and a 24-bit device address. You can have 125 networks with 16,777,214 devices per network, and the addresses are in the range 001.xxx.xxx.xxx to 126.xxx.xxx.xxx (where xxx represents the device portion).
-
Page 92: Assigning Ip Addresses To A Small, Contained Network
B: IP IPX A PPENDIX DDRESSES The bits of the subnet mask are set to 1 if the device should treat the corresponding bit in the IP address as part of the original network number or as part of the subnet number. -
Page 93: Introduction
Microsoft Windows ‘95 and want to access the switch’s web interface through the switch’s console port, you must use the 3Com serial web utility (SLIP Driver) supplied on the floppy disk that accompanies the switch. The 3Com serial web utility only works on Windows ‘95. - Page 94 C: S PPENDIX ERIAL TILITY In the Run dialog box, type drive (where drive is the letter of Drivers\Slip\SETUP your disk drive) and click OK. The installation program starts and checks your system configuration; enter any information that’s requested. If the setup program cannot find specific files on your management station, it asks you to insert your Windows ‘95 CD-ROM.
-
Page 95: Using The Serial Web Utility
When you have finished, the final installation dialog box is displayed informing you that the serial web utility has been installed on your management station. Click on Finish to close the dialog box. You are asked if you want to restart Windows ‘95 so that it can use the new settings you have configured. -
Page 96: Solving Problems With The Serial Web Utility
C: S PPENDIX ERIAL TILITY The connection is successful if the web interface’s password panel is displayed. You are now ready to manage the switch; refer to Chapter Solving Problems With the Serial Web Utility If you are unable to connect to the switch’s web interface, it may be that: The unit is not powered on. -
Page 97: Echnical Upport
Corporation’s latest news releases, NetAge Magazine, technical documentation and more. 3ComBBS contains patches, software, and drivers for all 3Com products, as well as technical articles. This service is available via modem or ISDN 24 hours a day, 7 days a week. -
Page 98: 3Comfacts Automated Fax Service
3Com Corporation’s interactive fax service, 33 1 6986 6954 3ComFacts, provides data sheets, technical articles, 4989 62732 188 diagrams, and troubleshooting instructions on 3Com 852 2537 5608 products 24 hours a day, 7 days a week. 39 2 27300680 Call 3ComFacts using your Touch-Tone telephone... -
Page 99: 3Comforum On Compuserve ® Online Service
Online Technical Services ® 3ComForum on CompuServe 3ComForum contains patches, software, drivers, and technical articles about all 3Com products, as well as a messaging section for peer support. To use 3ComForum, you need a CompuServe account. To use 3ComForum: Log on to your CompuServe account. -
Page 100: Support From Your Network Supplier
Support from Your Network Supplier If additional assistance is required, contact your network supplier. Many suppliers are authorized 3Com service partners who are qualified to provide a variety of services, including network planning, installation, hardware maintenance, application training, and support services. - Page 101 100BASE-TX 1-2, 2-5 hub, connecting 2-9 10BASE-T 1-2, 2-5 cables A-2 hubs, connecting 2-8 3Com Bulletin Board Service (3ComBBS) D-1 3Com serial web utility C-1 3Com URL D-1 3ComFacts D-2 3ComForum D-3 about the web interface 4-5 access levels 4-3 accessing...
- Page 102 NDEX configuring ageing time 4-21 Alert LED 4-12 console port 4-15 contact information 4-18 Forwarding Mode 4-22 IP 5-7 IP addresses 4-11 location information 4-20 location of online files 4-18 management addresses 4-11 PACE 4-23 password 4-20 port setup 4-16 switch database 4-25 system name 4-21 web browser 4-2...
- Page 103 gateway, default 4-12, 5-7 Getting Started page 4-19 glossary 1-2 graphs 4-27, 4-28 half duplex 4-17 hardware version 4-11 Health pages 4-27 help 5-6 help system 4-9, 4-18 IP addresses work B-2 switch can be used 1-4 switch works 1-5 web interface can be used 4-7 web interface pages are connected 4-6 you can manage the switch 3-2...
- Page 104 NDEX navigating CLI 5-5 network 1-2 adapter cards 2-4 addresses, configuring 4-11 error rate 4-14 loop 1-3 management 3-6 management application (SNMP) 3-3 supplier support D-4 terminology 1-2 utilization 4-14 networking 1-1 null modem cables A-3 obtaining help 5-6 registered IP address B-2 online documentation 4-9, 4-18 help system 4-9, 4-18...
- Page 105 1-4 features 1-5 system name 4-11 uptime 4-11 System Name page 4-21 Index technical support 3Com URL D-1 Bulletin Board Service D-1 fax service D-2 network suppliers D-4 using CompuServe D-3 Telnet 3-2 using 3-7, 5-3 Terminal 5-2 terminal 3-2, 4-15...
- Page 106 NDEX unicast 1-3 unit features 2-1 Unit Graph page 4-28 Unit pages 4-10 Unit Status page 4-11 Unit View 4-10 areas 4-7 unshielded cables 2-5 upgrading switch 4-24 Transcend 3-3 uptime 4-11 URL D-1 user access 4-8 levels 4-3 using CLI 5-5 serial web utility C-3 SNMP network management...
- Page 107 3Com warrants that the software programs licensed from it will perform in substantial conformance to the program specifications therefor for a period of ninety (90) days from the date of purchase from 3Com or its Authorized Reseller. 3Com warrants the media containing software against failure during the warranty period.
- Page 108 IN CONNECTION WITH THE SALE, INSTALLATION, MAINTENANCE, OR USE OF ITS PRODUCTS. 3COM SHALL NOT BE LIABLE UNDER THIS WARRANTY IF ITS TESTING AND EXAMINATION DISCLOSE THAT THE ALLEGED DEFECT IN THE PRODUCT DOES NOT EXIST OR WAS CAUSED BY CUSTOMER’S OR ANY THIRD PERSON’S MISUSE,...
- Page 109 LECTRO AGNETIC OMPATABILITY FCC S TATEMENT This equipment has been tested and found to comply with the limits for a Class B digital device, pursuant to part 15 of the FCC rules. These limits are designed to provide reasonable protection against harmful interference in a residential installation.
Need help?
Do you have a question about the OfficeConnect 140M and is the answer not in the manual?
Questions and answers