Advertisement
Quick Links
DO NOT USE FOR ORAL SURGERY
BEFORE OPERATING THE HANDPIECE, CAREFULLY READ AND FOLLOW ALL OF THESE INSTRUCTIONS.
SAVE THESE INSTRUCTIONS FOR FUTURE REFERENCE AND OBSERVE ALL WARNINGS AND CAUTIONS.
Indications For Use
®
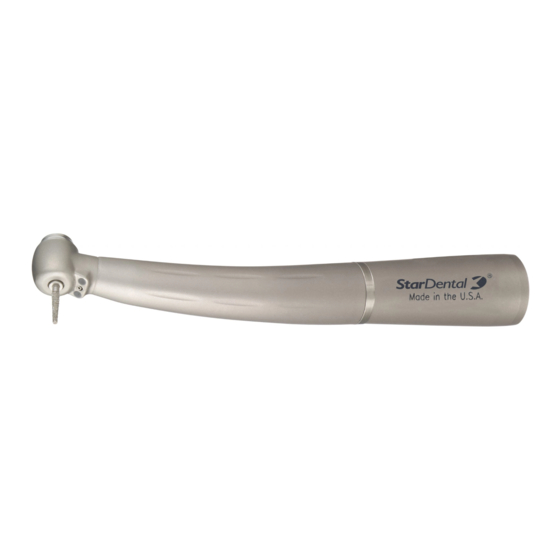
The Solara
QT High Speed Dental Handpieces are pneumatically driven, hand-held devices intended for use by trained
dental professionals for drilling in the oral cavity. Procedures include, but are not limited to, caries removal, restorative
work and crown preparations.
Any serious incident occurring from the use of this device should be reported to StarDental immediately. If incident occurred
NOTICE
in a EU Member State the Competent Authority must be notified.
Contents
Solara QT High Speed Handpieces are designed to fit a StarDental 360° quick disconnect swivel. The Solara QT connects
to standard 4-line ISO fiber optic tubing and standard 4/6-line ISO fiber optic tubing.
• Specifications
• Handpiece Operation
• Lubrication - For Lubricated
Handpieces ONLY
• Handpiece Installation
• Safety Rules
• Cleaning & Sterilization
Specifications (Nominal)
Type: High speed fiber optic with a swivel & replaceable turbine. (Swivel sold separately.)
Operating Air Pressure: 30 to 34 psi
Air Consumption: 2.0 SCFM @ 34 psi
No Load Speed: 430,000 rpm
Connection: 360° quick disconnect swivel with 4-line ISO configuration & fiber optics.
4/6 line ISO fiber optic tubing.
135°C
Power: 18 watts
Weight: 32.8g
Handpiece Installation
Note: Filter air and water supplies, recommended filtration: 25 microns. Soften and deionize water. Be sure filters operate efficiently.
1. Grasp the swivel in front of the bearing assembly between the thumb
and index finger as shown.
2. Slide tubing coupler until the end of the ISO connector is exposed;
hold in hand as shown with fingers securing the tubing.
3. Align and insert swivel tubes into the ISO connector holes.
4. While applying slight pressure to hold fittings in the connector holes,
slide coupler forward and engage threads. Continue threading
coupler clockwise until hand tight against the swivel.
5. Using the wrench as shown, tighten the swivel to tubing coupler
until snug. Be sure to turn tubing coupler, not swivel.
DO NOT OVER TIGHTEN. Connect handpiece to swivel.
Note: This joint loosens over time, resulting in loss
of power. Check for tightness periodically.
Air and Water Adjustment
1. Air Pressure –
To prevent premature damage to the turbine, do not exceed 34 psi when using a HiFlo swivel.
NOTICE
Use an air pressure gauge, StarDental Part #262591 for 4/6-Line, set pressure to 30-34 psi.
If a gauge is not available, set pressure at delivery head allowing 1 psi pressure loss for every foot of tubing. (See
Specifications for recommended operational pressure.)
For example, if you want to operate at 34 psi and you are using either 5 feet or 12 feet of tubing, then the pressure should
be set at the delivery head to compensate for the air pressure losses.
2. Water Pressure –
Adjust water volume at the delivery head to obtain a satisfactory spray stream, 30 cc/m is recommended.
3. Non-StarDental 6-pin Fiber Optic System:
If the handpiece is connected to a non-StarDental 6-pin F.O. system, consult your operator's manual of F.O. system for
correct voltage. Non-StarDental F.O. systems must have a rated amperage output between 1.5 Amps dc and .73 Amps
dc at 3.1 Vdc. Use StarDental Part # 262962 bulb for non-StarDental F.O. systems that meet these requirements. Adjust
the voltage per instructions with the 3.1 VDC bulb.
If the non-StarDental 6-pin F.O. system has a rated amperage output of at least 1.5 Amps dc at 3.3 VDC, then the StarDental
Part #262522 bulb may be used. Adjust the voltage per instructions with the 3.3 VDC bulb.
Handpiece Operation
Use standard length concentric diamond and carbide burs; all burs to have .0628"
nominal diameter friction grip shanks designed for high speed handpieces. Every
StarDental Diamond Bur meets the specifications below for recommended lengths.
Contact your dealer for a complete list of StarDental Diamond Burs. StarDental
autochuck turbines have the following bur requirements:
Use only burs with hardened, tempered steel shanks or carbide shanks. Every
StarDental Diamond Bur maintains required hardness. Before use, verify concentric
rotation by operating handpiece outside the oral cavity in a safe place.
NOTE: Do not use burs that produce excessive noise or do not run concentrically.
Do not use burs that are modified, eccentrically designed, or are bent or 'soft' (non-heat treated) shanks.
Autochuck Bur Changing System
1. Insert bur into autochuck until resistance is felt.
2. Depress autochuck end cap button and continue to feed-in bur until it clicks
and stops.
3. Release end cap button. Now, apply light inward force to the dental bur. This
will help set the chucking mechanism for initial start up. (Always tug on bur
• Troubleshooting
after it has been installed to confirm that it is secure).
• Turbine Replacement
1. To remove, grasp handpiece firmly so your thumb touches the end cap and
• Replacement Part Numbers
push until a slight 'click' is noticed.
• Warranty
2. Pull bur straight out.
3. Release end cap.
Never depress the autochuck end cap button or rest the end cap against any part of the oral anatomy
CAUTION
during handpiece operation. Depressing the end cap while a bur is rotating can activate the chuck
mechanism and result in end cap heat-up and/or loss of bur retention.
Sterilizable up to 135°C
SAFETY
INSTRUCTIONS
ISO Connector
To minimize risk of serious injury:
Swivel
• Always insert bur the full length of the chuck. If you attempt to extend it from the chuck, the bur may dislodge during use
Tubing
Coupler
and possibly injure you or your patient.
To minimize risk of injury or damage to handpiece or auto chuck:
Bearing
Assembly
• Replace turbine when handpiece does not run at full speed or runs noisily.
Tubing
• Use only recommended burs. An improperly clamped or bent bur, usually indicated by sudden high-pitched sound or
increased vibration during use, may dislodge injuring you or your patient.
Turn tubing coupler
• Follow these safety instructions:
while holding
Wrench
- Confirm bur is secure by tugging on it after it is loaded
swivel in place
- Verify concentric rotation by operating handpiece outside oral cavity. Do not use if it does not run concentrically or
runs with excessive noise.
- Do not operate handpiece without an installed bur.
- Always use burs with overall length of less than 24mm. Shank length must be at least 7.3 mm. This includes most short
shank burs. (see Handpiece Operation)
Tubing Coupler
- When using autochuck, never depress end cap while bur is rotating.
5 feet tubing
34 psi + 5 psi = 39 psi
12 feet tubing
34 psi + 12 psi = 46 psi
Autochuck Bur Changing System
Maximum
24.0 mm
OVERALL LENGTH
Minimum
7.3 mm
Shank Length
WARNING
CAUTION
Lubrication
- For Lubricated Handpieces ONLY
LUBRICATED Ceramic Bearing Turbine:
For maximum turbine life do not exceed recommended pressure.
Note: Lubricate handpiece daily with DentaLube II , StarDental Part #262539, and prior to
each sterilization procedure.
1. Disconnect handpiece.
2. Assemble the conical red tip applicator, StarDental Part #202954, into the DentaLube II bottle cap.
3. Find drive air tube at rear of handpiece and place three drops of DentaLube II.
(See illustrations for more detail).
Note: Never operate handpiece without bur in place.
4. With bur in place connect handpiece to tubing, operate for 20 seconds to expel excess
lubricant.
LubeFree Handpieces Contain A LubeFree Ceramic Bearing Turbine -
NOTICE
This turbine uses a sophisticated ceramic bearing design and, therefore, requires no lubrication. To ensure
the life of, and to prevent damage to, this turbine - do not lubricate it. If it gets lubricated even once, it MUST
then continue to be lubricated for the rest of its life.
Cleaning & Sterilization
It is the responsibility of the user to use only FDA compliant sterilizing equipment and accessories
CAUTION
that are capable of meeting the manufacturers recommendations below.
Do not exceed 135°C
CAUTION
To prevent damage to the bur, use an autoclavable bur block.
Do not use:
• dry heat sterilizer
• cold sterilizers
• chemical disinfectors
• immersion techniques
• surface wipes
• hand soaps
• sterilizer bags
•surface sprays
containing disinfectants
Limits On Reprocessing
Repeated processing has minimal effect on this handpiece. End of life is normally determined
by wear and damage due to use.
INSTRUCTIONS
Clean and sterilize handpieces and burs as soon as practical before first use and after each patient.
WARNING
Containment and
It is recommended that handpieces are reprocessed as soon as is reasonably practical
transportation:
following use.
Preparation for cleaning:
Remove handpiece from swivel. No further disassembly is required.
Cleaning - Automated:
Washer-disinfectors are not recommended.
Cleaning - Manual:
Cleaning Handpieces:
Optical Surface
(1 of 2)
Internal Surface
Cleaning Diamond Burs:
•
After each use, clean the diamond bur by running it against a wet diamond cleaning stone.
•
To mechanically clean, the diamond bur should be held in a solution of either enzymatic
presoak, Sparkl® Dental Instrument Cleaner StarDental Part# 205472, or water.
•
Rinse the bur thoroughly and allow it to dry, then Sterilize – See Sterilization.
Lubrication:
Lubricate - For Lubricated Handpieces ONLY - See 'Lubrication' instruction section
Disinfection:
Use steam sterilization exclusively for complete sterility as outlined below.
Maintenance:
Use Junk-Out High Speed Chuck Cleaner Kit (263790) once a week prior to sterilization to
ensure optimum working condition of the chuck. Instructions for cleaning the chuck are
included in the Junk-Out kit.
See Turbine Replacement section of this manual for additional information.
Handpiece should be routinely maintained, checked for corrosion, worn parts, etc. and should
be replaced on an as needed basis.
Inspection & function testing:
See Handpiece Operation or Troubleshooting sections of this manual.
Packaging:
Single: A standard sterilization packaging material must be used. Ensure that the pack is large
enough to contain the handpiece without stressing the seals.
In sets: Handpieces may be loaded into dedicated instrument trays or general purpose
sterilization trays. Ensure that cutting edges are protected and do not exceed the tray
manufacturer's limit per tray. Wrap the trays using appropriate packaging materials and methods.
Wrapped Instrument
Gravity Type Autoclave:
Sterilization:
• Minimum of 15 minutes at 132° C
• Minimum of 30 minutes at 121° C
Do not exceed 135° C
Drying:
Dry the handpiece for 30 minutes minimum using the sterilization dry cycle and allow the
handpiece to cool to room temperature in bag prior to use. If moisture is present, increase your
sterilizer dry cycle appropriately.
Storage:
Store in bag after sterilization until ready to use.
Additional information:
Do not exceed the sterilizer manufacturer's guidelines for load capacity.
Manufacturer contact:
See front or back panels of this manual.
Red Tip
Applicator
Drive Air Tube
Coolant
Air
Water
Drive Air
• ultrasonic cleaners
• surgical milk
• detergents
Remove debris from external surfaces using a small
brush and isopropyl alcohol. Clean internal
surfaces of the handpiece at the swivel connection
location using a small brush and isopropyl alcohol.
Optical surfaces can be cleaned with a cotton swab
soaked in isopropyl alcohol. Dry thoroughly.
Repeat after each patient.
Pre-Vacuum Autoclave:
• Minimum of 4 minutes at 132° C
Advertisement

Related Manuals for DentalEZ StarDental Solara QT


Summary of Contents for DentalEZ StarDental Solara QT
- Page 1 Air and Water Adjustment Lubrication - For Lubricated Handpieces ONLY 1. Air Pressure – LUBRICATED Ceramic Bearing Turbine: To prevent premature damage to the turbine, do not exceed 34 psi when using a HiFlo swivel. NOTICE For maximum turbine life do not exceed recommended pressure. Use an air pressure gauge, StarDental Part #262591 for 4/6-Line, set pressure to 30-34 psi.
- Page 2 Service at 1-866-DTE-INFO. Correction: Clean all exposed optical surfaces. (Refer to Cleaning.) Anyone wishing to return any DentalEZ Inc. product to a DentalEZ facility MUST obtain the proper RETURN AUTHORIZATION Turbine Replacement NUMBER from the Customer Service Department. The RA Number must appear clearly marked on both the outside and Problem: REDUCED LIGHT inside of the returned product carton.
Need help?
Do you have a question about the StarDental Solara QT and is the answer not in the manual?
Questions and answers